

To guarantee high availability, your applications should run on multiple identical virtual machines so that your application is not affected when a small subset of these VMs is not available due to updates or power failures. Using several VMs for your application may require you to set up an Azure Load Balancer. This post will cover the section Manage ARM VM Availability of the 70-532 Developing Microsoft Azure Solutions certification exam.
Availability sets
Availability sets help you to increase the availability of your VMs by grouping VMs which never should be turned off at the same time. Additionally, these VMs are physically separated therefore they have different network and power connections. At no point in time should all VMs of your availability set offline. Availability sets consists of update and fault domains.
Update domains
An update domain works similarly to the Availability Set and constraints how Azure updates the host machines which run your VM. By default, Azure uses five update domains in which your VMs are placed in a round-robin process. Azure ensures that only one update domain at a time is affected by updates and restarts. This means if you have two VMs in your update domains, never more than 50% of your VMs are affected by updates to the host machine.
Fault domains
Fault domains provide isolation regarding power and network. VMs in separate fault domains will not be on the same host machine or even the same server rack as another. By default, Azure places VMs in a round-robin fashion into the fault domains.
Availability sets and application tiers
It is best practice for multi-tier applications to place all VMs belonging to a single tier in an unique availability set and have separate availability sets for each application tier.
Configure an availability set for a new VM
To create a new VM and put it into an availability group, follow these steps:
- Go to the Marketplace in the Azure Portal.
- Select Compute and then click on Windows Server 2016 Datacenter.
- On the Create virtual machine, provide a name, user name, password, subscription, and location for your new VM.
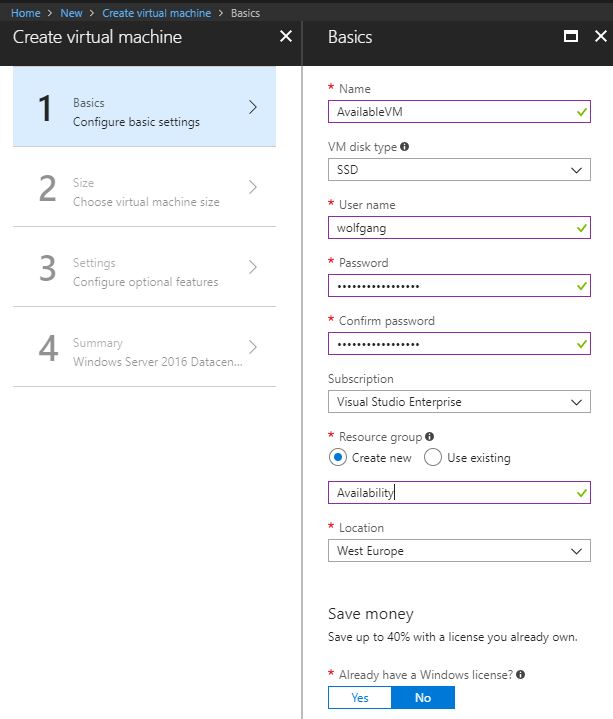
Create a new VM
- Select the desired size of your VM on the Choose a size blade.
- On the Settings blade, click on Availability set. Either add a new one by clicking on Create new or select an existing one.
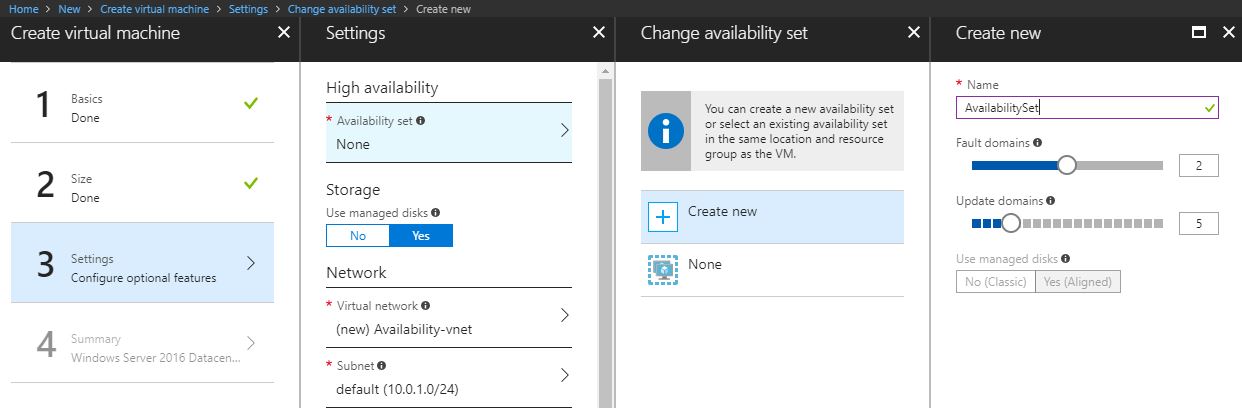
Create a new Availability Set
- After adding the availability set click OK.
- On the Summary blade, click Create to start the deployment process of your VM.
Configure an availability set for an existing VM
An existing VM can’t be added to an availability set. You can add a VM to an availability set only when creating the VM. To move a VM to an availability set, you have to recreate it.
Add a Load Balancer to an availability set
The Azure Load Balancer distributes the incoming traffic to all VMs within an availability set in a round robin manner. It also checks the health of the VM and removes unresponsive VMs automatically from the rotation.
Configure a Load Balancer with your availability set
To add an Azure Load Balancer, follow these steps:
- In the Azure Portal, go to the Marketplace and search for Load Balancer.
- Select the Load Balancer and click Create.
- On the Create a Load Balancer blade, provide a name, subscription, resource group, and location.
- Select Public as type, if you want to load balance traffic from the Internet, or internal if you want to load balance traffic from your virtual network
- Select or add a new Public IP address.
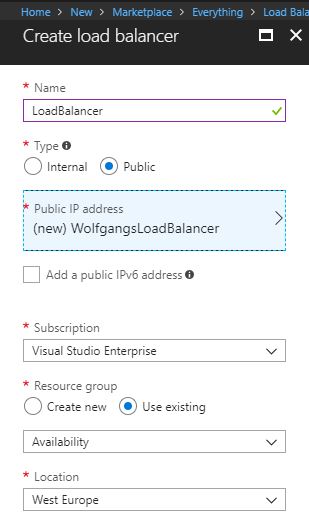
Create a Load Balancer
- Click Create.
- After the Load Balancer is deployed, select Backend pools under the Settings menu and click + Add.
- On the Add backend pool blade, provide a name and in the Associated to drop-down list select Availability set.
- Click + Add a target network IP configuration to add your VM. Repeat this step for each VM you want to add.
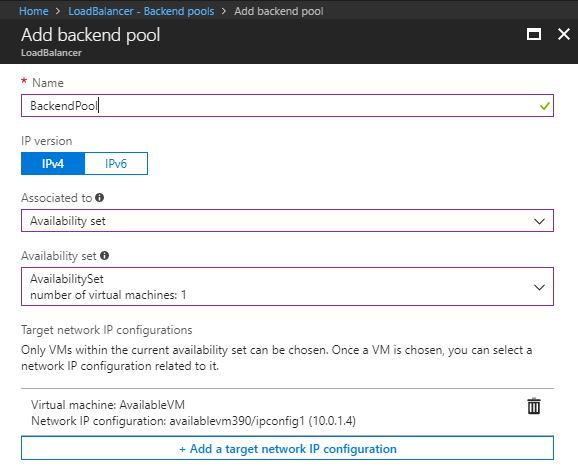
Add a backend pool
- Click OK.
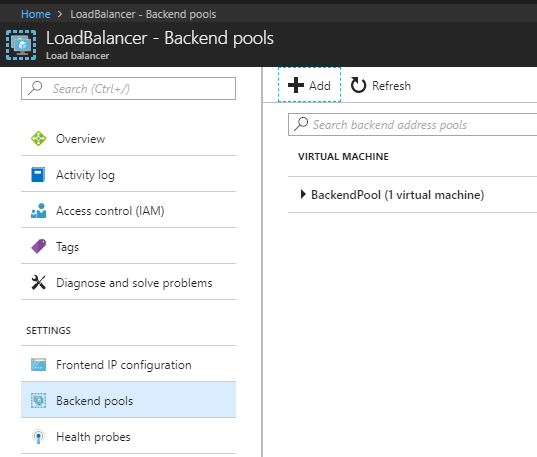
The created backend pool
- Select Health probes under the Settings menu and click + Add.
- On the Add health probe, provide a name. You can leave the remaining options as they are. Optionally you can change the checking interval, and after how many failed tries a VM should be marked as unhealthy.
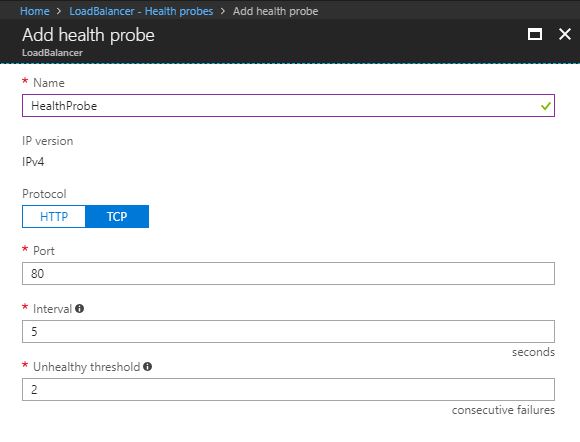
Add health probe to your Load Balancer
- Click OK.
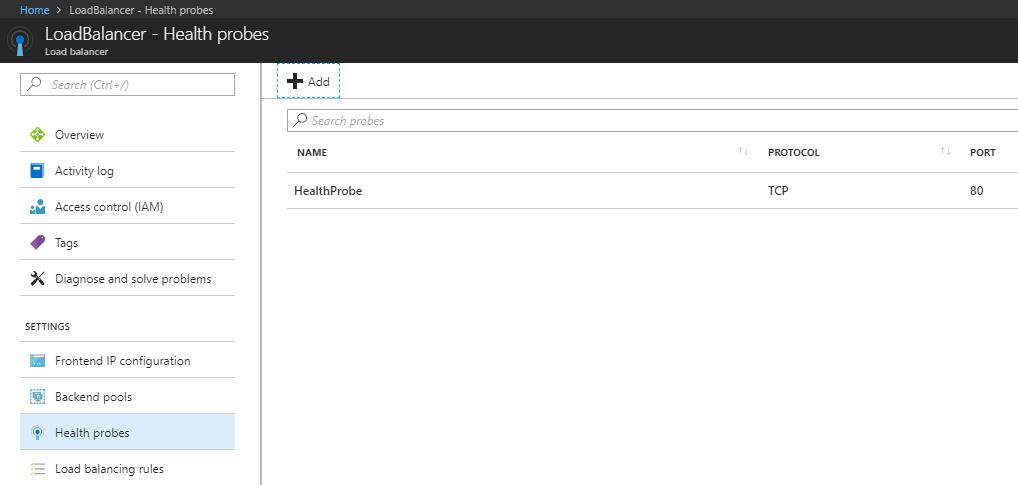
The created health probe
- Select Load balancing rules under the Settings menu and click + Add.
- On the Add load balancing rule, provide a name, the previously created pool, and health probe. You can leave the remaining options as they are.
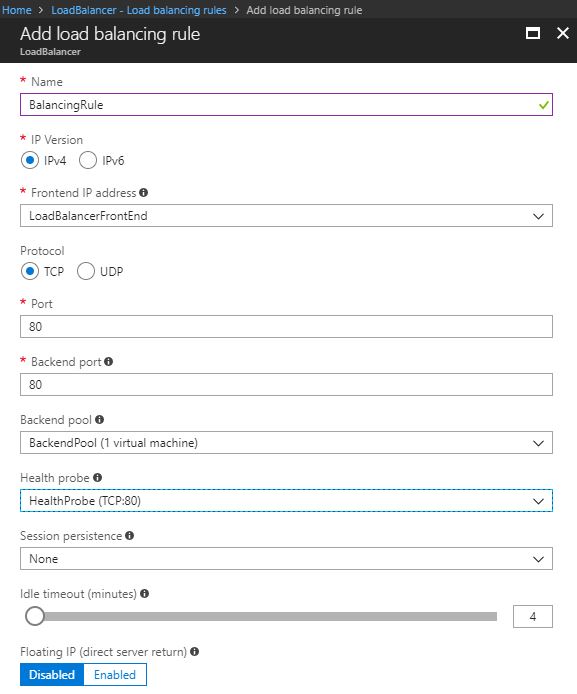
Create a load balancing rule
- Click OK.
Conclusion of Manage ARM VM Availability
This post explained what availability sets are and how they use fault and update domains to guarantee that never all your VMs are turned off at the same time. Then I talked about the Azure Load Balancer and how it can be configured to load balance traffic to different VMs within your availability set. These topics covered the part Manage ARM VM Availability of the 70-532 Developing Microsoft Azure Solutions certification exam.
For more information about the 70-532 exam get the Exam Ref book from Microsoft and continue reading my blog posts. I am covering all topics needed to pass the exam. You can find an overview of all posts related to the 70-532 exam here.
Comments powered by Disqus.