

Azure Service Fabric is a platform that makes it easy to package, deploy, and manage distributed solutions at scale. It provides an easy programming model for building microservice solutions with a simple, familiar, and easy to understand development experience that supports stateless and stateful services and actor patterns. In addition, to providing a packaging and deployment solution for these native components, Service Fabric also supports the deployment of guest executable and containers as part of the same managed and distributes system.
| Native and executable component | Description |
| Stateless Services | Stateless-Fabric-aware services that run without a managed state. |
| Stateful Services | Stateless-Fabric-aware services that run with a managed state where the state is close to the compute. |
| Actors | A higher level programming model built on top of stateful services. |
| Guest Executable | Can be any application or service that may be cognizant or not cognizant of Service Fabric. |
| Containers | Both Linux and Windows containers are supported by Service Fabric and may be cognizant or not cognizant of Service Fabric. |
Create a Service Fabric application
A Service Fabric application can consist of one or more services. The application defines the deployment package for the service, and each service can have its own configuration, code, and data. A Service Fabric cluster can host multiple applications, and each has its own independent deployment upgrade lifecycle.
To create a new Service Fabric application, follow these steps:
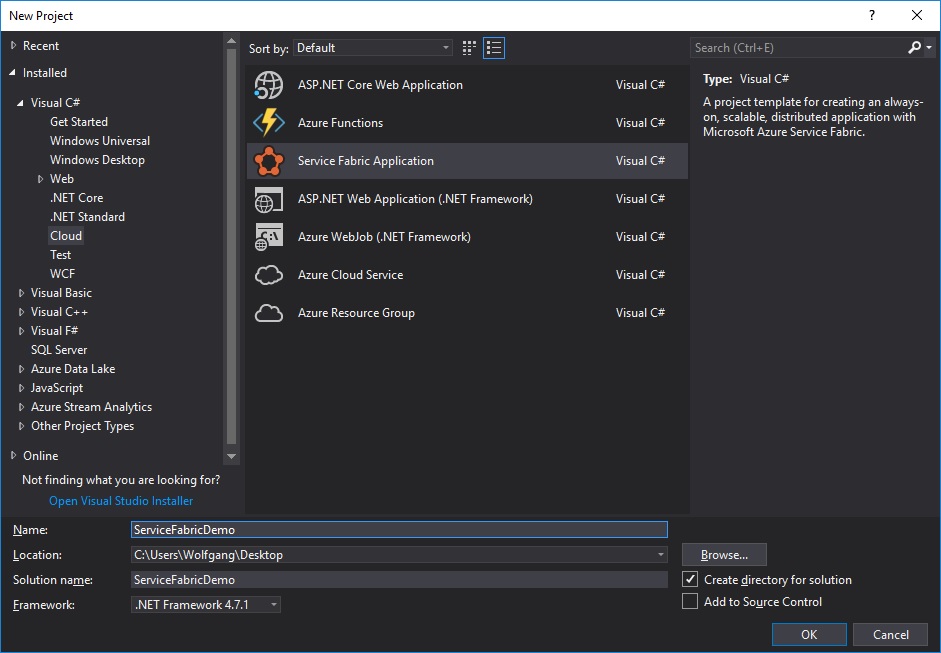
- Open Visual Studio and select File -> New -> Project.
- In the New Project dialog, select Service Fabric Application within the Cloud category. Provide a name and click OK.
Create a Service Fabric application
- Select Stateful Service from the list of services and provide a name.
- Click OK.
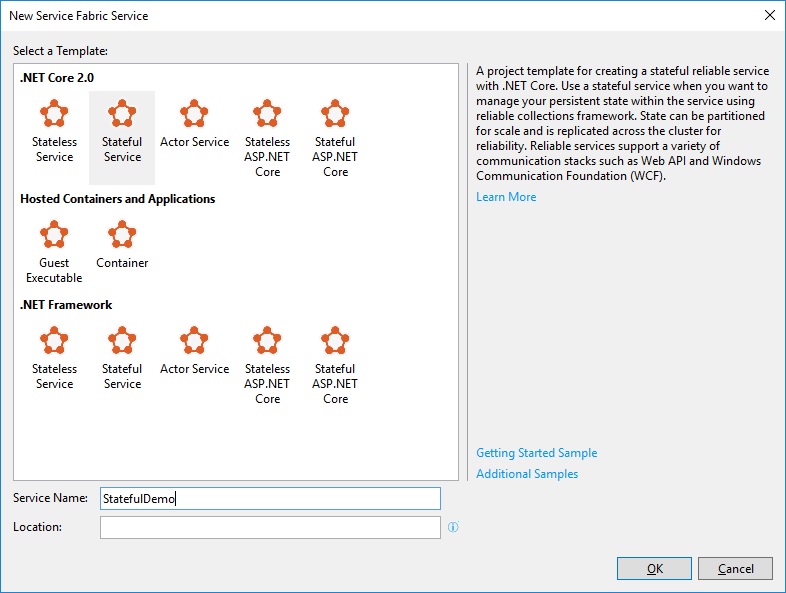
Select a Template for your Fabric Service
- Expand the PackageRoot folder in the Solution Explorer and you will find the ServiceManifest.xml file there. This file describes the service deployment package and related information. It includes a section that describes the service type that is initialized when the Service Fabric runtime starts the service.

The service type description
Configure your Service Fabric application
- A service type is created for the project. In this case, the type is defined in the Simulator.cs file. This service type is registered in Program.cs when the program starts so that the Service Fabric runtime knows which type to initialize when it creates an instance of the service.
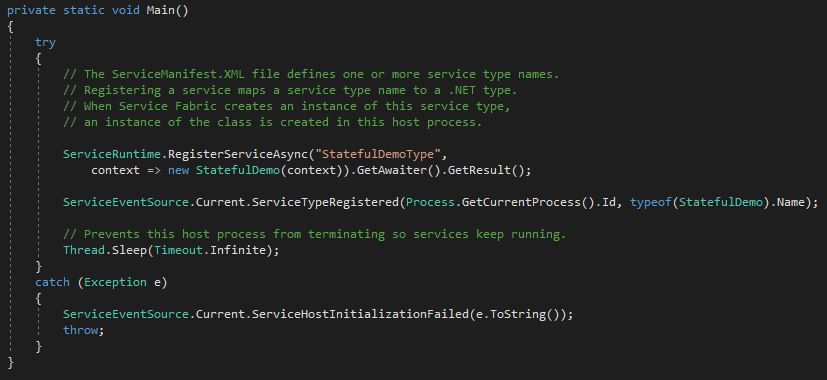
Registering a service type in the main method
- The template produces a default implementation for the service type, with a RunAsync method that increments a counter every second. This counter value is persisted with the service in a dictionary using the StateManager, available through the service base type StatefulService. This counter is used to represent the number of leads generated for the purpose of this example.
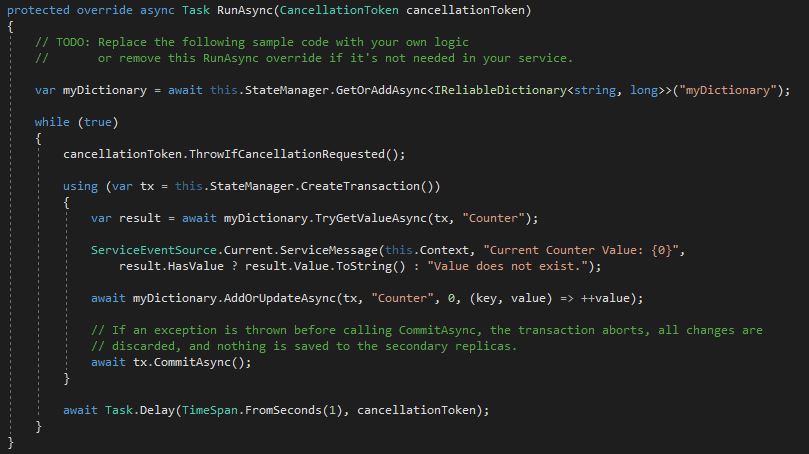
RunAsync which increments a counter every second
- The service will run, and increment the counter as it runs persisting the value, but by default, this service does not expose any methods for a client to call. Before you can create an RPC listener you have to add the required NuGet package, Microsoft.ServiceFabric.Services.Remoting.
- Create a new service interface using the IService marker interface from the previously installed NuGet, that indicates this service can be called remotely.
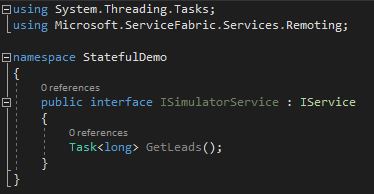
Create the ISimulatorService interface
- Implement the previously created interface on the Simulator service type, and include an implementation of the GetLeads method to return the value of the counter.
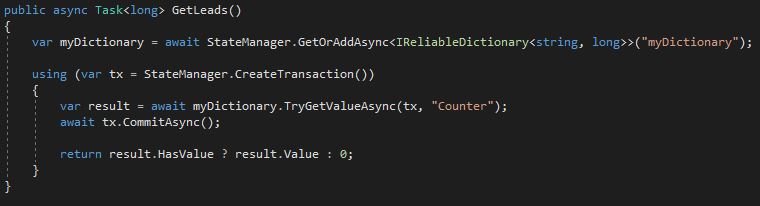
Implementation of the GetLeads method
- To expose this method to clients, add an RPC listener to the service. Modify the CreateServiceReplicaListeners method in the Simulator service type implementation, to add a call to the CreateServiceReplicaListeners method.

Modify the CreateServiceReplicaListeners method
Add a web front end to a Service Fabric application
In this section, I will create a web front end to call the stateful service endpoint which I create previously.
To add a web app to your Service Fabric application, follow these steps:
- Right-click the Services node of your Service Fabric application and select Add and then New Service Fabric Service…
- In the template dialog, select Stateless ASP.NET Core, provide a name and click OK.
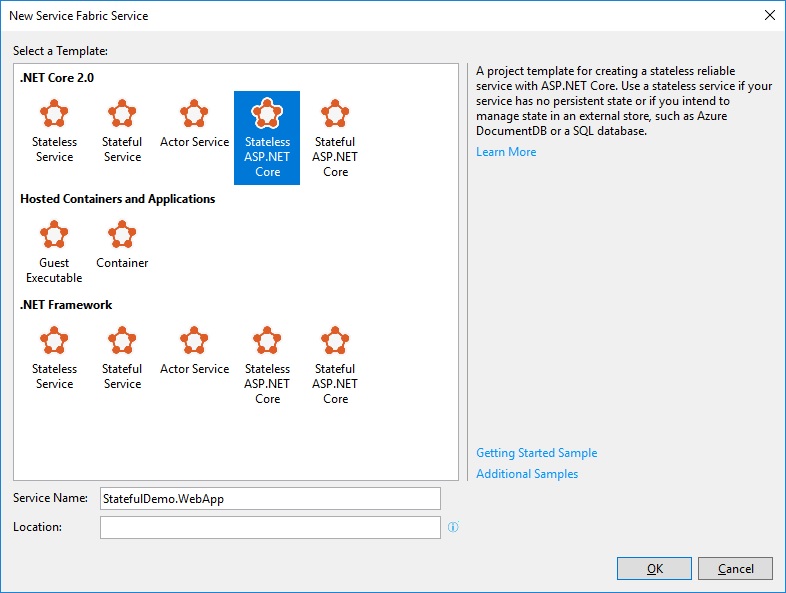
Create a web app in your Service Fabric app
- On the next page select Web Application (Model-View-Controller) and click OK.
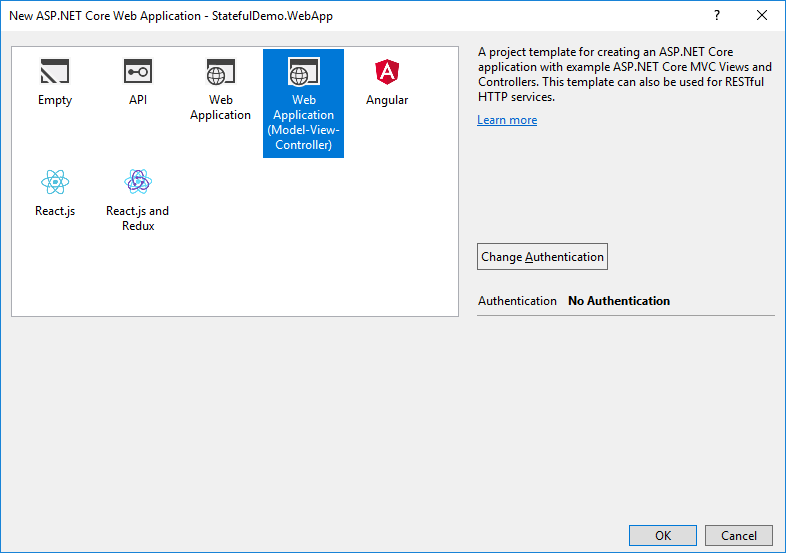
Select the MVC template for your web app
- Expand the PackageRoot folder in the Solution Explorer and you will find the ServiceManifest.xml file there. This file describes the service deployment package and related information. It includes a section that describes the HTTP endpoint where your web app will listen for requests.

The HTTP endpoint description
- The new WebApp type is defined in the WebApp.cs, which inherits from StatelessService. For the service to listen for HTTP requests, the CreateServiceInstanceListeners() method sets up the WebListener.
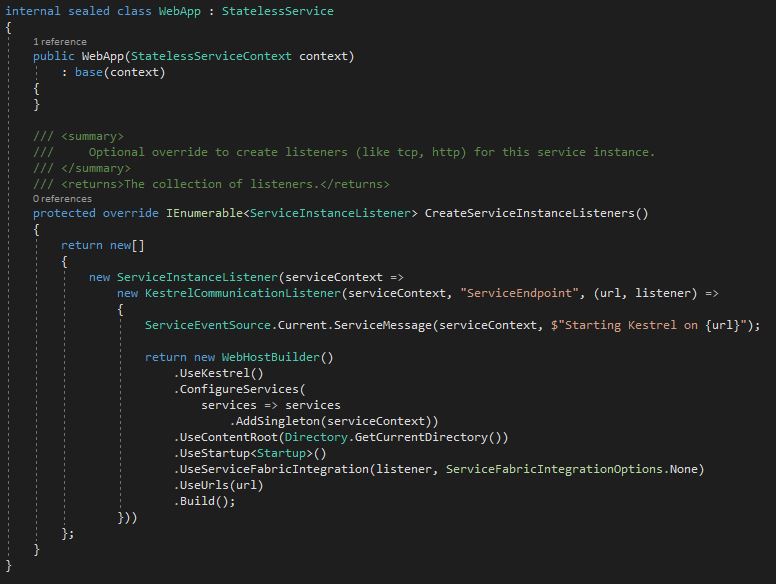
The WebApp class
- The next step is to call the stateful service that returns the leads counter value, from the stateless web app.
- Make a copy of the service interface defined for the service type, ISimulatorService.
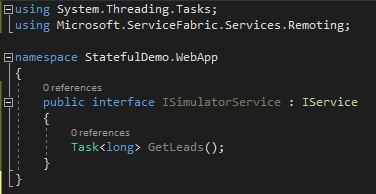
The copied ISimulatorService interface
- Modify the ConfigureServices instruction in the WebApp.cs to inject an instance of Fabric client.
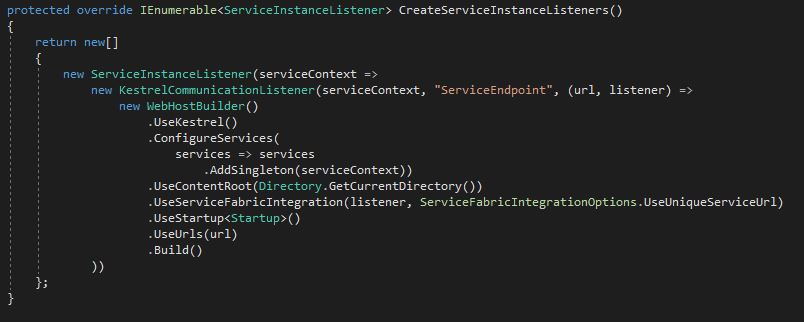
The modified CreateServiceInstanceListeners method
- Modify the HomeController to use the FabricClient via dependency injection.
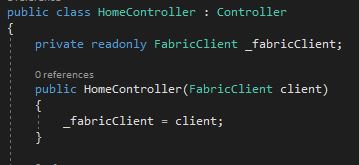
Inject FabricClient into the HomeController
- Modify the Index method in the HomeController to use the FabricClient instance to call the Simulator service
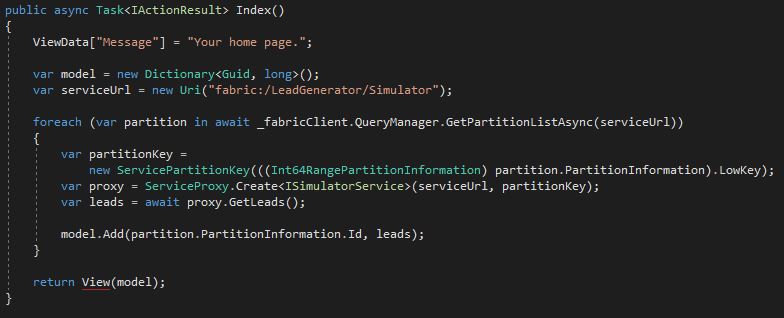
Modify the Index method to call the Simulator service
- Update the Index.cshtml view to display the counter for each partition.
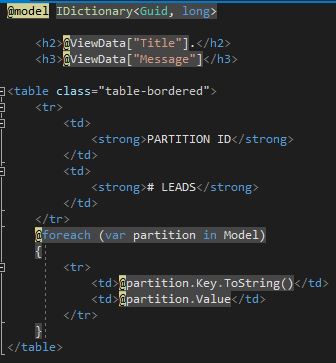
Modify the Index.cshtml view
Deploy and run your Web App
- To run the web app and stateful service, you can publish it to the local Service Fabric cluster. Right-click the Service Fabric application node in the Solution Explorer and select Publish. From the Publish Service Fabric Application dialog, select a target profile matching one of the local cluster options, and click Publish.
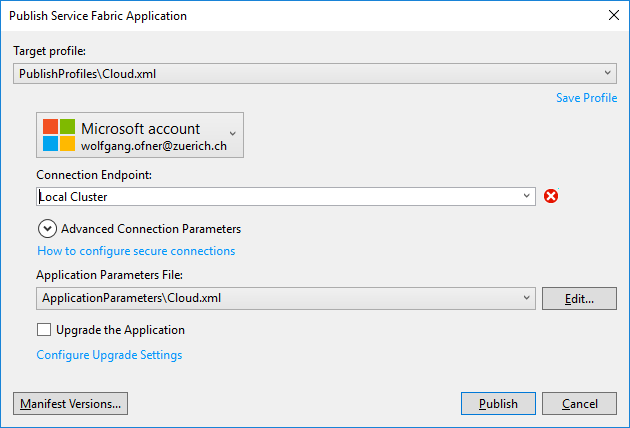
Deploy to a local cluster with an error message
- If you get an error message as on the screenshot shown above, start PowerShell as administrator and run the following code: & “$ENV:ProgramFiles\Microsoft SDKs\Service Fabric\ClusterSetup\DevClusterSetup.ps1″. This creates a local cluster.
- The installation takes a couple of minutes.
- Once the installation is done, close and re-open the Publish window and the error should be gone.
- Deploy your application and then access your web app at http://localhost:8527 (or whatever port you configured in the ServiceManifest.xml in your web app).
You can find the code of the demo on GitHub.
Build an Actor-based service
The actor model is a superset of the Service Fabric stateful model. Actors are simple POCO objects that have many features that make them an isolated, independent unit of compute and state with single-threaded execution.
To create a new Service Fabric application based on the Actor service template, follow these steps:
- Open Visual Studio and select File -> New -> Project.
- In the Cloud category select Service Fabric Application, provide a name and click OK.
- Select Actor Service from the templates list, provide a name and Click OK.
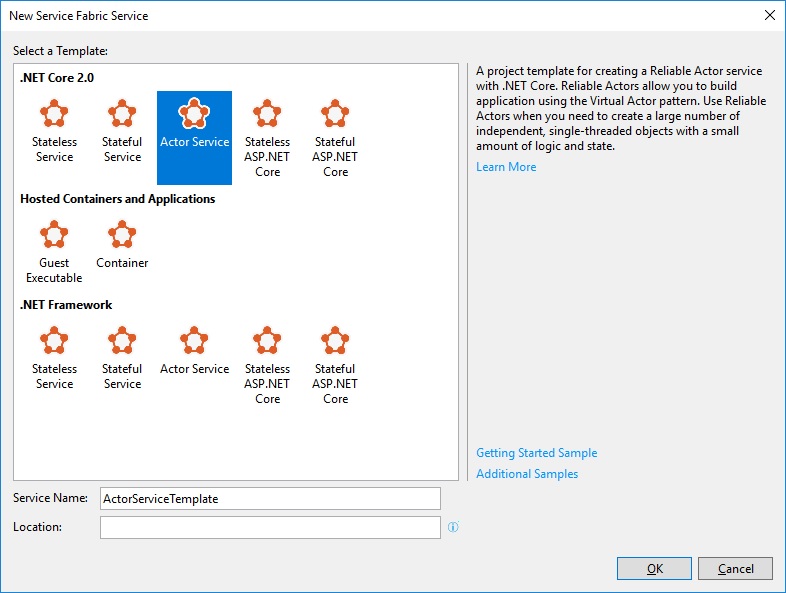
Create an Actor service
Monitor and diagnose services
The Azure portal offers several features to monitor and evaluate the performance or resource consumption of your application at runtime.
Deploy an application to a container
Service Fabric can run processes and containers side by side, and containers can be Linux or Windows based containers. If you have an existing container image and wish to deploy this to an existing Service Fabric cluster, you can follow these steps to create a new Service Fabric application and set it up to deploy and run the container in your cluster.
- Open Visual Studio and select File -> New -> Project.
- In the Cloud category select Service Fabric Application, provide a name and click OK.
- Select Container from the templates list, provide a name and container image and Click OK.
- Expand the PackageRoot folder in the Solution Explorer and you will find the ServiceManifest.xml file there. Modify the Resources section to add a UriScheme, Port and Protocol setting for the service point.

Add a UriScheme, Port and Protocol to the ServiceManifest.xml file
- Open the ApplicationManifest.xml file. Create a policy for the container to host a PortBinding by adding the Policies section to the ServiceManifestImport section. Additionally, indicate the container port for your container.
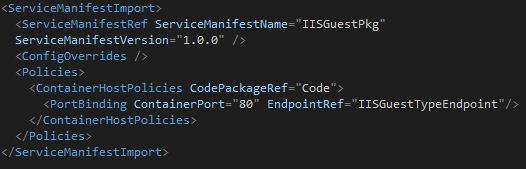
Create a PortBinding policy for the container
- The application is configured and ready to be published.
Migrate apps from cloud services
You can migrate your existing cloud service, both web and worker roles to Service Fabric applications.
Scale a Service Fabric app
To scale a Service Fabric app, you have to understand Instances, Partitions, and Replicas.
By default, the Service Fabric tooling produces three publish profiles that you can use to deploy your application.
| Publish profile | Description |
| Local.1Node.xml | To deploy against the local 1-node cluster. |
| Local.5Node.xml | To deploy against the local 5-node cluster. |
| Cloud.xml | To deploy against a Cloud cluster. |
The publish profiles indicate the settings for the number of instances and partitions for each service.
| Publish profile parameter | Description |
| WebApp_InstanceCount | Specifies the number of instances the WebApp service must have within the cluster. |
| Simulator_PartitionCount | Specifies the number of partitions (for the stateful service) the Simulator service must have within the cluster. |
| Simulator_MinReplicaSetSize | Specifies the minimum number of replicas required for each partition that the WebApp service should have within the cluster. |
| Simulator_TargetReplicaSetSize | Specifies the number of target replicas required for each partition that the WebApp service should have within the cluster. |
Create, secure, upgrade, and save Service Fabric Cluster in Azure
To publish your Service Fabric application to Azure in production, you will create a cluster and have to learn how to secure it. Also, you should know how to upgrade applications with zero downtime, and configure the application to scale following Azure’s best practices
Conclusion
This post gave an overview of Azure Service Fabric and its features and how to deploy it.
For more information about the 70-532 exam get the Exam Ref book from Microsoft and continue reading my blog posts. I am covering all topics needed to pass the exam. You can find an overview of all posts related to the 70-532 exam here.
Comments powered by Disqus.