

In my last post, I described how to dockerize my microservices. To start the whole application, you have to start both microservices and RabbitMQ. Today, I will add a docker-compose file which is a tool to easily run multi-container applications.
This post is part of “Microservice Series - From Zero to Hero”.
What is the Docker-Compose File?
Docker-compose is a yml file in which you can set up all the containers your application needs to run. Simplified, it executes several docker run commands after each other. If you are used to docker run commands, the content of the compose file will look familiar. Let’s have a look at the content of the file:
This file describes two images, rabbitmq, and customerapi. Let’s have a closer look at the customerapi definition:
- Ports: The container is listening to the ports 8000 and 8001 and redirects the request to the ports 80 and 443 inside the container.
- Environment: This section provides environment variables and their value to enable Kestrel to process SSL requests.
- Image: This specifies which image should be used. If it is not available locally, it will be downloaded from Docker Hub.
- Restart: Here you can configure the restart policy. This container is always restarting on failure. Other options are always and until-stopped.
- Depends on: This section specifies dependencies. It only specifies that the rabbitmq container has to be started before the customerapi container. It doesn’t guarantee that the container is already finished starting up
To get started with docker-compose, I highly recommend the website composerize.com. On this website, you can paste a docker run command and it will give you a compose file with your parameters.
Start multiple Container with Docker-Compose
You can find the code of the finished demo on GitHub.
To execute your compose file, open Powershell, and navigate to the location of your file. In my demo code, I am providing the compose file in the root folder. Once you navigated to your file, use the following command:
The -d parameter executes the command detached. This means that the containers run in the background and don’t block your Powershell window.
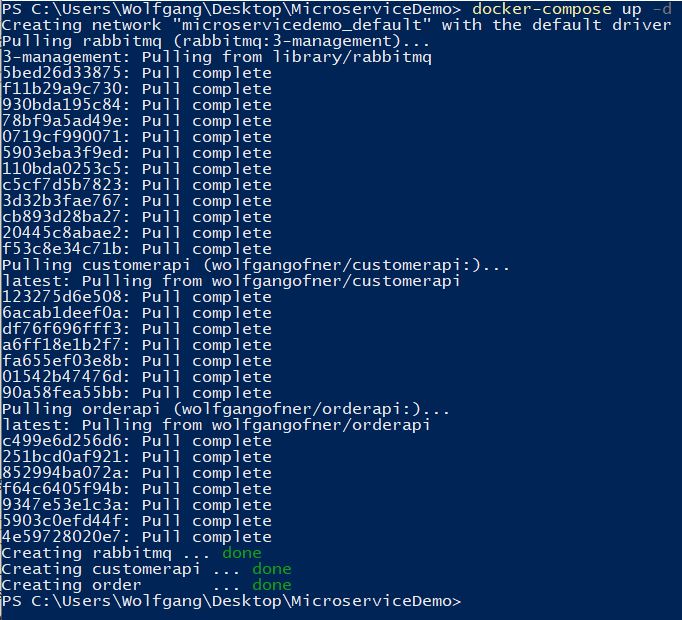
Start multiple container with docker-compose
To prove that all three containers are running, use docker ps.

Check all running container
Another great feature of docker-compose is, that you can stop all your applications with a single command:
Build and run Containers
You don’t have to use images from Docker Hub in your compose file, you can also build images and then run them. To build an image, use the build section and set the context to the location of the Dockerfile. I have created a new Dockerfile, called Dockerfile.Build which looks like the original one except that it doesn’t contain any tests or anything that might slow down the build.
I named this file docker-compose.Build. You can use the -f parameter to specify the file in your docker-compose command:
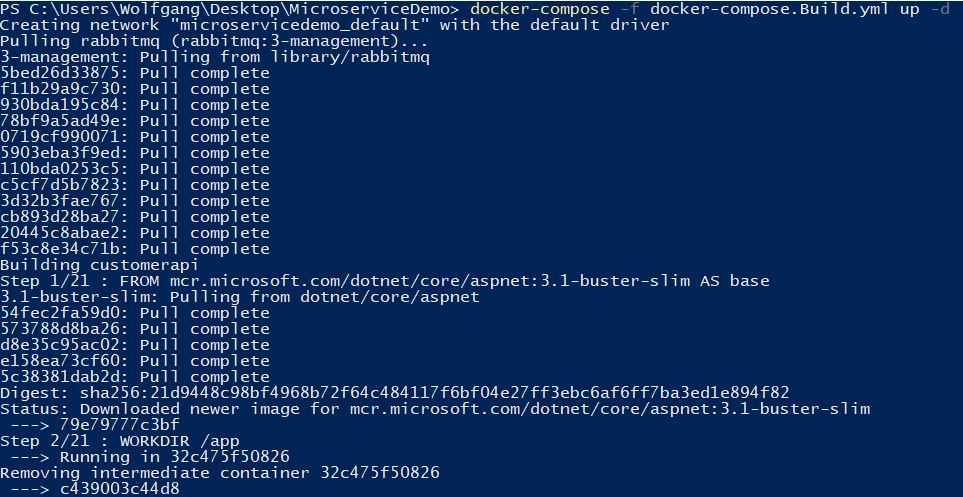
Build images with docker-compose
How can Containers talk to each other?
When starting multiple containers with a compose file, a default network is created in which all containers are placed. Containers can reach each other with the container name. For example, the CustomerApi can send data to the queue using the name Rabbitmq.
Conclusion
In today’s post, I talked about docker-compose and how it can be used to easily set up applications with multiple containers.With this post, most of the features of the two microservices are implemented. With my next post, I will start to focus more on the DevOps process. This means that I will create CI pipelines, run tests automatically during pull requests, and later on will automatically deploy the microservices.
You can find the code of the finished demo on GitHub.
This post is part of “Microservice Series - From Zero to Hero”.
Comments powered by Disqus.