

Azure Static Web Apps were announced at the Build conference this year and they allow you to host your static websites for free. You can use HTML, plain Javascript of front-end frameworks like Angular or React. The website retrieves data, if needed, from Azure Functions. A great feature of Azure Static Web Apps is that you don’t have to configure your CI/CD pipeline. This is done for you by Azure and GitHub using Git Actions.
Today, I want to show how to create a React front-end and how to retrieve data from an Azure Function. You can find the code of the React demo here and the code of the Azure Function demo here.
Azure Functions
Azure Function is an event-driven serverless feature which can be used to automate workloads or connect different parts of an application. They can be flexible scaled and they offer different triggers, for example, run some code when a message is written to a queue when a web API call was made or many more. You can use different programming languages like Javascript, Node.js, or .NET Core.
Azure Functions offer a consumption plan, where you pay what you used, a premium plan, or an App Service plan. I like the consumption plan because it gives you 400,000 GB/s for free every month. This should be more than enough for small projects.
Creating an Azure Function in the Azure Portal
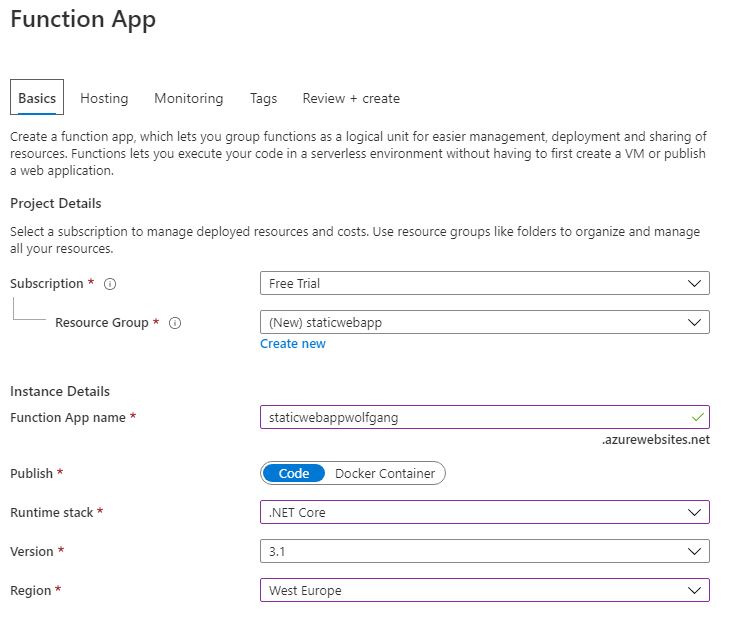
To create an Azure Function in the Azure portal, search for Function App, and click on Create. In the Basics tab of the creation process, enter your basic information like the resource group, the region, and the runtime.
Create an Azure Function
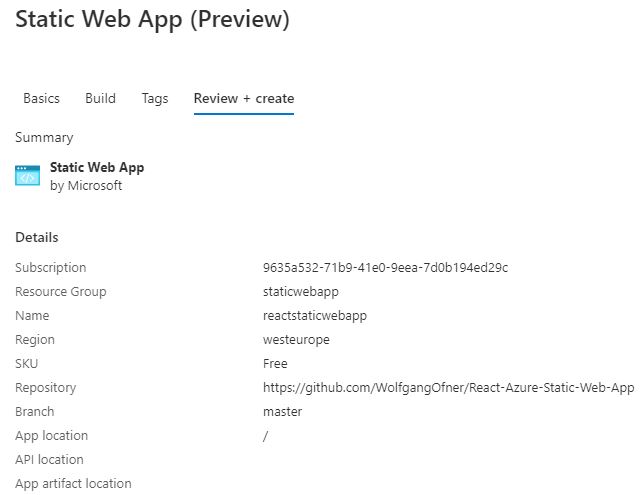
In the next screenshot, you can see a summary of all my provided information. Note that I selected Windows as my operating system. First I wanted to use Linux but for whatever reason, I couldn’t deploy to the Linux Azure Function.
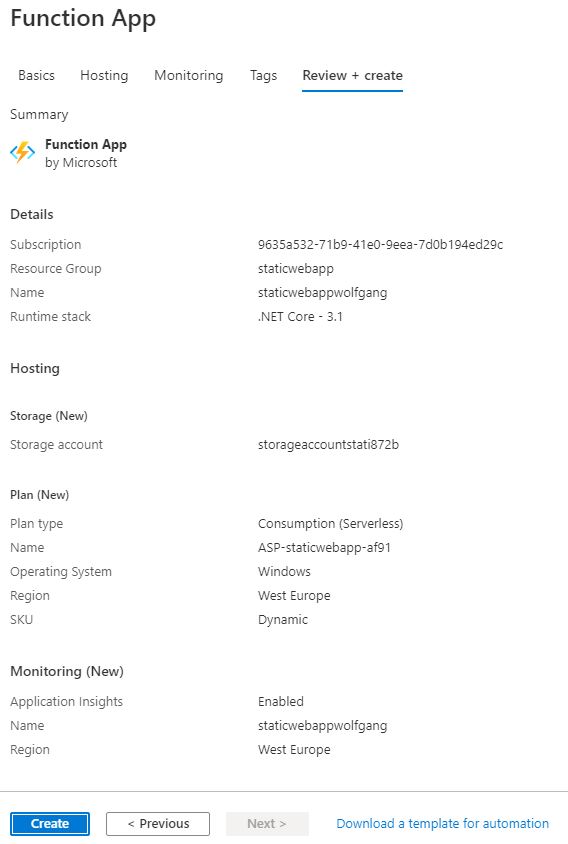
Reviewing the Azure Function before creating it
Click on Create and the Azure Function deployment starts.
Creating an Azure Function using Visual Studio
To create my Azure Function, I am using Visual Studio 2019. You can also use Visual Studio Code. If you want to use Javascript for your Azure Function, you even have to use VS Code since Visual Studio only supports C#. Create a new project and select the Azure Functions template.
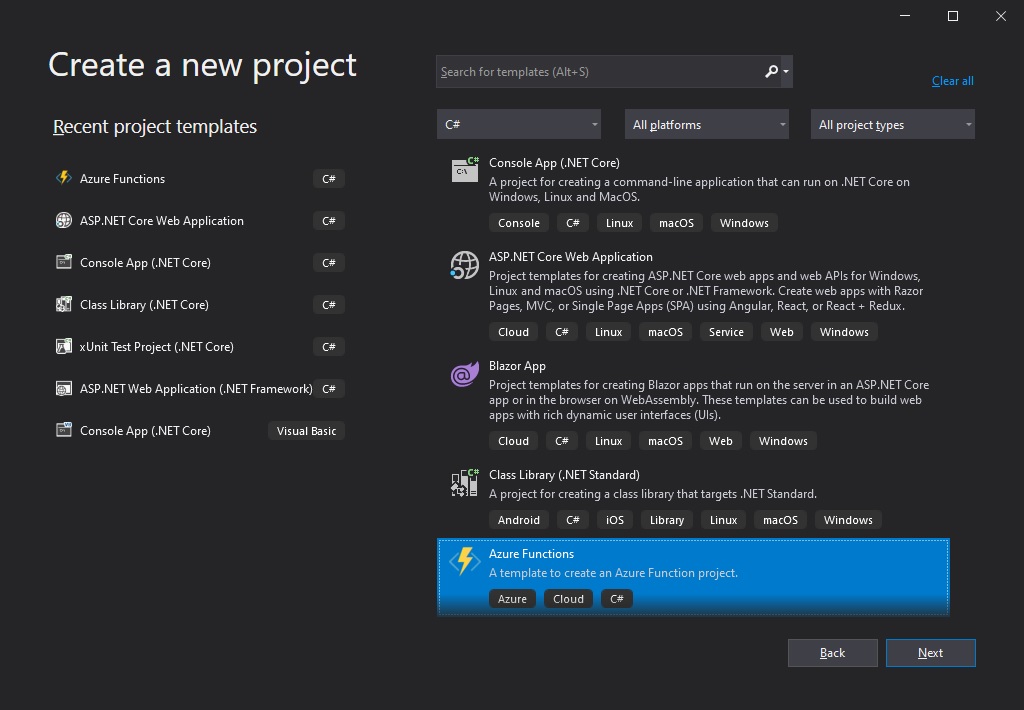
Select the Azure Function template
In the next window select HTTP trigger and set the Authorization level to Anonymous. This configuration starts the code execution every time an HTTP request is received.
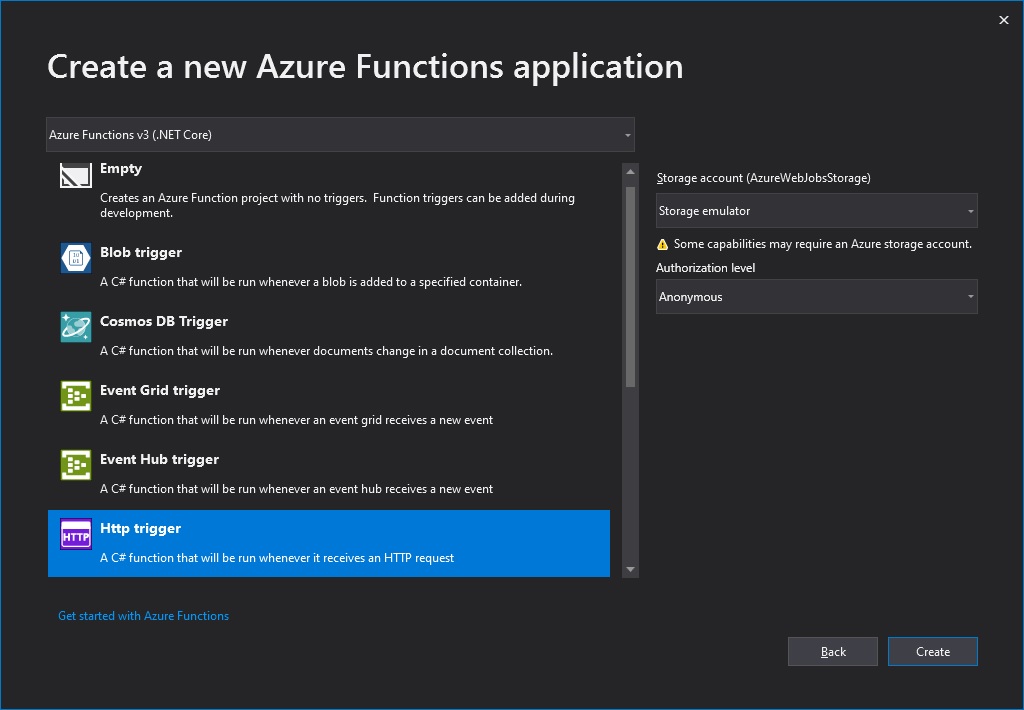
Select HTTP trigger and set the Authorization level to Anonymous
After the Azure Function is created, I change the code so it returns a JSON list of products:
The Product class has the following properties:
Start the application and a console window will appear telling you the URL of your function. Enter this URL into your browser and you should see the JSON list displayed.
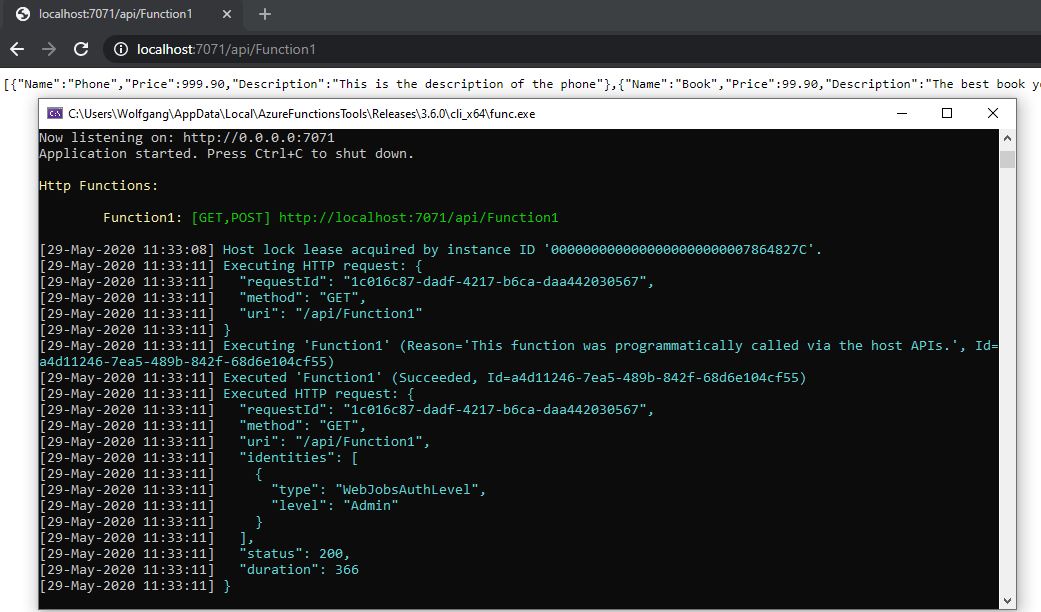
Testing the Azure Function locally
Deployment of the Azure Function
You can deploy the Azure Function directly from within Visual Studio. You can deploy to an existing Azure Function or even create a new one. Since I already created one, I will deploy it to this one. To make things even easier, I will download the publish profile from the Function in the Azure portal by clicking on Get publish profile on the Overview tab.
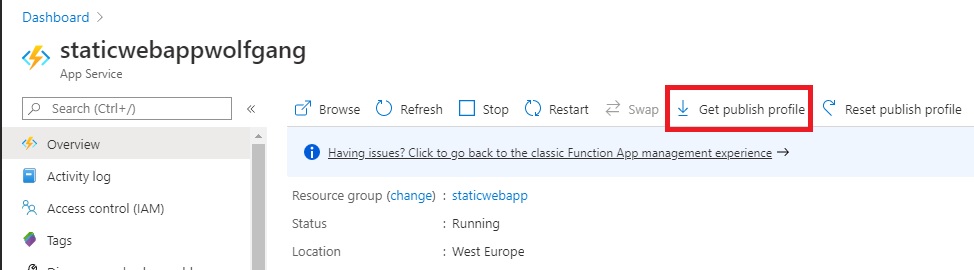
Download the publish profile of the Azure Function
After you downloaded the publish profile, in Visual Studio right-click on your project and select Publish. This opens a new window, select Import Profile and then select your previously downloaded publish profile.
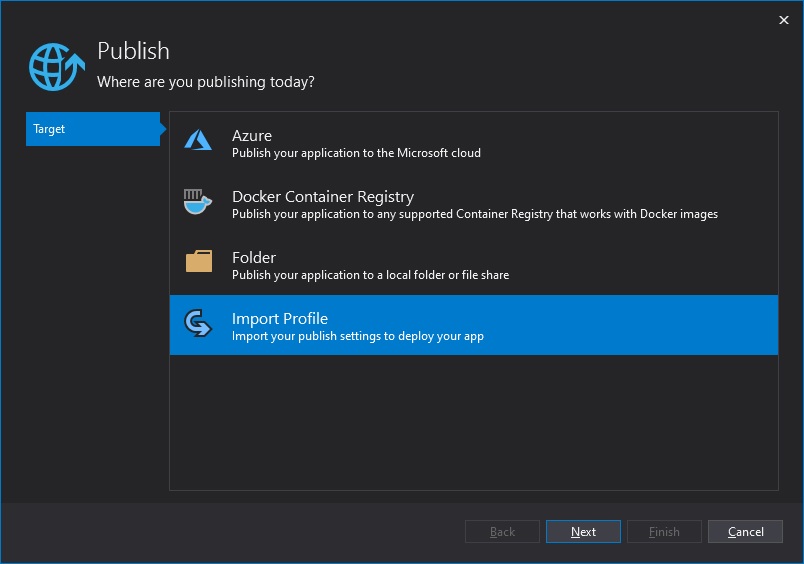
Import the downloaded publish profile
After the publish profile is imported, click on Publish and the Azure Function will be published to Azure.
Configuring and Testing of the Azure Function
In the Azure portal, click on the Functions tab of your Azure Function. There you will see your previously deployed function.
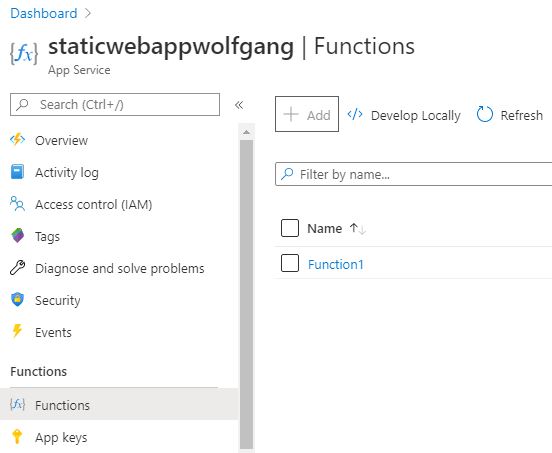
The published function appears in the Azure Portal under Functions
Click on the Function (Function1 in my case) and then click on Test. This opens a new panel where you can send a request to your function to test its functionality.
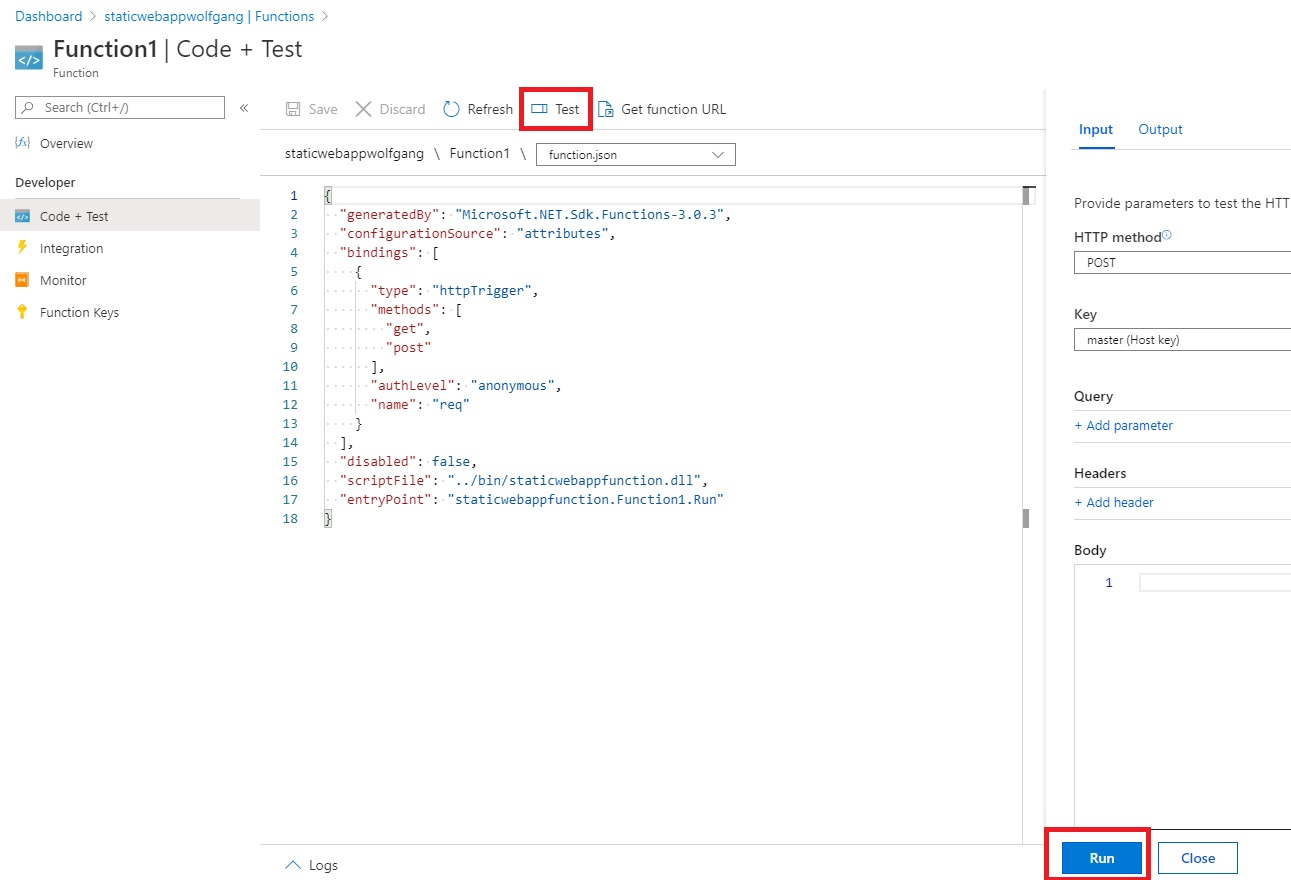
Call the Azure Function to test its functionality
Click on Run and the JSON list of your products should be displayed in the Output tab.
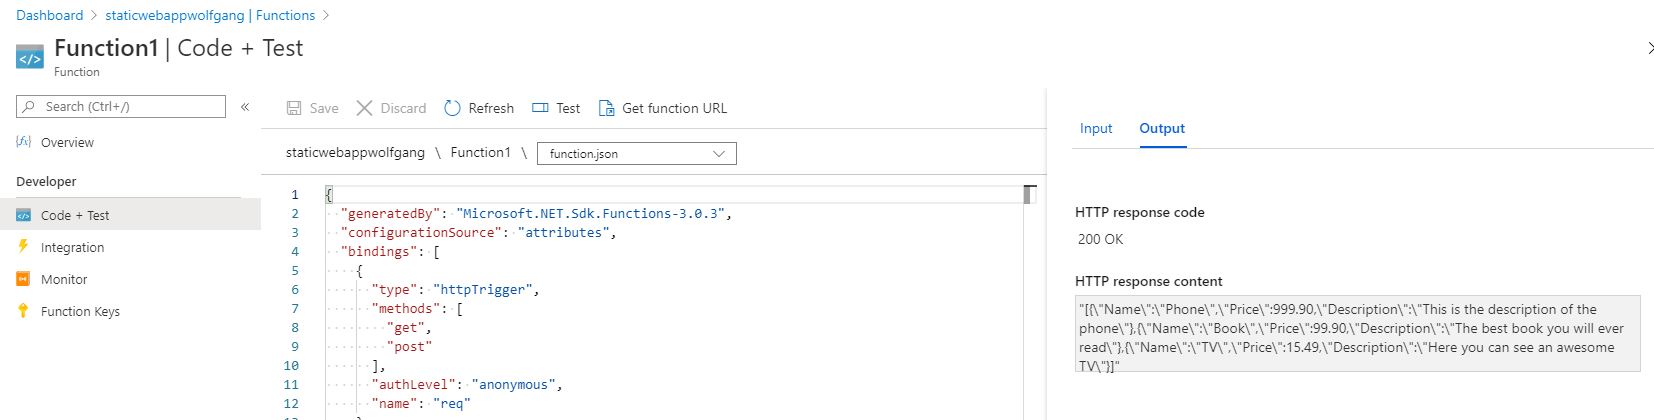
The function returns the JSON with products
Next call the function from your browser. The URL is

Test the function call in the browser
If we create the React app now and try to call the Azure Function, it won’t work. The reason why it won’t work is that CORS is not configured and therefore the request will be blocked. The configure CORS, open then the CORS tab, and enter http://localhost:3000. This will be the URL of the React app during the development.
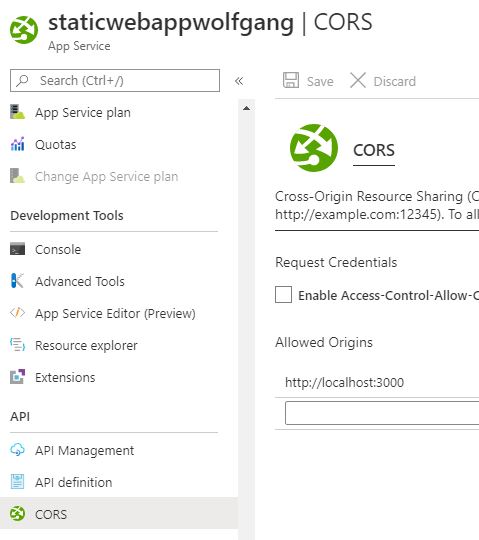
Configure CORS
I also tried * to allow all requests but it didn’t work for me.
Create the React App which will be deployed using Static Web Apps
You should have basic knowledge of React. If you are new to React, take a look at the documentation to install node.js and npm.
Open a new Powershell window and create a new react app with the following command:
This will create a react project, named react-static-web-app. Go inside the project folder in Powershell and open Visual Studio Code with the following code:
I will change the application to call my Azure Function and then display the returned list with Bootstrap cards. First, I create a new folder, called components, and create a new file inside this folder called products.js. Then I add the following code to the new file:
This method takes a list of products and displays every item. The next step is to implement the Azure Function call in the App.js file.
Lastly, I add the Bootstrap css file in the index.html file which is located in the Public folder.
Open a new terminal in VS Code and start the application with:
This automatically opens your browser and should display your product list.
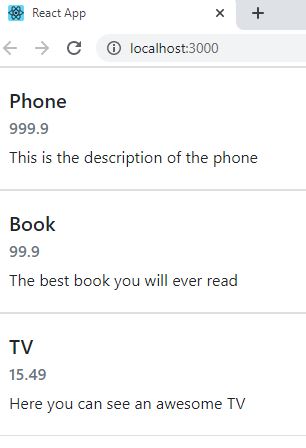
Testing the React app with the data from the Azure Function
Check in the React app into GitHub and let’s deploy it with Static Web Apps.
Create Static Web Apps
In the Azure portal, search for Static Web App and click on Create to start the deployment process.
Create a Static Web App
On the Basics tab enter a name, select a region, and select your GitHub repository and branch. Note the region is only the initial region for the deployment. After the deployment, Static Web Apps deploys your application globally to give your users the best possible user experience.

Configure the Static Web App
On the Build tab, I removed the Api location because I have my Azure Function already deployed. The Static Web Apps are still in preview and I couldn’t deploy a C# Azure Function because the build failed. The build demanded that the direction of the function must be set in the function.json file. With C#, you can’t edit the function.json file because it is created during the build. I was able to deploy a Javascript Azure Function using Static Web Apps though.

Configure the location of the app and api
On the following screenshot, you can see all my entered information. Click on Create and the deployment process starts.
Overview of the Static Web App before creation
After the deployment is finished, you can see the URL of the Static Web App and also a link to the created GitHub Action.
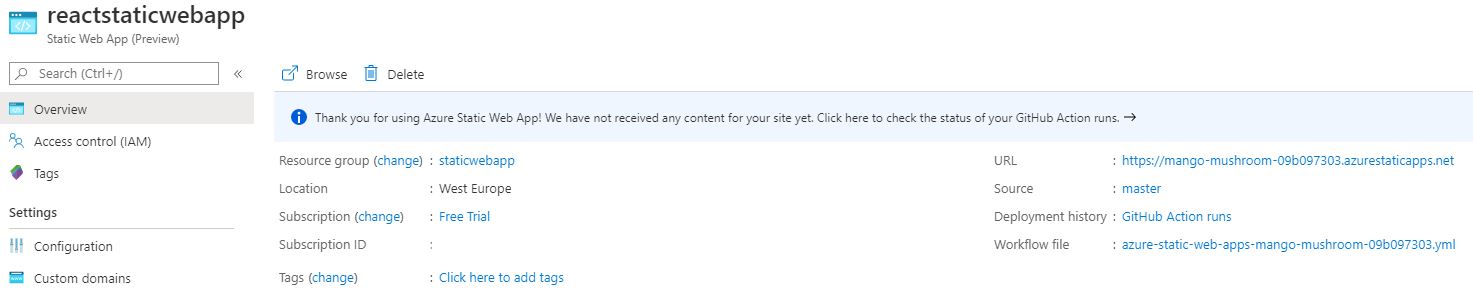
Overview of the published Static Web App
Click on GitHub Action runs and you will be redirected to the Action inside your GitHub repository.
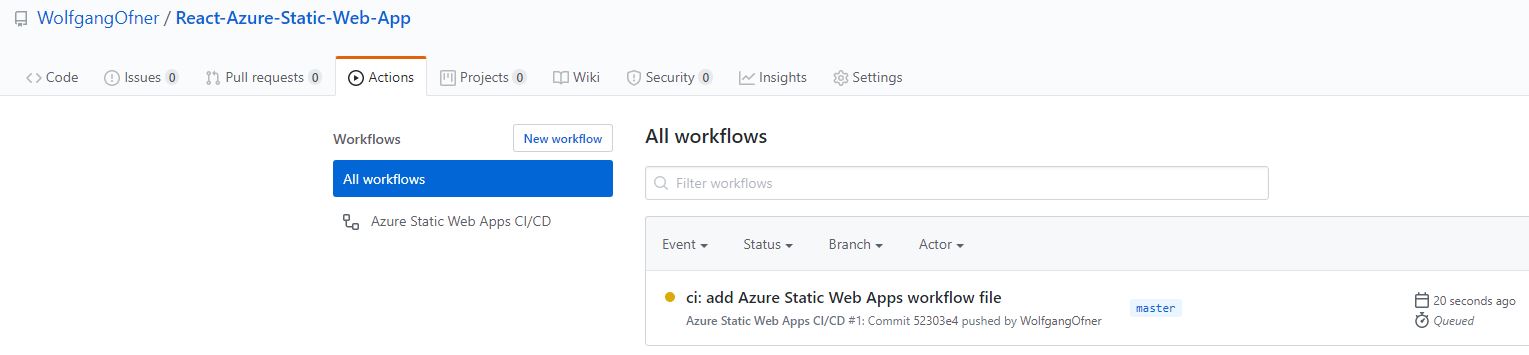
The Git Action is building your application
Click on the CI/CD pipeline and you can see more detailed information.
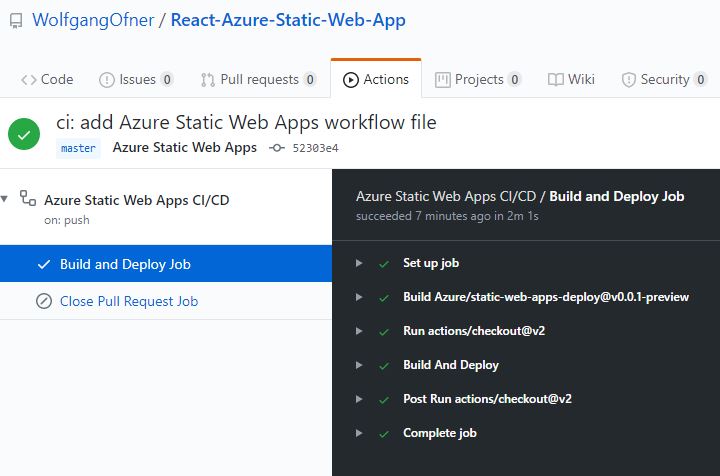
The Git Action run finished
Before you can test your deployed React app, you have to enter its URL in the CORS settings of your Azure Function. You can find the URL on the overview tab of your Static Web Apps.
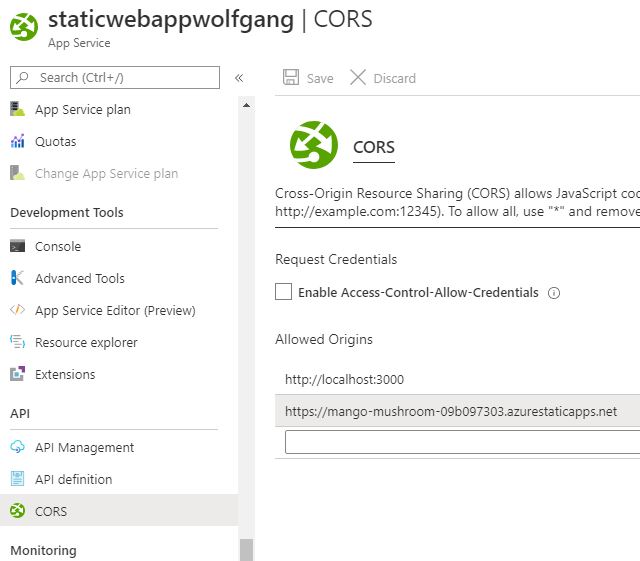
Add the URL of the Static Web App to the CORS Setting of the Azure Function
After you entered the URL in the CORS settings, call it in your browser and you should see your React app displaying the list of products.
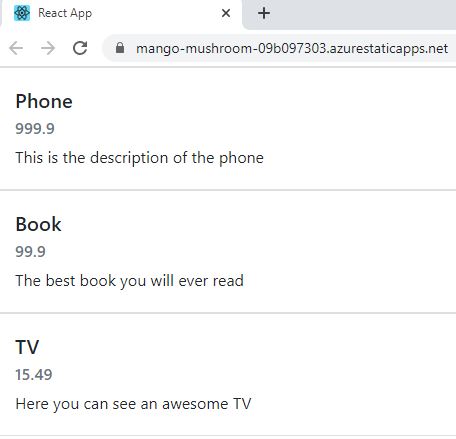
Testing the Static Web App with the Azure Function
Conclusion
Static Web Apps are a great new feature to quickly deploy your static website and host it globally. The feature is still new and in preview therefore it is no surprise that everything is not working perfectly yet. Once all problems are solved, I think it will be a great tool for a simple website, especially since it is free.
In my next post, I will show you how to host your website for free and also extend the Azure Function to be able to read data from a database.
You can find the code of the React demo here and the code of the Azure Function demo here.
Comments powered by Disqus.