Last week, I talked about hosting your static website with Azure Static Web Apps. Today, I will extend this example using a free Cosmos DB for the website data and Azure Functions to retrieve them. This approach will give you free website hosting and global distribution of your website.
You can find the demo code of the Azure Static Web App here and the code for the Azure Functions here.
Azure Cosmos DB
Cosmos DB is a high-end NoSQL database that offers incredible speed and global distribution. Cosmos DB is way too comprehensive to talk about all the features here. I am using it because it offers a free tier which should give you enough compute resources for a static website.
Create a Free Tier Cosmos DB
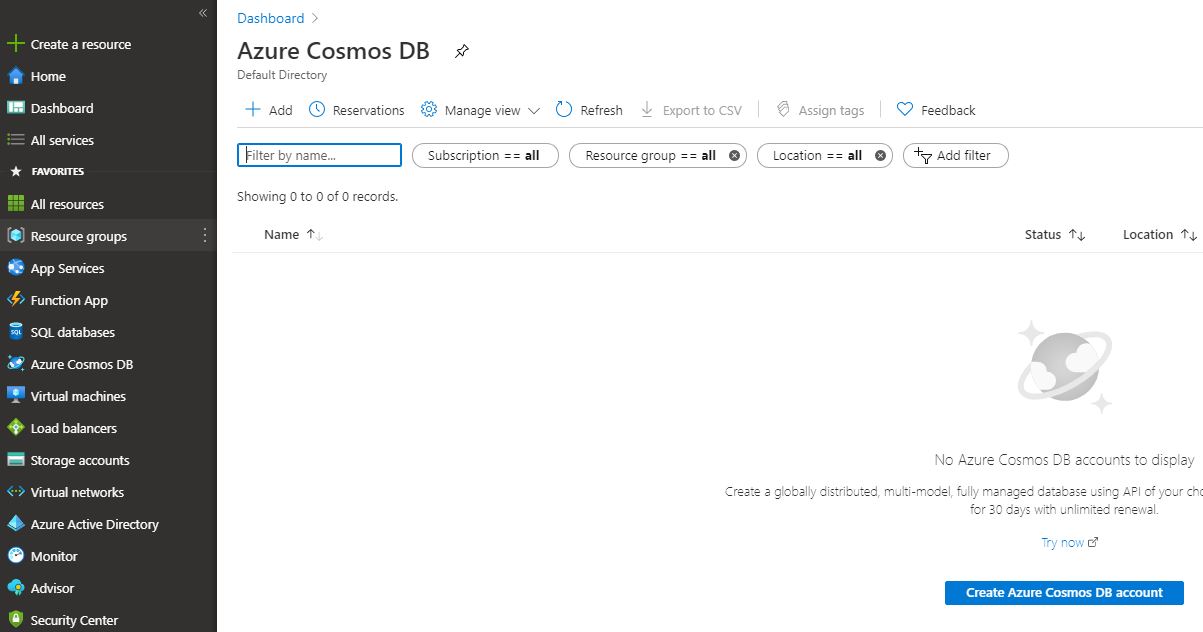
In the Azure Portal search for Azure Cosmos DB, select it and click on Create or select Azure Cosmos DB from the left panel and then click on Create Azure Cosmos DB account.
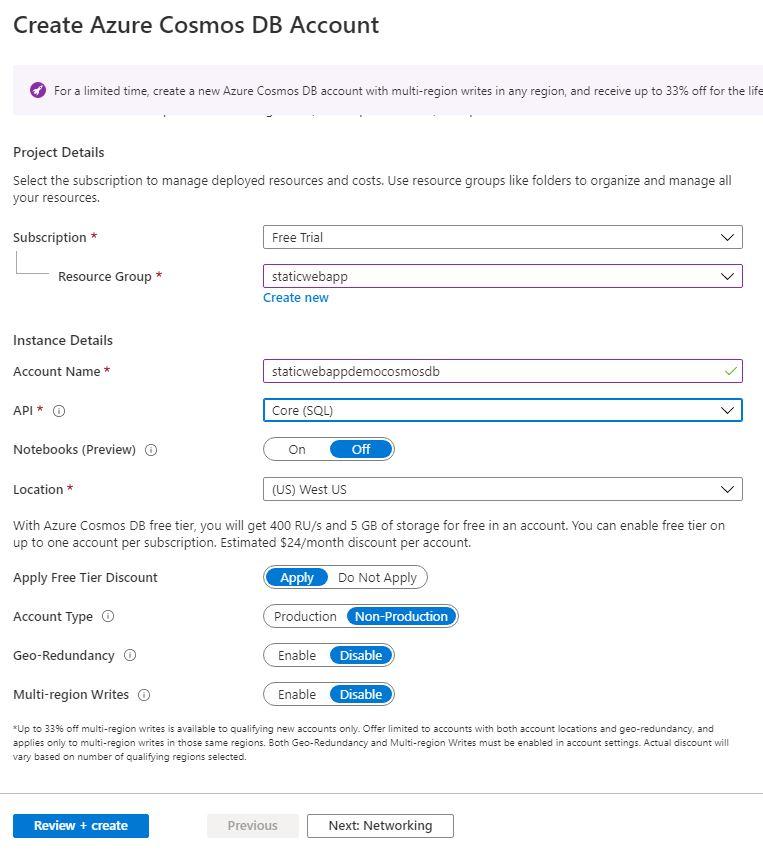
On the next page, select a resource group and make sure that the Free Tier Discount is applied. After filling out all information click on Review + create.
The deployment will take around ten minutes.
Add Data to the Cosmos Database
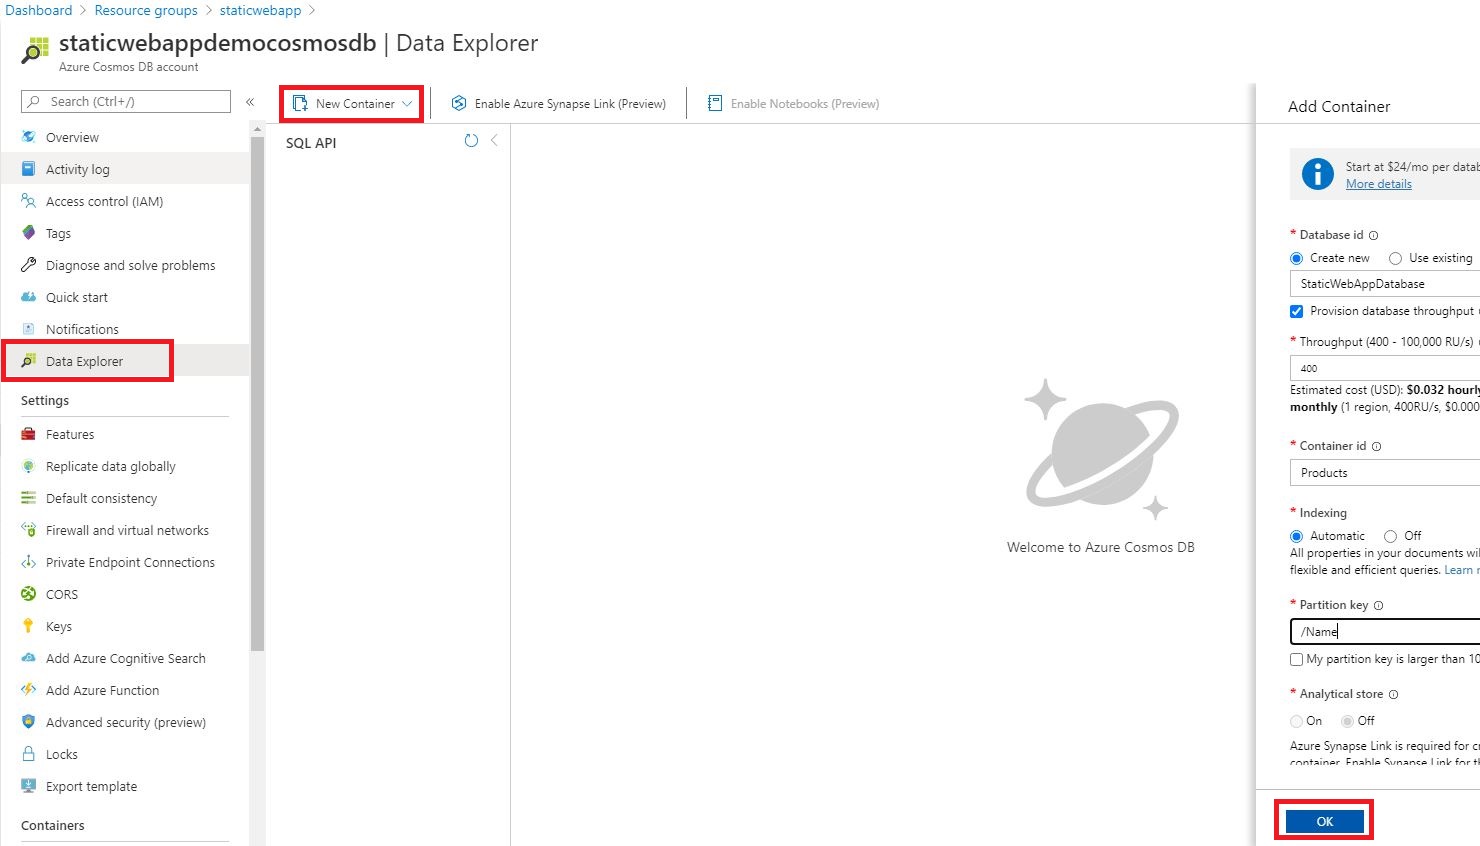
After the deployment is finished, navigate to the Data Explorer tab in your Cosmos DB account. Click on New Container and a new tab is opened on the right side. There enter a Database id, Container id, and Partition key and click OK.
Open the newly created database and the Products container and click on New Item. This opens an editor where you can add your products as JSON.
Again, Azure Cosmos DB is too big to go into any details in this post. For the free hosting of your website, it is only important to know that I added the data for the website into the database. The next step is to edit the Azure Function so it doesn’t return a static list but uses the Azure Cosmos DB instead.
Using an Azure Function to read Data from Cosmos DB
I am re-using the Azure Function from my last post. If you don’t have any yet, create a new Azure Function with an HTTP trigger. To connect to the Cosmos DB, I am installing the Microsoft.Azure.Cosmos NuGet package and create a private variable with which I will access the data.
Next, I create a method that will create a connection to the container in the database.
To connect to the Azure Cosmos DB container, you have to enter your URI and primary key. You can find them in the Keys tab of your Cosmos DB account.
In the next method, I am creating an iterator that will return all my products. I add these products to a list and return the list. You can filter the query by providing a filter statement in the GetItemQueryIterator method.
In the Run method of the Azure Function, I am calling both methods and convert the list to a JSON object before returning it.
I keep the Product class as it is.
Start the Azure Function, enter the URL displayed in the command line and you will see your previously entered data.
The last step is to deploy the Azure Function. In my last post, I already imported the publish profile. Since nothing has changed, I can right-click on my project, select Publish and then Publish again.
Testing the Free Website Hosting Implementation
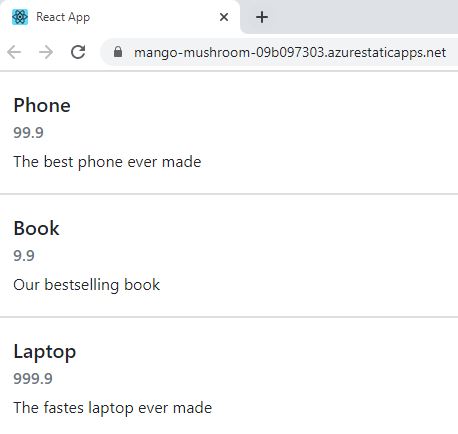
Open the URL of your Azure Static Web App and the data from the Cosmos DB will be displayed.
Conclusion
Today, I showed how to use Azure Cosmos DB, Azure Functions and Azure Static Web Apps to achieve free website hosting and also a global distribution of the website. You can find the demo code of the Azure Static Web App here and the code for the Azure Functions here.
During Ignite in September 2020, Microsoft announced new features for Static Web Apps. From now on it is also possible to host Blazor apps and the connection with the Azure Function got improved a lot. You can find my post about it here.


Comments powered by Disqus.