

In my last post, I have created an on-premises k3s cluster and introduced the requirements of this project. One of the requirements/restraints of this project is that the k3s cluster sits behind a firewall that blocks all incoming traffic.
Today, I will show you how to install Azure Arc which will help to manage the cluster with Azure, even though it is not accessible over the internet.
This post is part of “Azure Arc Series - Manage an on-premises Kubernetes Cluster with Azure Arc”.
Install Azure CLI and prepare the Cluster for Azure Arc
The installation of Azure Arc will be executed on the master node of the k3s cluster. To install Azure Arc, you have to install the Azure CLI and the connectedk8s extension first. Use the following commands to install the CLI, the extension, and then login into Azure:
I prefer using the –use-device-code parameter for the az login command because I had some problems when trying to log in on a remote machine. Open the displayed URL and enter the code. You will be logged in a couple of seconds later.

Install the Azure CLI and login into Azure
Another step you have to take before installing Azure CLI is to register 3 resource providers. They are necessary for Azure Arc to be installed. Registering them might take up to 10 minutes. You can use the following commands to register the resource provider and also check if the registration is finished.
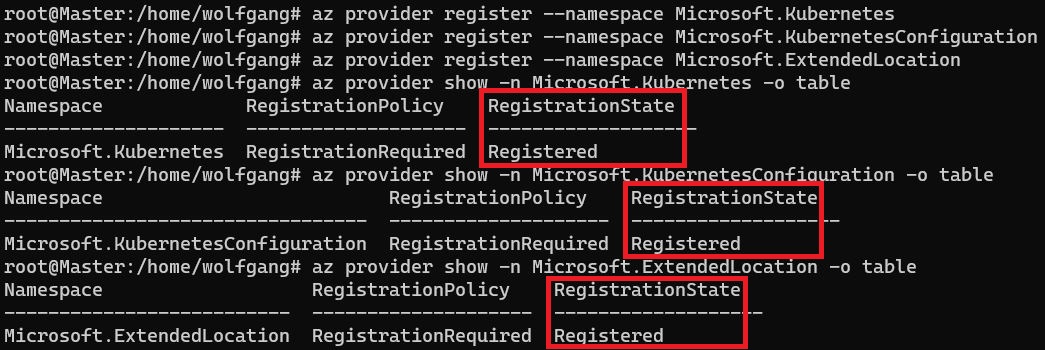
Register Service Provider in Azure
Make sure that the RegistrationState is Registered for all 3 resource providers. There is one last step you have to take after the resource providers are registered. You have to move the config file of the Kubernetes cluster. Azure Arc expects the config file under /root/.kube/config whereas k3s installs the config under /etc/rancher/k3s/k3s.yaml. Use the following command to move the config file to the right location:
In case you get the error message “mv: cannot move ‘/etc/rancher/k3s/k3s.yaml’ to ‘/root/.kube/config’: No such file or directory”, create the /.kube folder using the following command:
After moving the config file, install Azure Arc with the following command:
Make sure to use a location close to your on-premises infrastructure. Currently, not all Azure locations support Azure Arc. The Azure CLI will tell you if you selected an unsupported region and what regions are available right now. The name parameter configures the name of the Azure Arc instance.

Install Azure Arc
Check the Azure Arc Installation
The installation takes around 5-10 minutes. In the past, I often got disconnected and had to reconnect. Use the following command to check if the Azure Arc installation is finished:
This command prints all Azure Arc instances in the provided resource group to the console. You should see the previously created Azure Arc instance.

Azure Arc got installed
You can also see the Azure Arc instance in your resource group in the Azure Portal. Click on it and you will see some information about your cluster like the Kubernetes version or what distribution you are using (I updated the k3s cluster since the last post and therefore have a newer version now).
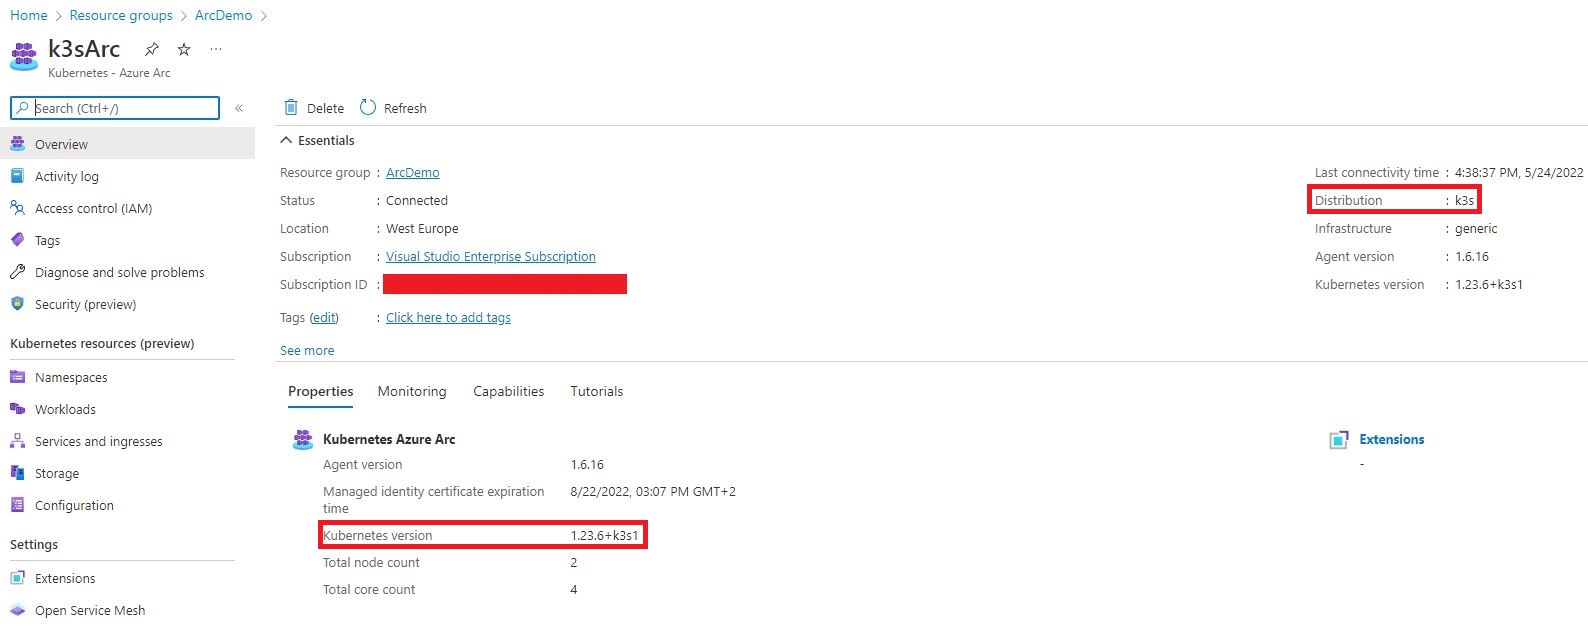
Azure Arc in the Azure Portal
Azure Arc installs all the needed applications in the newly created azure-arc namespace. These applications manage the connection to Azure, authentication to Azure Active Directory, and collect metrics that can be displayed in dashboards in the Azure Portal.
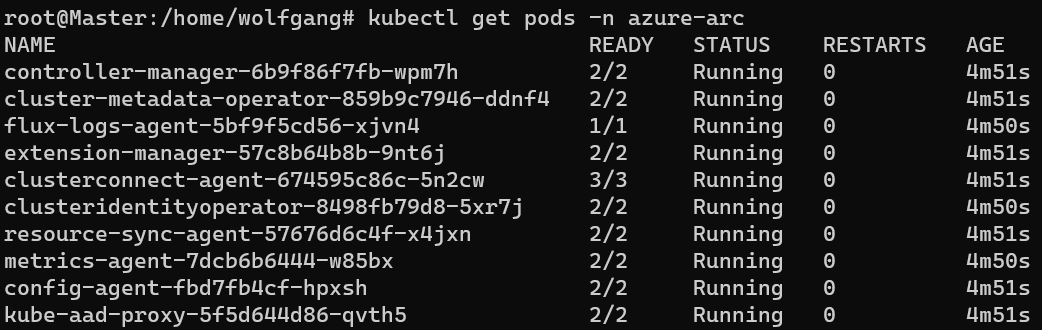
Applications in the azure-arc Namespace
Back in the Azure Portal, click on any of the Kubernetes resources panes on the left and you will see that you need to sign in to view the Kubernetes resources.
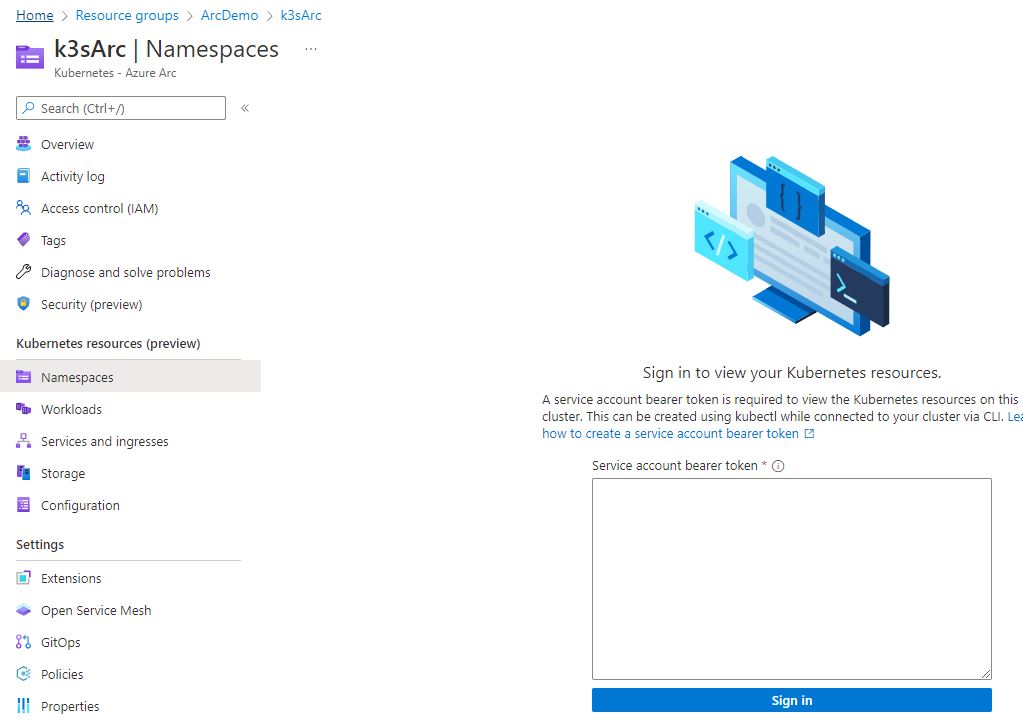
Sign in to view your Kubernetes resources
In my next post, I will show you how to authenticate a user to sign in to the Kubernetes cluster using Azure Arc.
Video
Here is the blog post as video:
Conclusion
Azure Arc can be easily installed using the Azure CLI and allows you to project your cluster into Azure. This means that you can see information such as the K8s version and the distribution in the Azure Portal. To do that, Azure Arc installs a couple of applications in the azure-arc namespace.
In my next post, I will show you how to authenticate a user to sign in to the Kubernetes cluster using Azure Arc.
This post is part of “Azure Arc Series - Manage an on-premises Kubernetes Cluster with Azure Arc”.
Comments powered by Disqus.