Using cloud technologies is amazing and makes a developer’s life so much easier. Lately, I have to work with an on-premises Kubernetes cluster and I had to realize how much work it is to do all these things cloud providers offer. That’s the reason why I got into Azure Arc. In my last post, Azure Arc - Getting Started, I explained what Azure Arc is and how it can be used to manage on-premises resources.
Today, I would like to get more practical and show you how to install an on-premises k3s cluster and in the next post, I will install Azure Arc to manage the cluster.
This post is part of “Azure Arc Series - Manage an on-premises Kubernetes Cluster with Azure Arc”.
Project Requirements and Restrictions
My project has the following requirements and restrictions:
- Two on-premises Ubuntu 20.04 VMs
- Install and manage a Kubernetes distribution
- Developers must use CI/CD pipelines to deploy their applications
- A firewall blocks all inbound traffic
- Outbound traffic is allowed only on port 443
- Application logging
- Monitor Kubernetes and Vms metrics
- Alerting if something is wrong
The biggest problem with these restrictions is that the firewall blocks all inbound traffic. This makes the developers’ life way hard, for example, using a CD pipeline with Azure DevOps won’t work because Azure DevOps would push the changes from the internet onto the Kubernetes cluster.
All these problems can be solved with Azure Arc though. Let’s start with installing a Kubernetes distribution and project it into Azure Arc.
Installing an on-premises k3s Cluster
Since I am a software architect and not really a Linux guy, I decided to use k3s as my Kubernetes distribution. K3s is a lightweight and fully certified Kubernetes distribution that is developed by Rancher. The biggest advantage for me is that it can be installed with a single command. You can find more information about k3s on the Rancher website.
My infrastructure consists of two Ubuntu 20.04 VMs. One is called master and will contain the Kubernetes control plane and also serve as a worker node. The second VM, called worker, will only serve as a worker node for Kubernetes.
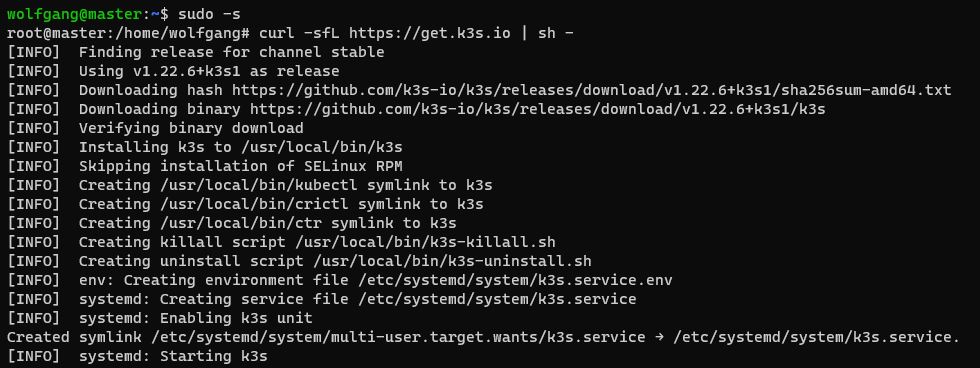
To get started, connect to the master server via ssh and install k3s with the following command:
There are several options to configure the installation. For this demo, the default is fine but if you want to take a closer look at the available options, see the Installation Options.
The installation should only take a couple of seconds. After it is finished, use the Kubernetes CLI, kubectl, to check that the cluster has one node now:
If you want a very simple Kubernetes installation, you are already good to go.
Add Worker Nodes to the k3 Cluster
To add worker nodes to the k3s cluster, you have to know the k3s cluster token and the IP address of the master node. To get the token, use the following command on the master node:
The node token should look as follows:
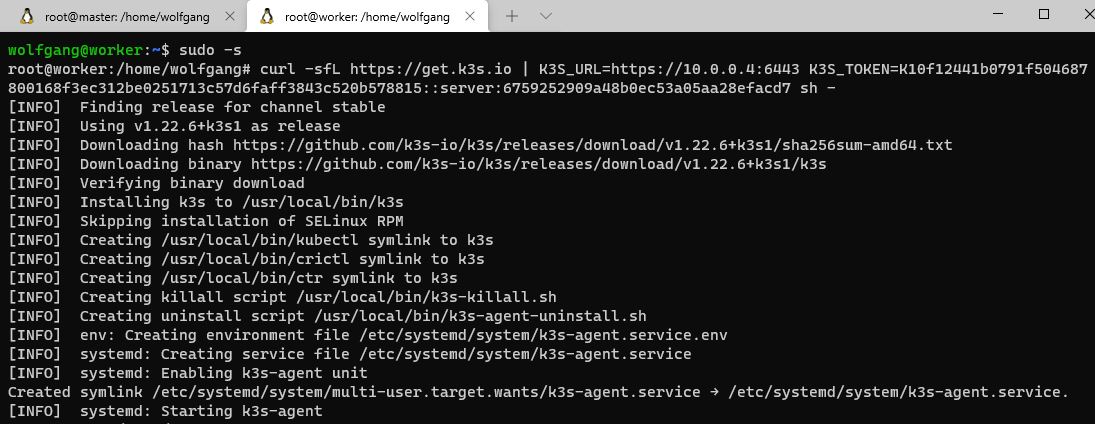
Copy the token somewhere and then connect to the worker VM via ssh. Use the following command to install k3s on the VM and also add it to the cluster:
Replace the URL with the URL of your master node and also replace the token with your token.
Go back to the master VM and you should see two nodes in your cluster now:
You can repeat this process for every node you want to add to the cluster.
Conclusion
K3s is a fully certified, lightweight Kubernetes distribution developed by Rancher. It can be easily installed and is a great tool to get started with Kubernetes when you have to use on-premises infrastructure.
In my next post, I will install Azure Arc and project the cluster to Azure. This will allow managing the cluster in the Azure portal.
This post is part of “Azure Arc Series - Manage an on-premises Kubernetes Cluster with Azure Arc”.


Comments powered by Disqus.