

Microsoft promotes going passwordless for a while now. Azure offers authentication against the Azure Active Directory where applications can acquire access tokens using their identity. Another use case would be accessing an SQL database running on Azure. Although, in theory, this sounds very easy, my experience showed that it can get tricky.
Today I want to show you how to configure Azure SQL with Azure Active Directory authentication and how to avoid annoying pitfalls.
This post is part of “Microservice Series - From Zero to Hero”.
Configure AAD Authentication for an Azure SQL Server
You can find the code of the demo on GitHub.
In one of my previous posts, I created an SQL Server that runs all my databases. If you also have an SQL server, you have to set an Active Directory admin. This admin can be either an AAD user or a group. Without this admin, the SQL server won’t be able to authenticate your users against the AAD.
You can either use the Azure portal or Azure CLI to set the Active Directory admin. If you use the portal, open your SQL server and select the Active Directory admin pane. There, click on Set admin, search for your user or group and save your selection.
If you use the Azure CLI, use the following query to get all AAD users:
The –query parameter filters the response to only display the principal name of the AAD user.

Get the principal name of all AAD users
My AAD currently has only one user and therefore returns only this one principal name. Once you know the principal name of the group or user you want to set as admin, you can filter using the –filter flag so your query only returns this one entity. Save the return value in a variable, so you can reuse it in the next step.
With the user set to the variable, use the following command to set the Active Directory admin. Replace the resource group and server name with your corresponding values.
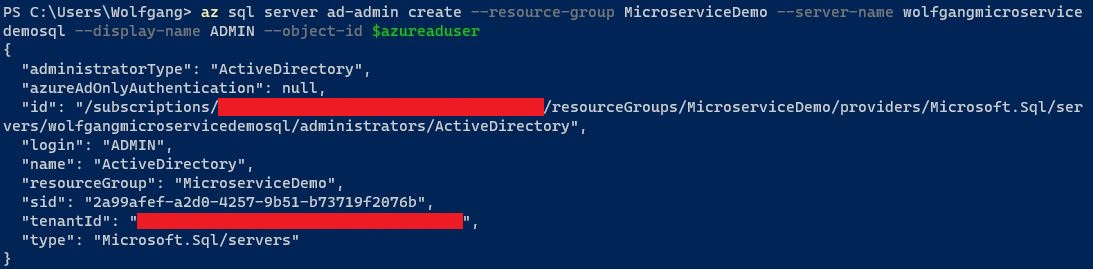
Set the Active Directory admin
Configure the Test Application to use AAD Authentication
You can find the code of the demo on GitHub.
Open the SQL management tool of your choice, for me, it’s Microsoft SQL Server Management Studio (SSMS), and log in with the user you previously set as the Active Directory admin.
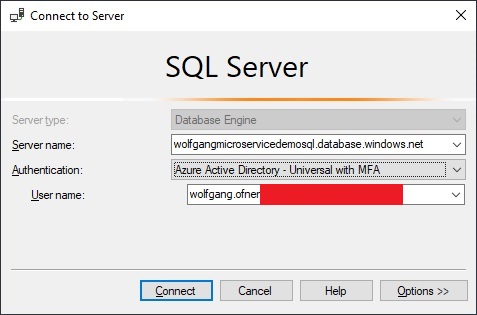
Log in using the server admin user
You should be able to log in and see all the databases on the server.
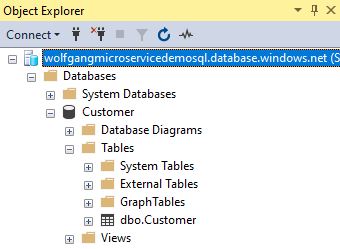
The-login-was-successful
Now it is time to test the login with a test application. To use AAD authentication when developing, you have to sign in to Visual Studio. Visual Studio then uses this user to request an access token and authenticate you to the SQL server. Since you should not use the admin account for your application, I log in with a different user.
Before you can use your test application, you have to make some small changes. First, install the following NuGet packages:
Next, create a custom SQL authentication provider. This class requests an access token from the AAD.
With the authentication provider set up, register your DbContext in the Startup.cs class and add the previously created authentication provider.
Lastly, set the following connection string in your appsettings.json file.
Testing the AAD Authentication
If you are using my demo application, make sure that you have set the “UseInMemoryDatabase” setting in the appsettings.json and appsettings.Development.json files to false. Otherwise, the application will use an in-memory database.
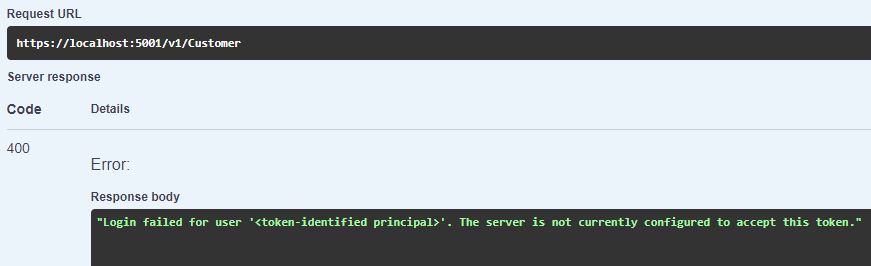
When you start the demo application, you will see the Swagger UI. Execute the Get request for Customer and you will see the following error message:
The-login-to-the-Customer-database-failed
The login failed because the user logged in to Visual Studio has no access to the Customer database. You have to add your users to the database before they can access it.
Add Users to your Database
Log in to the database with the user you previously set as the admin. Add your Visual Studio user with the following code and also give the user the desired roles.
Now you should be able to log in with this user. If you use SSMS, make sure that you select the Customer database as the default database. If you don’t set Customer as your default database, SSMS will use the Master database and since the user does not exist in this database, the login will fail.
The user does not exist in the Master database
Try the Test Application again
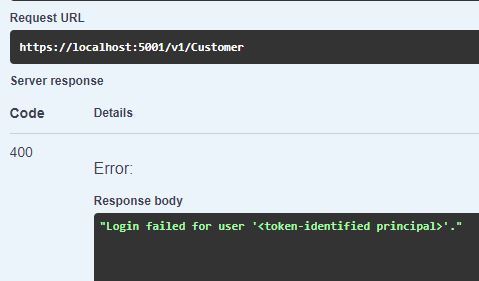
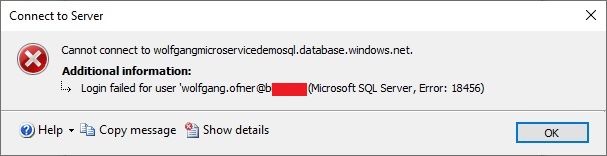
Start the test application and execute the Get request again. This time you should get some customers. You may get the following error though:
Login to the SQL server failed
If you google this error message, you won’t find much helpful information. Also, Microsoft’s documentation doesn’t mention anything about this error.
The problem you encounter here is that your user exists in multiple tenants and the authentication provider does not know which tenant it should use. To fix this problem, you have to add the tenant where the SQL server resides to your authentication provider.
Replace the XXX with your actual tenant Id.
Run your application again and now you should be able to retrieve the data from the database.
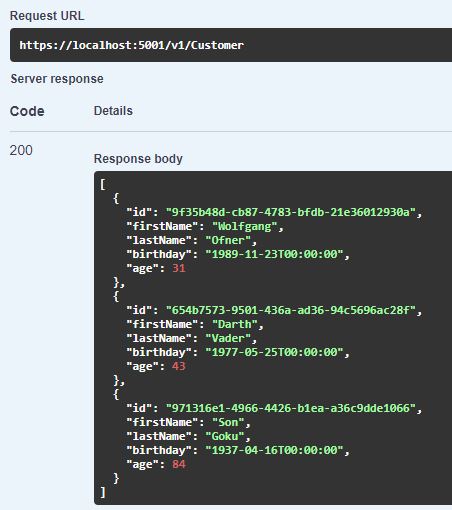
Successfully retrieved data from the database
To verify that you loaded the data from the right database, log in to your database using SSMS and query the Customers in your Customer database. The result should be the same as you saw previously in your test application.
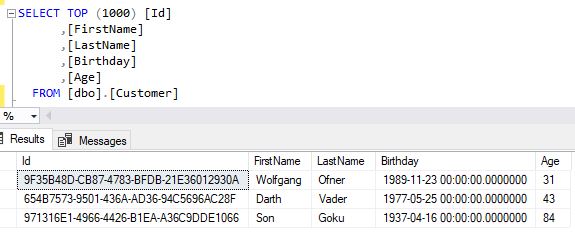
Query customers from the database using SSMS
Improving the Test Application
The test application can retrieve data using the AAD authentication but the code is not pretty yet. Especially the part where the tenant Id is hard-coded into the authentication provider. Let’s improve this code a bit.
First add a new property, TenantId to the appsettings.json file.
Next, add a constructor to your CustomAzureSqlAuthProvider with a string as the parameter. This string will contain the tenant Id. Assign the parameter to a private variable. Then replace the hard-coded tenant Id with the new private variable.
Lastly, read the value of the tenant Id from the appsettings.json file and pass it to the constructor of your authentication provider in the Startup.cs class.
Run your application again to make sure that everything still works.
Pass the Tenant Id during the Deployment
You want to pass the tenant id during the deployment to keep it secret. If you commit it to your version control, everyone would be able to read it. You have to take the following steps to pass the tenant id during the deployment:
Add a variable for the tenant id to your values.yaml file in your Helm chart. This variable has to start and finish with two underscores (__) so the Tokenizer task in the Azure DevOps pipeline can replace the value. Next, add your tenant id as a secret variable in your pipeline. Don’t forget to update the connection string in your deployment pipeline too.
The Tokenizer task will replace the tenant id in the Helm chart with your actual tenant id and therefore will override the empty TenantId value in your appsettings.json file. For a detailed explanation of how and why this works, see Replace Helm Chart Variables in your CI/CD Pipeline with Tokenizer.
Conclusion
Azure Active Directory authentication to access your databases is a great feature to get rid of passwords. This should also streamline the development process since you don’t have to share passwords with new developers. All you have to do is to add the developer to the desired database so they can log in.
There may be some roadblocks on the way and Microsoft’s documentation only showcases the happy path of the integration. This post should help you with the most common pitfalls and shows how to avoid them.
In my next post, I will show you how to use AAD authentication with your application running in AKS.
You can find the code of the demo on GitHub.
This post is part of “Microservice Series - From Zero to Hero”.
Comments powered by Disqus.