

Removing passwords and using identities to access resources is the way to go for new applications. In my last posts Use AAD Authentication for Pods running in AKS and Implement AAD Authentication to access Azure SQL Databases, I showed you how to enable AAD for Azure Kubernetes Service and how to use AAD authentication to access an Azure SQL database.
In this post, I want to show you how to use your own managed identity to configure an application running in AKS to access an Azure SQL database.
This post is part of “Microservice Series - From Zero to Hero”.
Configure AKS for AAD Authentication
You can find the details about the configuration of the AKS cluster in my previous post Use AAD Authentication for Pods running in AKS. Here is the short version to set up your AKS cluster:
Set up some variables before you start. Make sure to replace
Assign the Managed Identity Operator and Virtual Machine Contributor role to the managed identity of the AKS cluster.
Next, add and install the aad-pod-identity Helm chart. See Helm - Getting Started and Deploy to Kubernetes using Helm Charts for more information about Helm charts.
Lastly, create a new managed identity. This managed identity will be used to authenticate the application in your Azure SQL database.
Configure the Azure SQL Server and Database for AAD Authentication
You can find the details about the configuration of the Azure SQL Server and database in my previous post Implement AAD Authentication to access Azure SQL Databases. Here is the short version to set up your AKS cluster:
Set a user or group as admin of your SQL server. You can use the portal or the CLI.
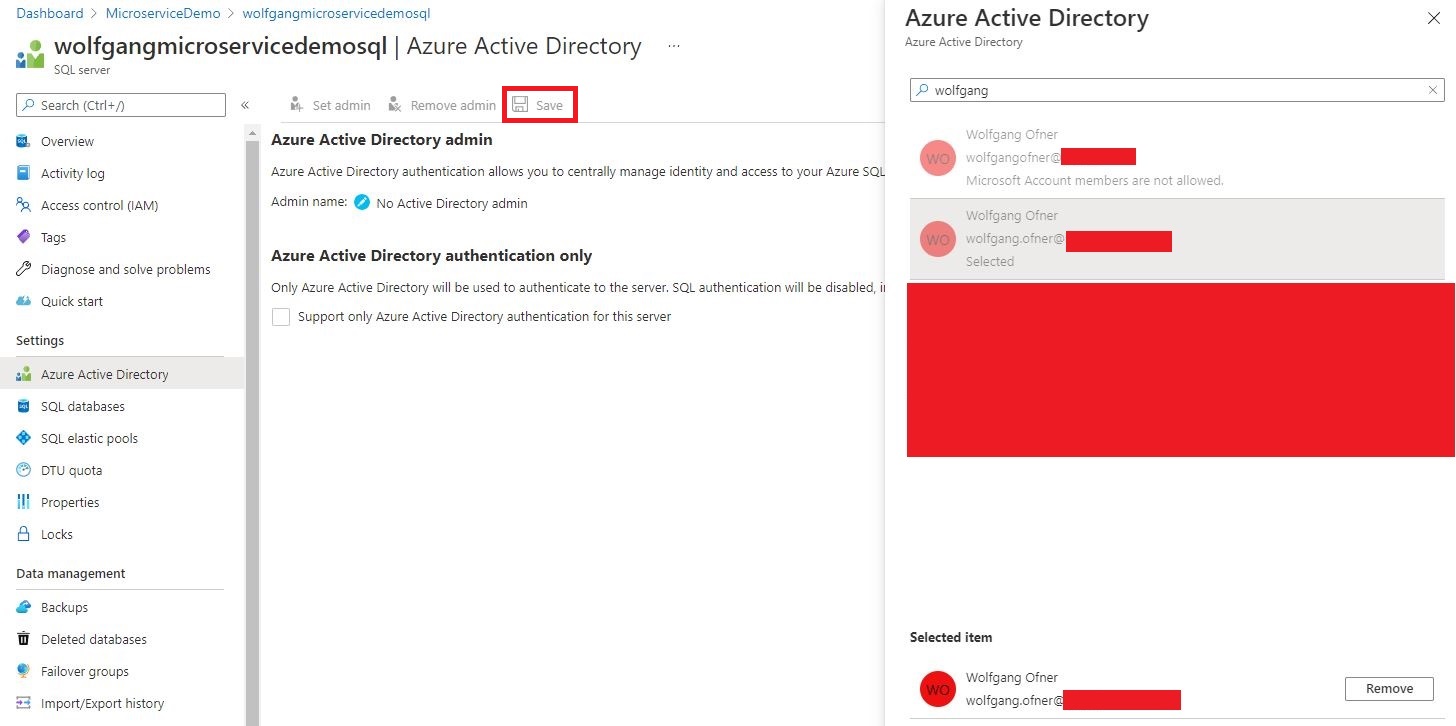
Set the SQL Server Admin
If you use the Azure portal, don’t forget to click Save after selecting a user or group.
Login to your SQL server with this admin user (or a member of the admin group) using AAD Authentication.
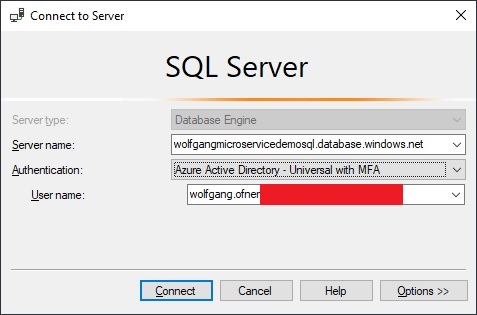
Log in using the server admin user
Open a new query window and set some permission for your previously created managed identity.
Make sure to change the database name and/or the managed identity name if you are not using the same names as I do.
Configure your Application running in AKS to use AAD Authentication
You can find the code of the demo on GitHub.
There are a few things you have to do before you can use AAD authentication for your SQL Server.
First, add two files to the Helm chart of your application, aadpodidentity, and aadpodidentitybinding. Aadpodidentity creates a resource of type AzureIdentity and configures the name of the managed identity, its resource id, and client id.
The second file creates a resource of the type AzureIdentityBinding and tells your application what managed identity it should use to acquire the authentication token.
If you do not want to use Helm or the values.yaml file, you can use normal strings in both files. You can find the resource id, and client id in the previously created variables when creating the managed identity.
Add the previously created new values to the values.yaml file:
The variables starting and ending with two underscores (__) will be replaced in the CD pipeline. You can read more about this in Replace Helm Chart Variables in your CI/CD Pipeline with Tokenizer.
Next, add the following label in the deployment.yaml file in your Helm chart in the labels section of metadata and template.
This label is necessary for the AzureIdentityBinding resource to select the right deployment. Make sure that the value of the label matches the value of the selector in the aadpodidentitybinding.yaml file.
Note that the files aadpodidentitybinding.yaml and aadpodidentity.yaml are not committed to my demo on GitHub. This is necessary to ensure users can deploy the application when they are not using pod identity. Without pod identity enabled, the Helm deployment would fail with these two files there.
Configure the CD Pipeline
You can find the code of the demo on GitHub.
The connection string is different when using AAD authentication. Since you don’t need a username or password anymore, make sure to edit your connection string. It should something like this:
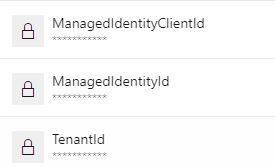
Lastly, make sure to add the new variable to your pipeline.
Also, add the client and resource id and the tenant id as the secret to your pipeline.
Add secrets to the pipeline
Test the Implementation
Check in your code and let the Azure DevOps pipeline run. After the deployment is finished, go to your application and you should be able to load your data from the database.
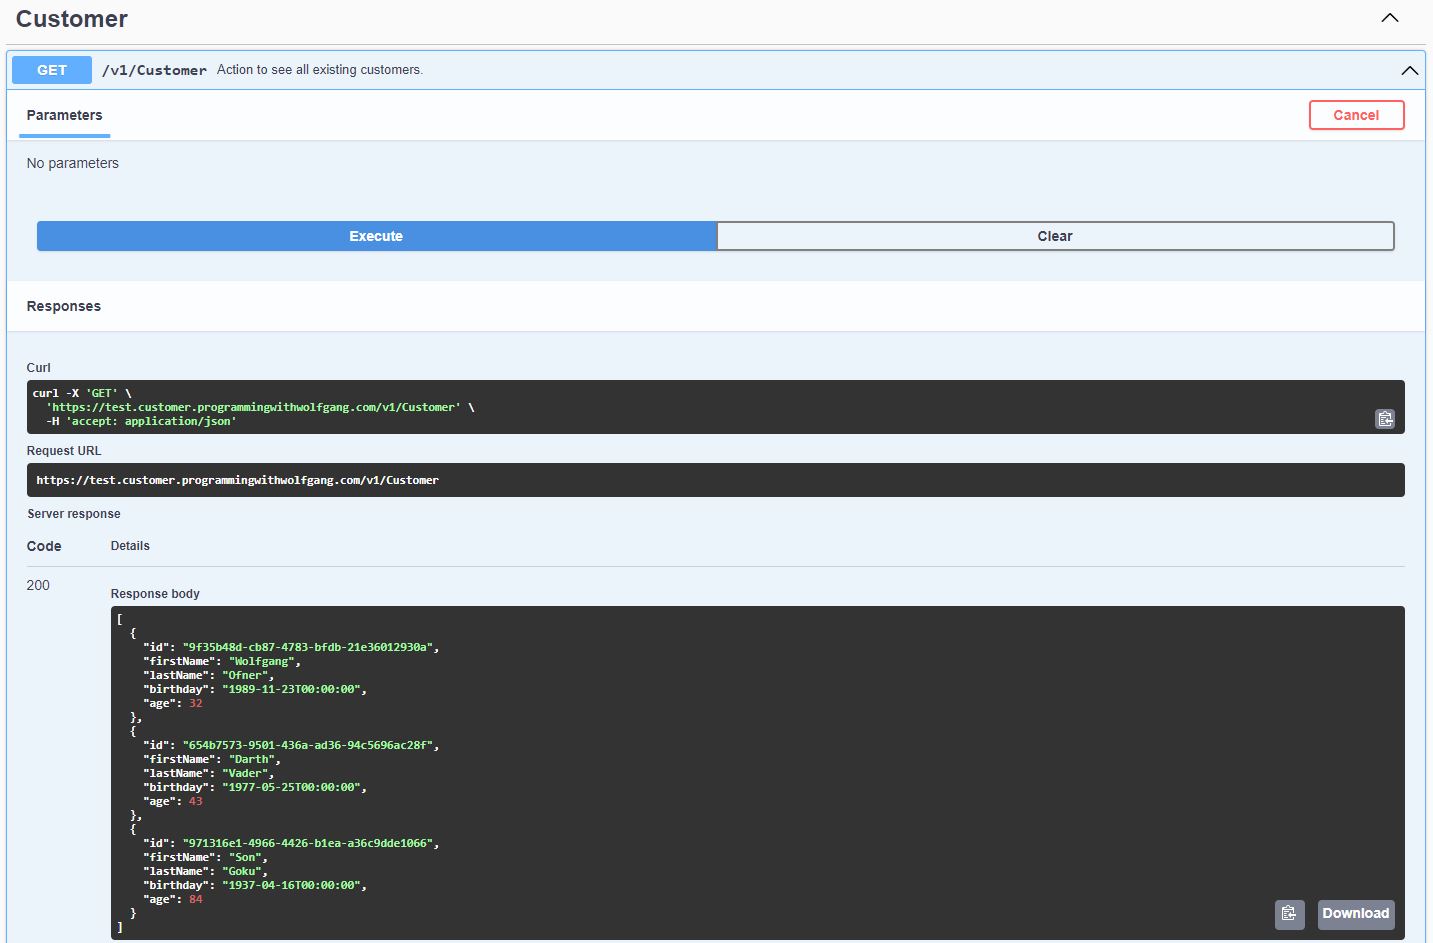
Retrieving data from the database works
Conclusion
Getting started with AAD authentication is not easy and Microsoft’s documentation is incomplete and a bit misleading at the time of this writing. There are several approaches and it took me some time to get it working. Once you figured out how it works, it is quite simple to configure, as you have seen in this post.
In my next post, I will show you how to make the necessary changes in the CI pipeline so that everything gets configured and deployed automatically.
You can find the code of the demo on GitHub.
This post is part of “Microservice Series - From Zero to Hero”.
Comments powered by Disqus.