Automated build processes should be a no-brainer nowadays but unfortunately, I still come across quite many projects which do their builds manually. In today’s post, I want to give an introduction to setting up an automated build pipeline for a .net and .NET Core application with Microsoft’s Azure DevOps Server. The DevOps Server is the on-premise version of Azure DevOps Services, but they are so similar that its negligible which one you use for this demo. I will use Azure DevOps Services. You can create a free account here.
Creating your first Build Pipeline for a .net Framework Application
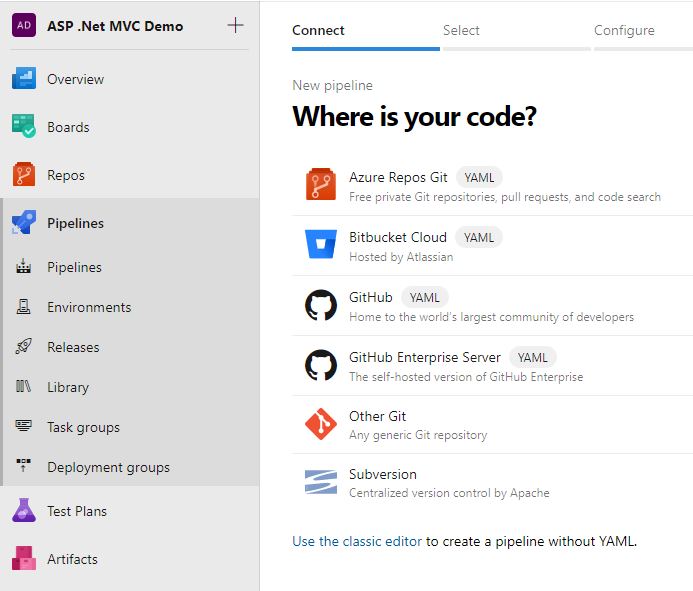
In your Azure DevOps project go to Pipelines and then again Pipelines. There click on Create Pipeline and the wizard starts.
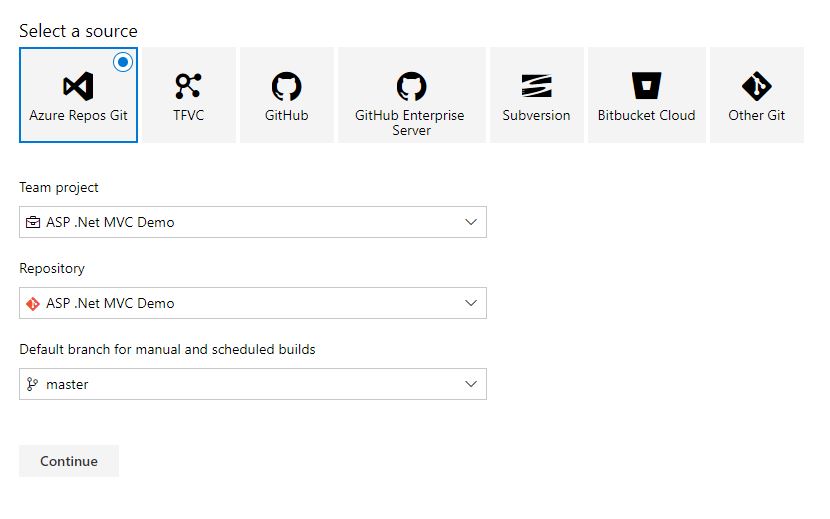
Here you can use either the new YAML editor which is selected by default or the classic editor. I use the classic editor by clicking on Use the classic editor at the bottom. In the next window, select the source of your code. The editor offers a wide range of repositories like Azure Repos Git, GitHub or even Subversion. Since I manage my code in Azure DevOps Services, I select Azure Repos Git and the wizard automatically selects your current project, repository and default branch. Click Continue to get to the template selection.
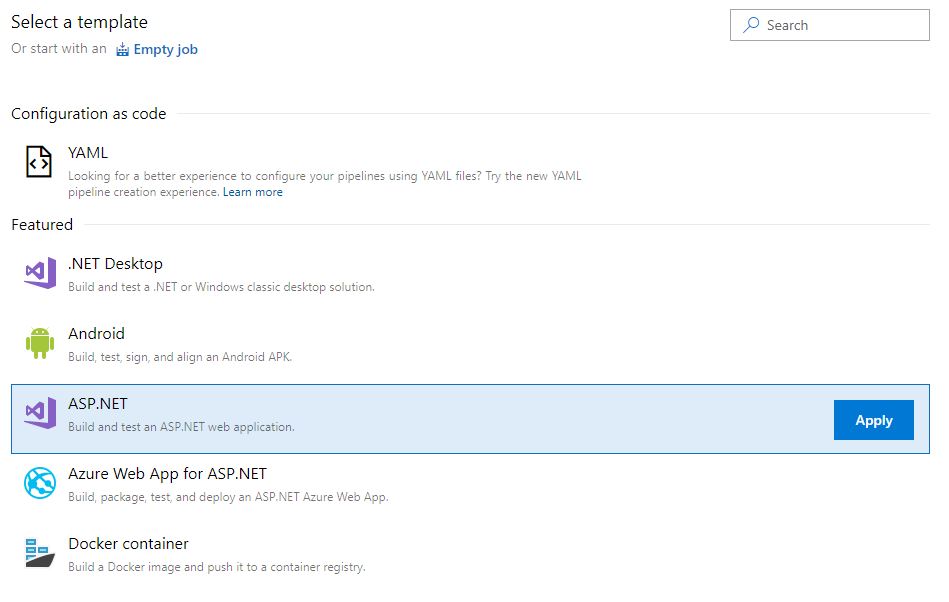
Azure DevOps Services offers a wide range of different templates as a starting point for your pipeline. There are templates for ASP .NET, Docker, Azure Functions and many more. You don’t have to select a template and could start without one by selecting Empty job or by importing a YAML file by selecting YAML. Since I have an ASP .NET MVC application, I select ASP. NET.
Click on Apply and the pipeline will be created for you.
Inspecting the Settings of the Build Pipeline
On top of your build pipeline, you can see six tabs with settings. Let’s check them out and see what we can configure there.
Tasks
The Tasks tab is the heart of your build pipeline and the part where all the magic happens. I will go over the steps in more detail in the next section.
Variables
In the Variables tab, you can create variables that can be used in every step of the pipeline. For builds, I barely use variables but you could set the username and password of an external service that you want to call. Azure DevOps already comes with a couple of predefined variables like the build configuration or platform.
With the checkbox on the right (Settable at queue time), you can configure that these variables can be changed when you create a build. On the left are also Variable groups. There you can also set variables. The difference is that you can reuse a variable group for several pipelines whereas the Pipeline variables are specific for your pipeline.
Triggers
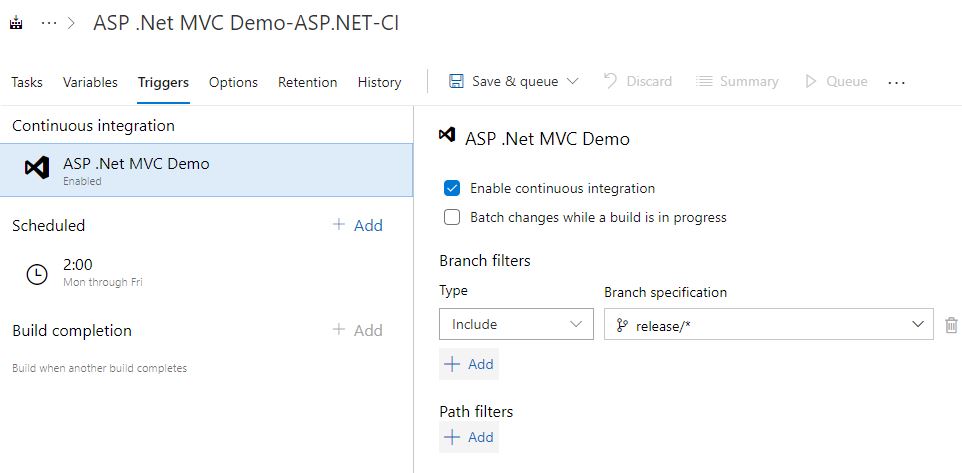
The Triggers tab configures continuous integration. On the following screenshot, you can see that I enabled continuous integration and trigger a build every time a change to a branch with the pattern release/* was made. (When I want to deploy I create a branch from master with the name release/sprint-XX. This puts the sprint-XX branch in the release folder and also triggers the build)
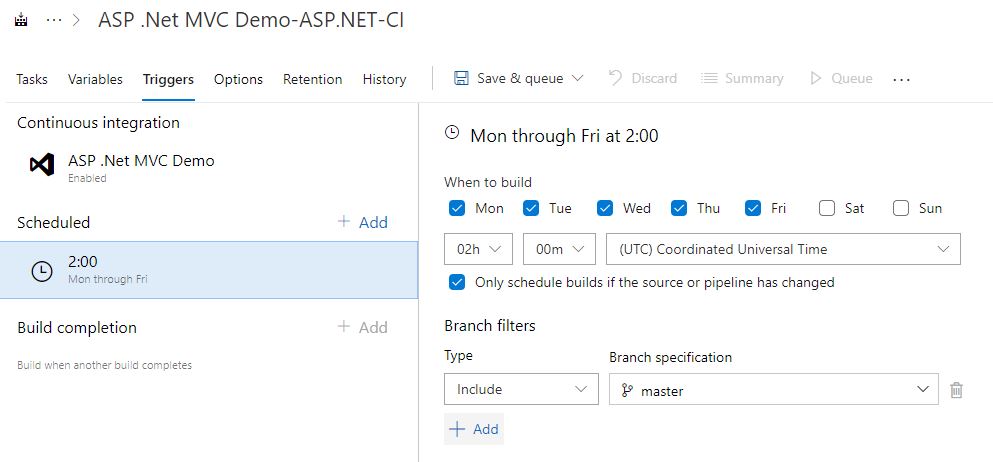
It is also possible to schedule builds. For example, if you have integration tests that take a long time to finish, you don’t want to run them at every commit. You can run them every night, for example, Monday to Friday at 2 am or on the weekend.
Options
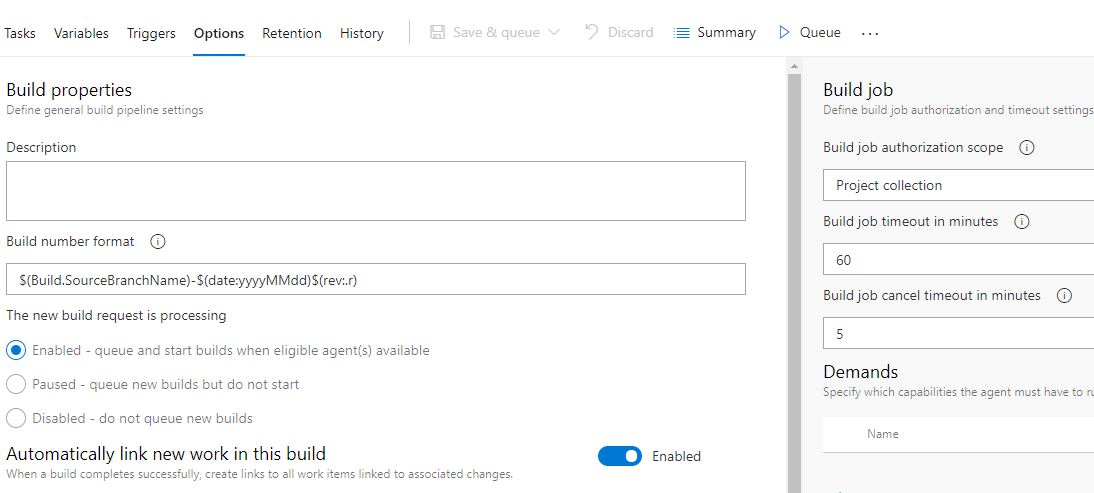
Here, you can edit the timeout for your builds and the build number format. I edited the number format to display the branch and then the date and build number. By default, only the date and build number are displayed. To do that, I am using the built-in variable Build.SourceBranchName.
Retention
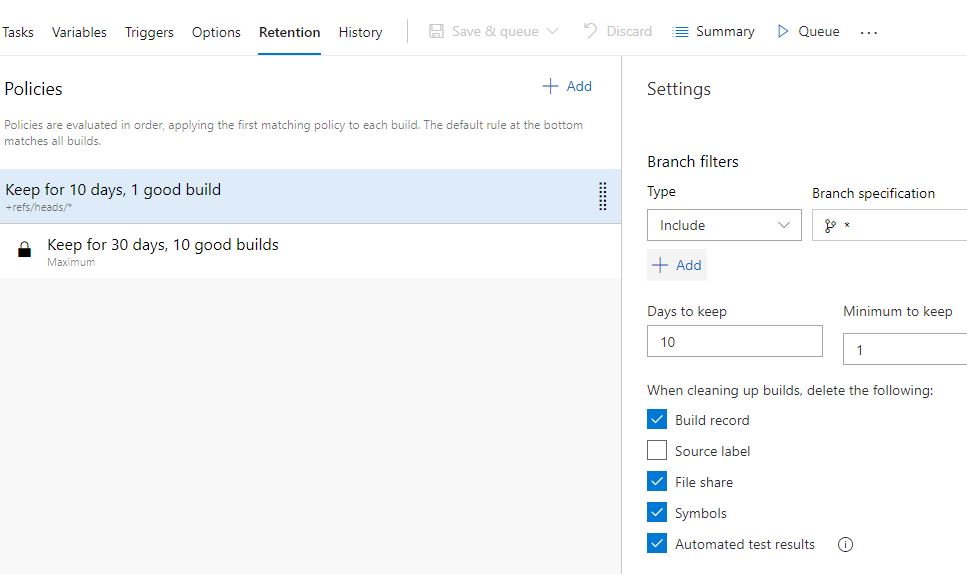
Under this tab, you can configure your retention policies for your builds. The default is to keep 10 good builds for 30 days. I leave this as it is.
History
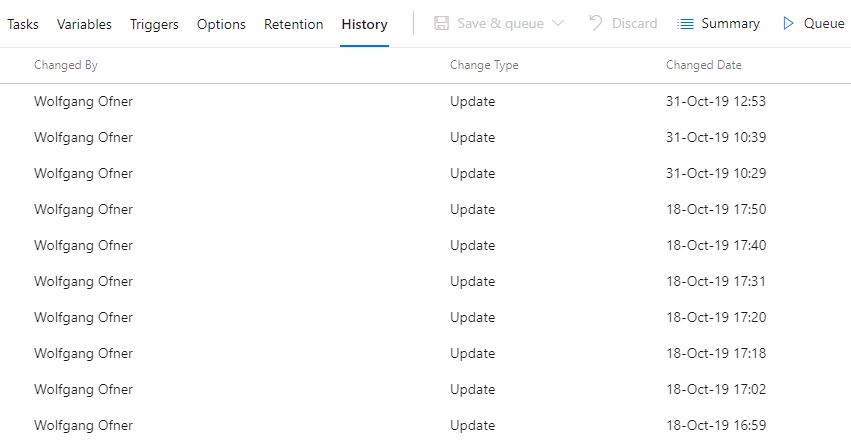
The history tab shows not the history of your builds but the history of your build pipeline changes. I highly recommend you to always make a comment when you save changes in your pipeline.
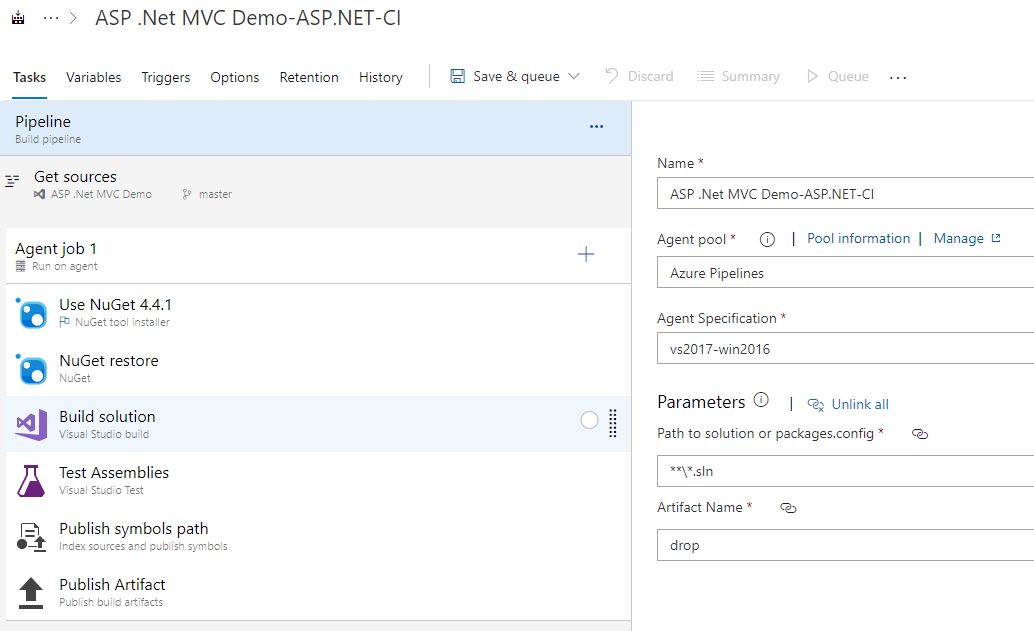
Inspecting the Build Tasks created by the ASP. NET Template
Now that all the settings are as wished, let’s look at the steps of the deployment.
Pipeline
Here you can configure the agent pool, agent and artifact name for your build. The agent pool groups agents together. An agent builds (and later deploys) your application. Since I am using Azure DevOps Services, I leave the agent pool at Azure Pipelines because I want to use the agents which are hosted by Microsoft. For the agent, I also leave it as it is. If you are running a .NET core build, you could switch to Ubuntu.
Get sources
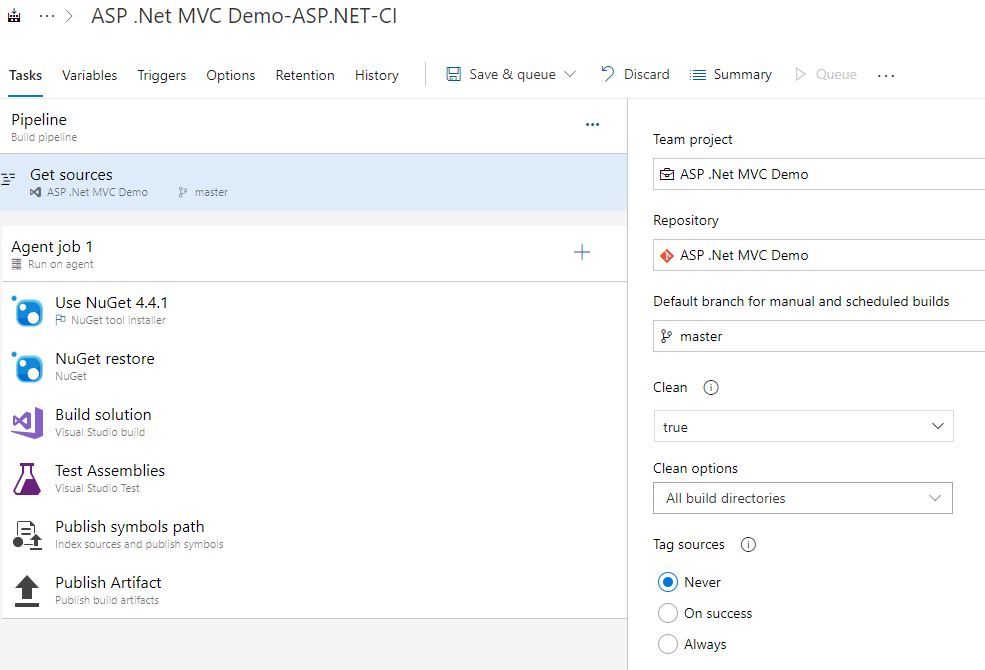
Under Get sources, you can change the project, repository and default branch for your build. You can also configure that a clean should be performed before the build. I set Clean to true and the Clean options to All build directories. Additionally, you could set a tag automatically for each build or each successful build.
Use NuGet
The first set of your build pipeline is used to set up the NuGet.exe which will be used in the next step to restore your NuGet packages. I leave all the settings at their default values.
NuGet restore
This step restores all the NuGet packages of your solution. By default the NuGet packages in all projects. You can change this by changing the Path to solution from *\.sln to whatever fits you.
Build solution
The build solution step builds your application and also publishes it. The publish is necessary to deploy it later. You can also configure which version of Visual Studio should be used. You can choose from 2012 on all versions. Latest always selects the newest version.
Test Assemblies
Here, all test assemblies with test in their names are executed. You can select to run only impacted tests to speed up your build process. This setting executes only tests that were affected by the last commit. You can also configure to run all tests in isolation or even rerun failed tests.
Publish symbols path
This task publishes all *.pdb files which can be used for remote debugging.
Publish Artifact
Publish Artifact is necessary for an automated deployment. This step publishes all the files which you want to deploy later. If you don’t do this, the release pipeline won’t find any files to deploy.
Running your first build
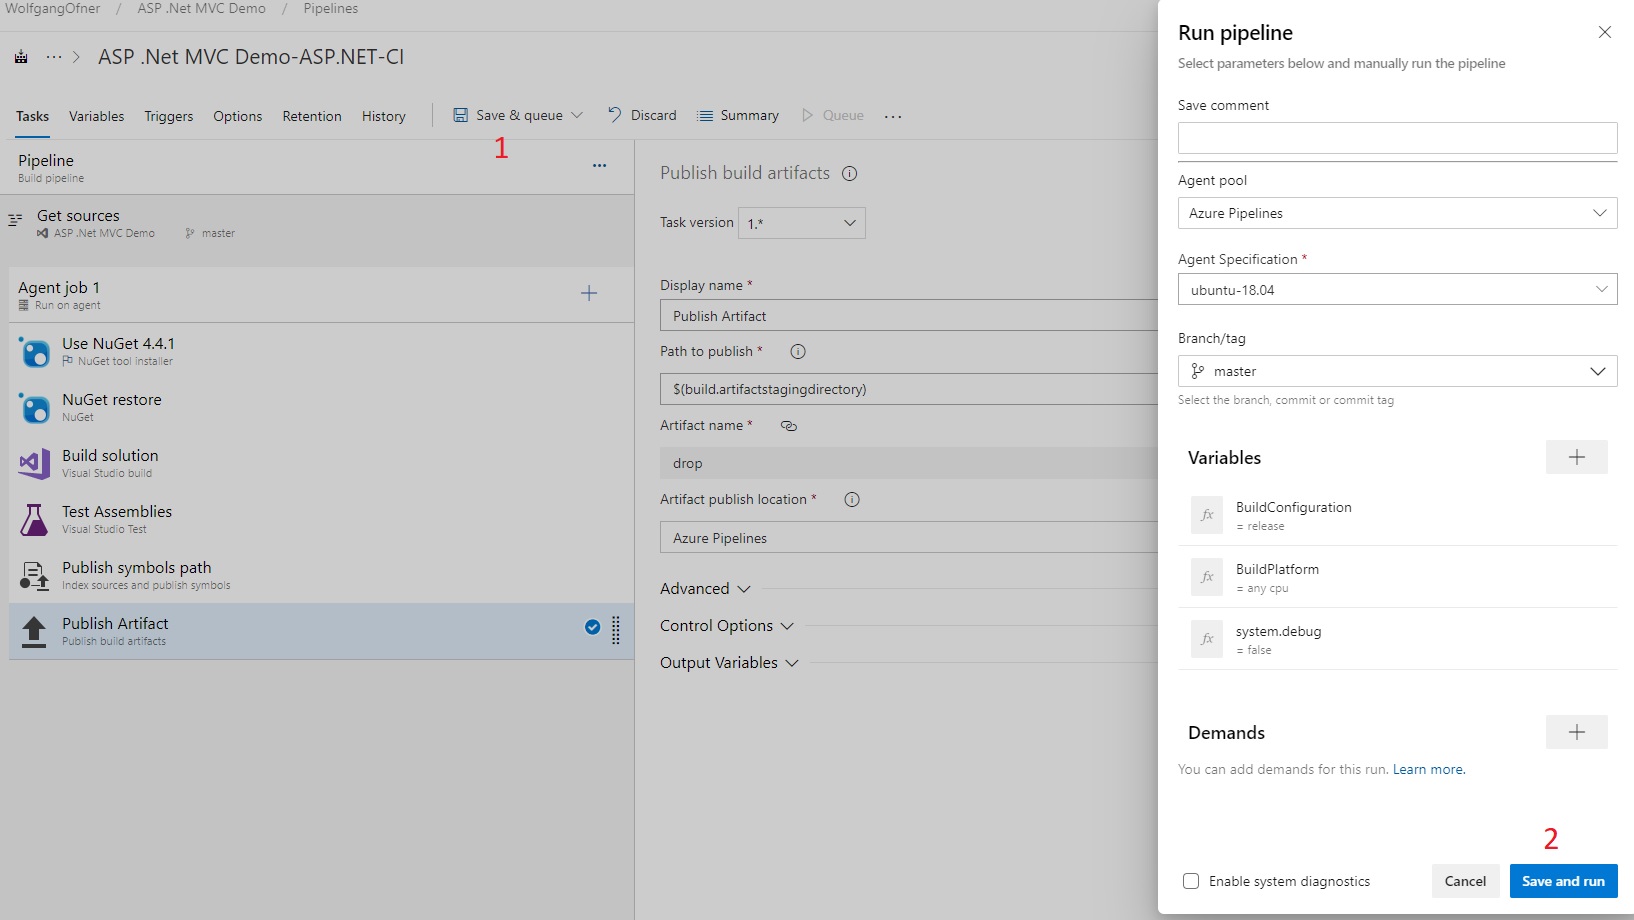
Now that everything is set up, you can run your first build by clicking Save & queue and then Save and run.
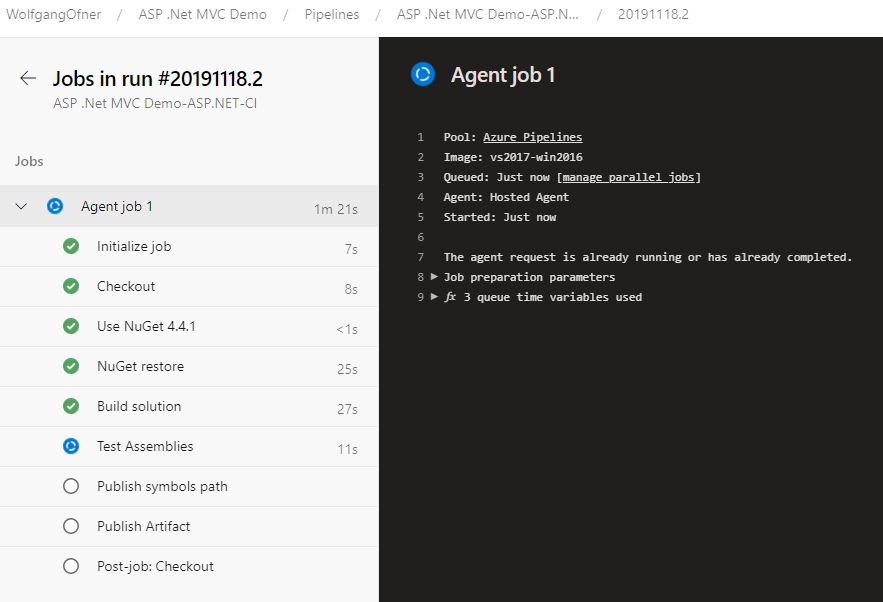
This starts the build process. You can see the status by clicking on Agent job 1. On the following screenshot, you can see that the build step is already done and the tests are run right now.
After a couple of minutes, your build should finish successfully.
Creating a Build Pipeline for a .net Core Application
Creating a build pipeline for .NET Core is the same process as for a .net framework application. The only difference is that I select ASP.NET Core as the template this time.
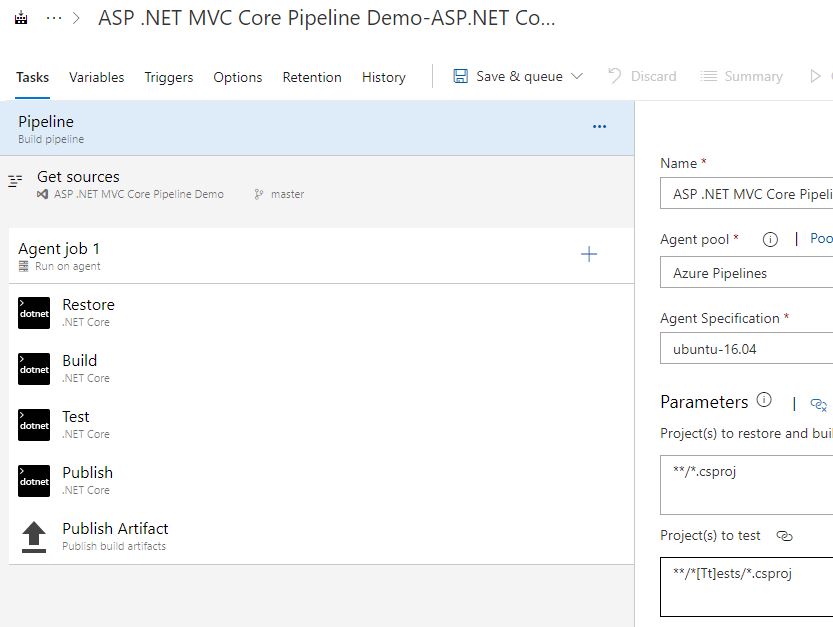
You can see a difference in the created build pipeline though.
Why I like the .net Core Build Pipeline better
There are several reasons why I like the .NET Core build pipeline better than the one for a .net framework application.
The first thing which got my attention is that all tasks look the same. All tasks except the last one use the dotnet CLI. The only difference is the argument (restore, build, publish and test). This means that I know exactly what’sgoing on and due to the similarity of the tasks, they are easy to configure.
An even better new feature is that it is possible to zip a project during the publishing process. Before that, you had to use a Powershell script or the Archive files of Azure DevOps to create the zip. But this meant that you have an additional step and also duplicate data since you have the “normal” published files and afterwards the zipped ones. Zipping the files is necessary to save storage space but more importantly to speed up the deployment process.
Conclusion
This post showed how you can quickly set up an automated build pipeline for your .net or .NET Core application in Azure DevOps. This is the first step to increasing the development velocity and reducing the bugs and later on also the deployment time.




Comments powered by Disqus.