

In my last post, I showed how to create a build pipeline for your .net and .NET Core project. Today, I want to use one of those pipelines to verify that new pull requests didn’t break my solution and I also want to show how to improve the code quality with branch policies.
Branch Policies
Branch policies let you define rules on your branch. These rules can be that commits can be only added through pull requests, a successful build validation or the approval of a reviewer. Another nice feature is that branches with policies can’t be deleted (except if you have special rights for that).
Protect the Master Branch with Policies
Let’s set up a policy for the master branch. In your Azure DevOps (on-prem or in the cloud), go to Branches, click the three dots next to the master branch and select branch policies.
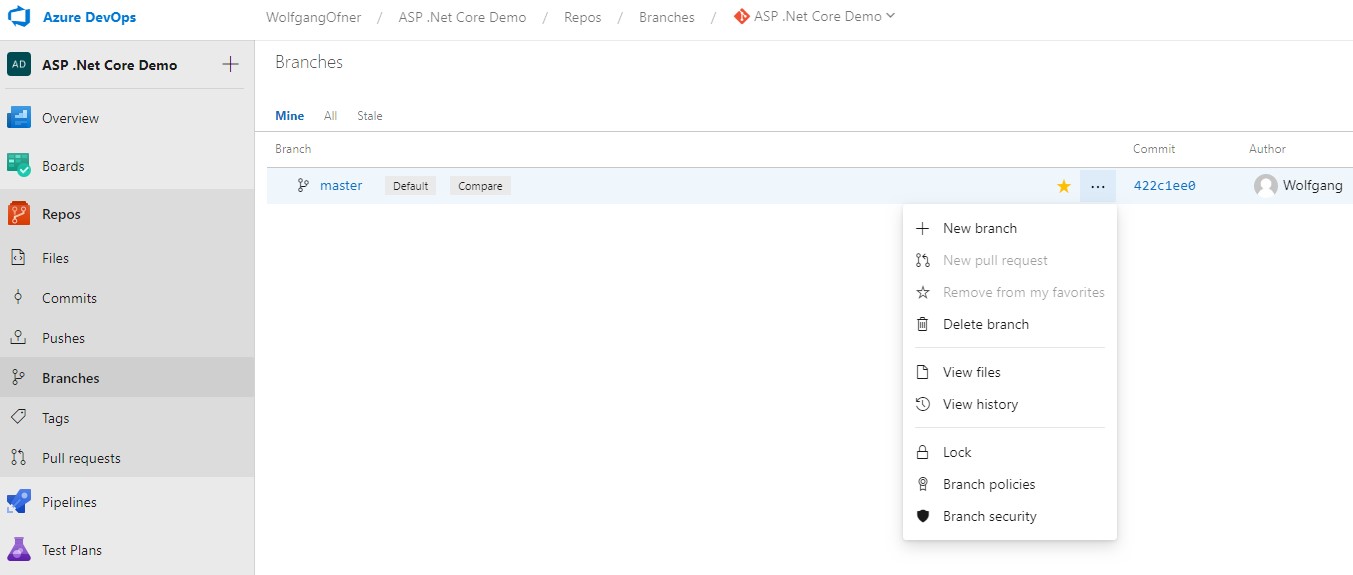
Open branch policies
On the Branch policies for master config page, I enable the following settings:
Require a minimum number of reviewers
This setting enforces that at least one reviewer approved the pull request. Microsoft found out in a research that 2 is the optimal number of reviewers. I only need one most of the time because my teams are usually small therefore needing two reviewers would be too much overhead. Additionally, I set the “Reset code reviewer votes when there are new changes”. This setting resets previously made approvals if new code is pushed to the pull request.
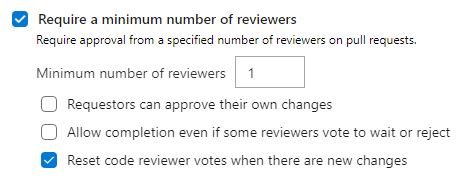
Configure a minimum number of reviewers
Check for linked work items
This feature indicates if a work item was linked with the pull request. I think the right setting would be to set it to required because every pull request should have a PBI. I have to admit that sometimes I create a pull request without a PBI, therefore I leave it as optional.
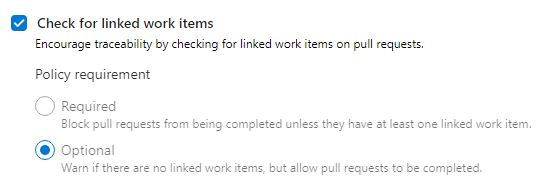
Check for linked work items
Check for comment resolution
I set this feature to required because when a comment is made, it must be resolved before a pull request can be completed. In my teams, the author of the comment resolves it except when the author specifies that the comment can be closed by the creator of the pull request.
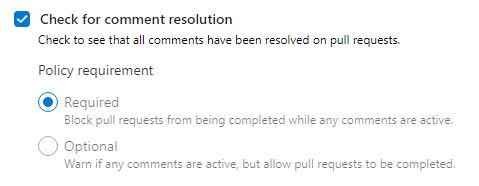
Check for comment resolution
Build validation
The build validation is probably the most important step for a pull request because it runs a build when a pull request was created. If this build is not successful, the pull request can’t be completed. To add a build policy click on “+ Add build policy” and select the previously created build pipeline.

Build validation
Other settings
I leave all other settings as they are. I encourage you to at least go over them and even try them out. They should be self-explaining.
Effects of Branch Policies
Now that the master branch is protected by a branch policy, let’s test it.
No more Commits to the Master Branch
I made some changes and committed them to my local master branch. When I try to push the branch, I get the following error message: Error encountered while pushing to the remote repository: rejected master -> master (TF402455: Pushes to this branch are not permitted; you must use a pull request to update this branch.). This means that I have to create a feature branch and create a pull request to merge my changes into the master branch.
Creating a Pull Request with a failed Build due to my Branch Policies
In my last commit, I changed some tests. I created a feature branch and pushed it to Azure DevOps Services. When you click on Repos –> Pull requests, Azure DevOps Services recognizes the new branch and suggests to create a pull request. To do that click on Create a pull request.

Azure DevOps Services suggests to create a pull request
On the New Pull Request, you can leave everything as it is and create the pull request by clicking on Create. This creates the pull request and automatically kicks off the build.
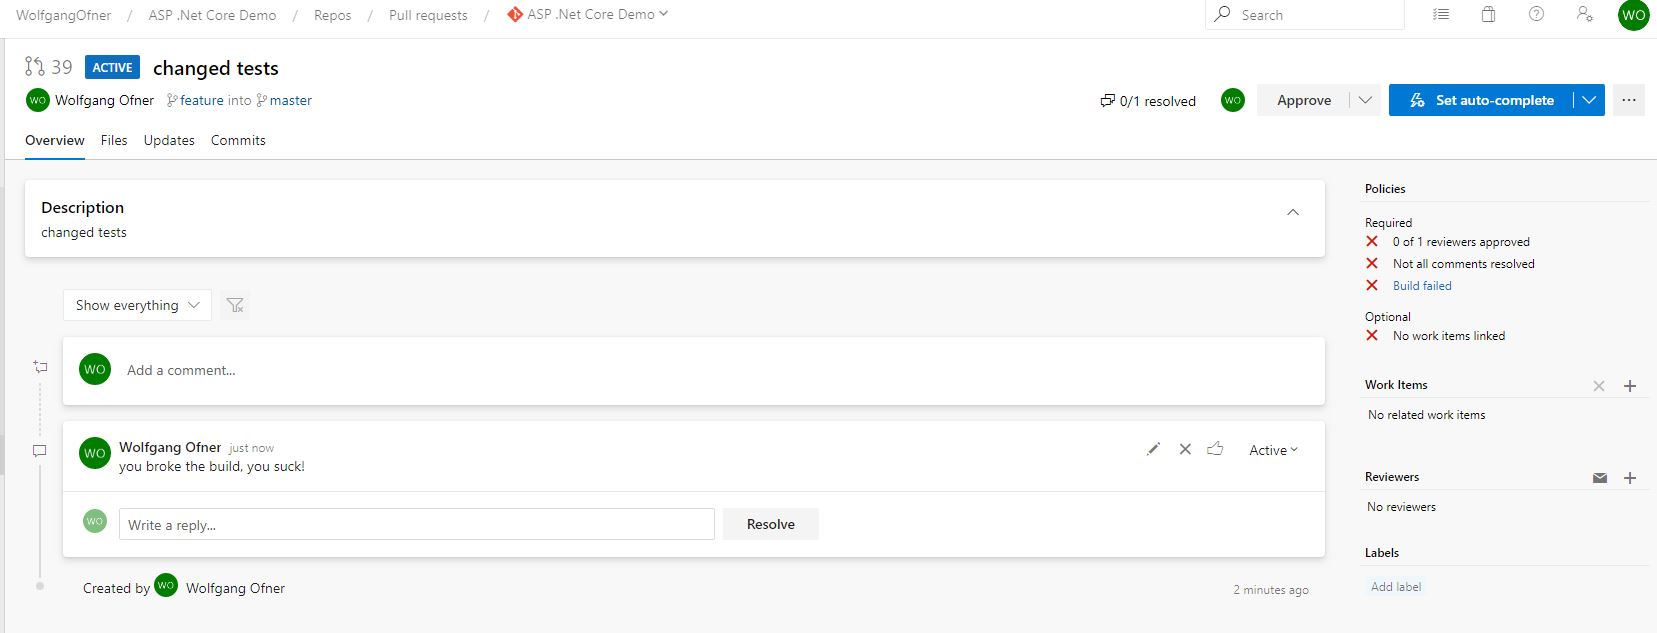
Overview of the open pull request
As you can see on the screenshot above, the build failed. This means that I broke something in the code. Without policies, it is way more likely that these defects get merged into the master branch and spread to all other developers. The screenshot also shows that someone commented and that I can’t finish the pull request until someone approved it, the comment is resolved and the build succeeded. Additionally, you can see that no work item is linked. This is only for information purposes and not required, as configured before.
Finishing a pull request
I fixed the broken build and pushed my changes to my feature branch. Azure DevOps Services recognizes the changes and automatically starts a new build. After the build succeeded, the author of the comment resolves the comment and approves the pull request.
To finish the pull request, I click on Complete, to complete it. In the Complete pull request window, I select Delete feature (the name of my branch) after merging. This deletes the feature branch automatically from the Azure DevOps Services Git. You could also set Auto-complete, which would finish your pull request automatically when all criteria are fulfilled. I set this all the time because I don’t want to go back and complete the pull request when the system can do it automatically for me.
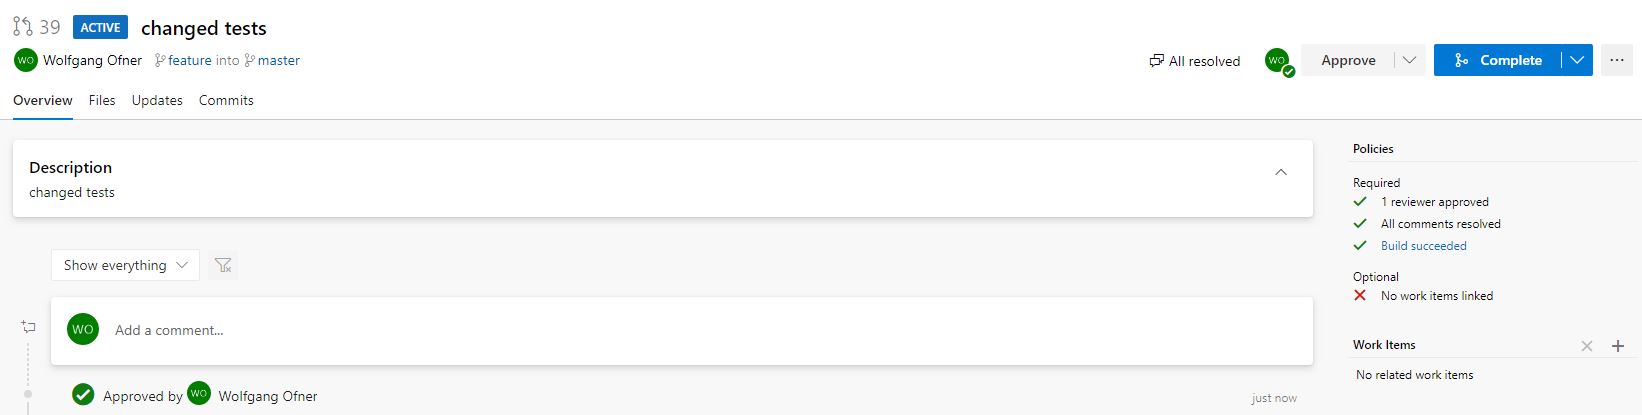
The pull request is accepted and can be completed
Note: for the screenshot above, I configure the branch that the creator is allowed to approve the pull request themselves because I only have this one user in the project and was too lazy to create a second one.
Conclusion
Today, I showed how to protect your branch with policies. These policies can be used to enforce successful builds and the approval of a pull request from a reviewer. Having at least a second pair of eyes and an automatic build should increase the quality of the commits and enable you and your team to increase the development velocity and also helps to increase the quality of new features.
Comments powered by Disqus.