

Changing the workflow of a work item in TFS is pretty simple, though for me it was hard to get started due to the complicated documentation. In this post, I will talk about adding new states to a work item, editing the transitions of the states and lastly about editing the process config template.
Getting started
To make changes to your TFS, you have to download, edit and then upload the xml configurations of the work item or process, you want to update. This can be done with the witadmin console application. Start witadmin as administrator under %programfiles(x86)%\Microsoft Visual Studio\2017\Professional\Common7\IDE\CommonExtensions\Microsoft\TeamFoundation\Team Explorer. Instead of TeamExplorer, your location might be, Professional, Enterprise or Community, depending on the version you’ve installed.
Adding new states and transitions to a TFS work item
As already mentioned, with witadmin you can download the configuration xml file for the work item you want to edit. The instruction to do that is witadmin exportwitd /collection:COLLECTION /p:PROJECT /f:FILENAME /n:TYPENAME. The type name is for example Bug for “Product Backlog Item”.
Adding a new state
After you downloaded the xml file, open it and find the
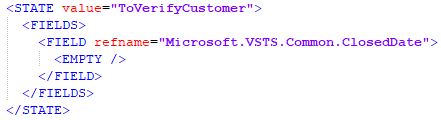
Add a new state to a work item
The value of the state is the text you will see in the TFS.
Adding a new transition
The new state can’t be selected right now because there is no transition for it. Transitions tell the TFS which state can be followed by the current one. For example, it makes sense that after new comes approved, but it wouldn’t make much sense if after new came implemented.
Below the states, you will find the

Add a new transition for the new state
Upload the type definition
With all changes made, you can upload the type definition with witadmin. Before you do that, you should validate your xml file with witadmin importwitd /collection:COLLECTIONNAME /f:XMLFILE /p:PROJECT /v. If everything is good, you can upload the xml file with the same instruction but without the /v.
Edit the process template
If you go to your TFS after uploading the type definition, you will see your new states and also the new transitions. But after selecting a new state, your TFS won’t be able to display the item anymore. Therefore, you have to add the new states to the process config template xml file.
Adding the new state
Download the config file with witadmin exportprocessconfig /collection:COLLECTIONNAME /p:PROJECT /f:FILENAME. Open the xml file and find the work item, you added the state to, for example, Bug or Backlog Item. Add the state in the States section.

Add the new state in the process config file
Upload the process template
After adding the states to the work items, you can upload the xml file to your TFS. Before you do that, you should validate it with witadmin importprocessconfig /collection:COLLECTION /p:PROJECT /f:FILENAME /v. If the file is valid, you can upload it without the /v parameter.
Conclusion
In this short post, I showed how to add new states to your TFS and how to configure your process template, so your TFS can handle them. For more information, see Microsoft’s documentation.
Comments powered by Disqus.