

It is really easy to integrate your bot, hosted on Azure to third-party tools like Slack or Skype. Today, I will show how to integrate your bot with Slack, Facebook, and your website. For this demo, I will use the code from my last post, in which I showed how to return different types of answers to enhance the experience of the users. You can find the code on GitHub.
Integrate your Bot in a third-party application
You can integrate your bot with several third-party applications. To see a list, which applications are available, go to your bot and open the Channels blade under the Bot management menu.
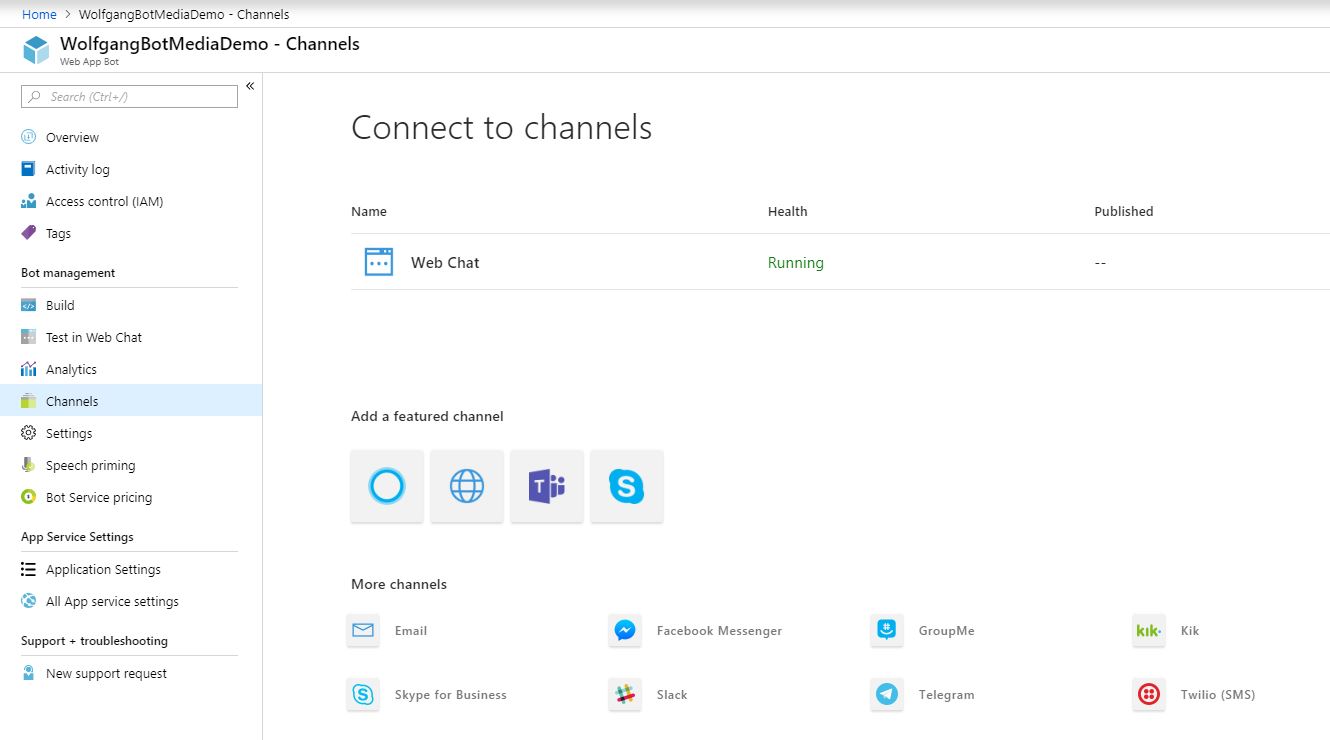
Available channels
The available channels are:
- Web
- Email (Office 365)
- Facebook Messenger
- GroupMe
- Kik
- Skype for Business
- Slack
- Telegram
- Twilio
Integrate the Bot with Slack
Follow these steps to integrate your bot with Slack:
- Create a new Slack App and enter a name for your app.
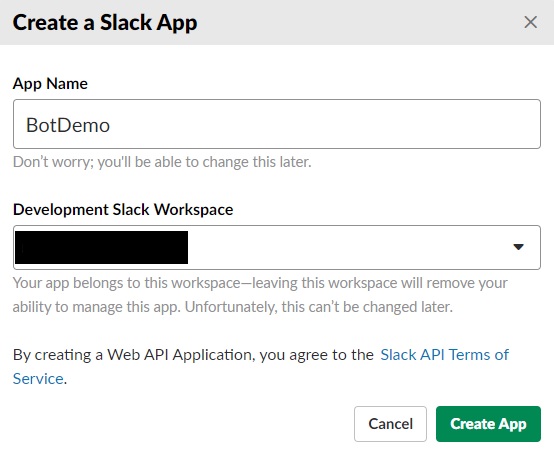
Create a Slack App
- Select OAuth & Permissions and Click Add New Redirect URL.
- Enter https://slack.botframework.com and click Add.
- Click Save URLs.
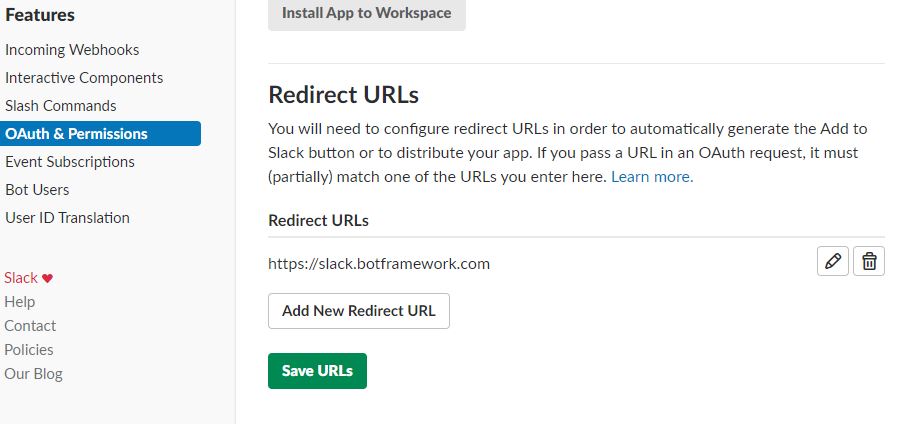
Add a redirect URL to Slack
- Select Bot Users and click Add a User.
- Optionally change the Display name and Default username.
- Switch the slider for Always Show My Bot as Online to On.
- Click Add Bot User.
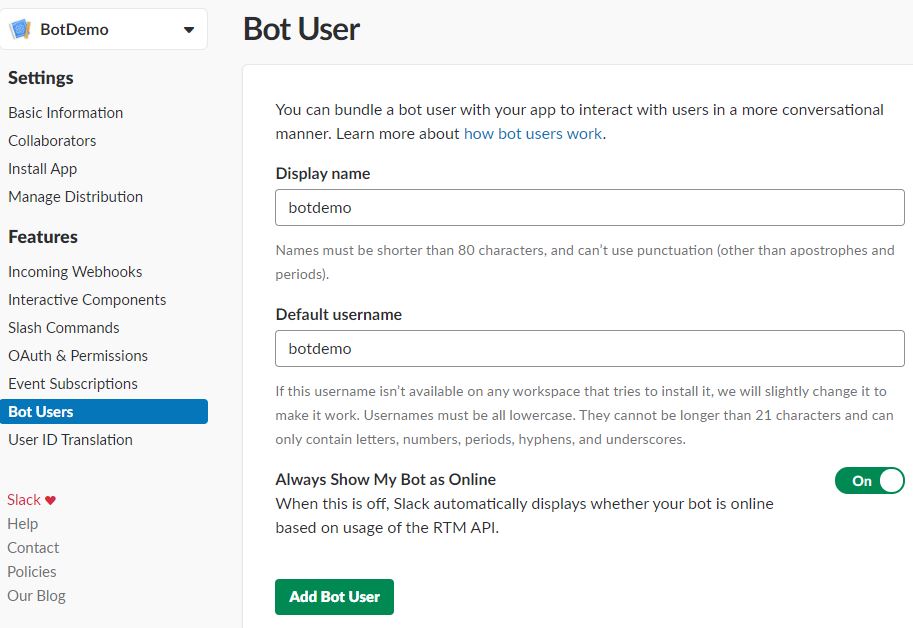
Add a bot user
- Select Event Subscriptions and switch the slider to On.
- Enter the as Request URL https://slack.botframework.com/api/Events/{YourBotHandle}, in my case this is https://slack.botframework.com/api/Events/WolfgangBotMediaDemo.
- Click Add Workspace Event and add the following events:
- member_join_channel
- member_left_channel
- message.channels
- message.groups
- message.im
- message.mpim
- Click Save Changes.
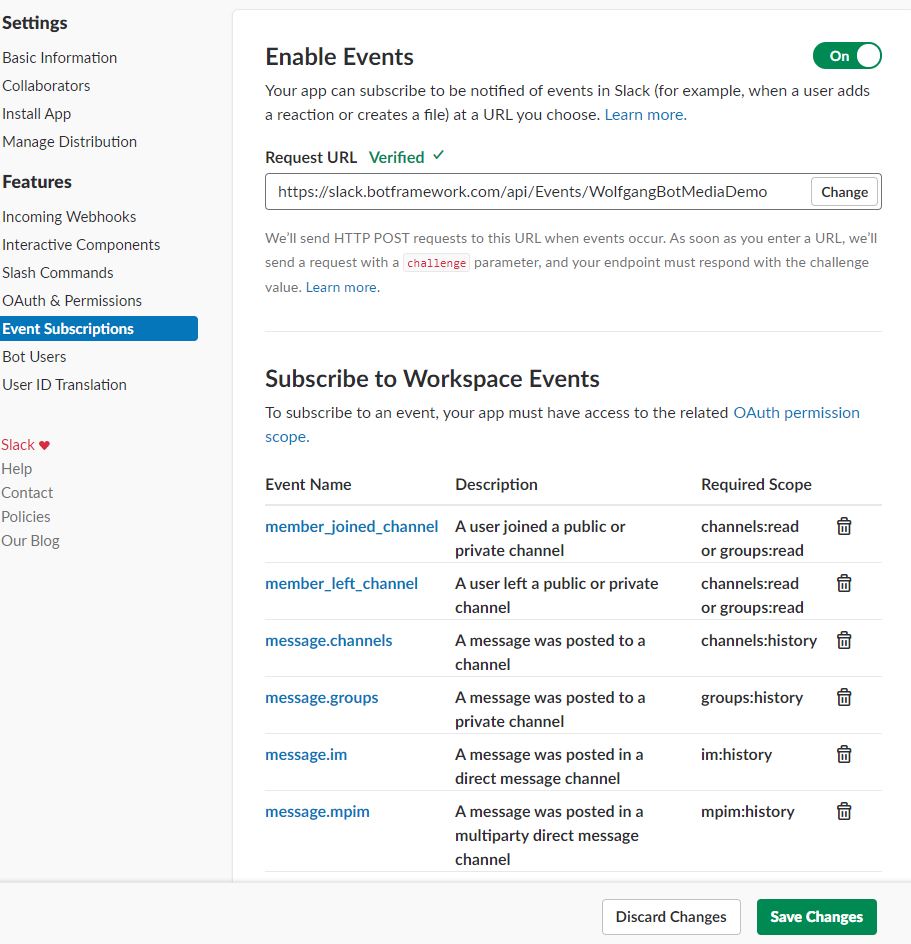
Add events
Enter your credentials
- Select Basic Information. There, you can find your App ID, Client ID, Client Secret, Signing Secret, and Verification Token.

The Slack app credentials
- Click on Install your App to your workspace and then on Install App to Workspace.
- On the next window, click Authorize and your app gets installed.
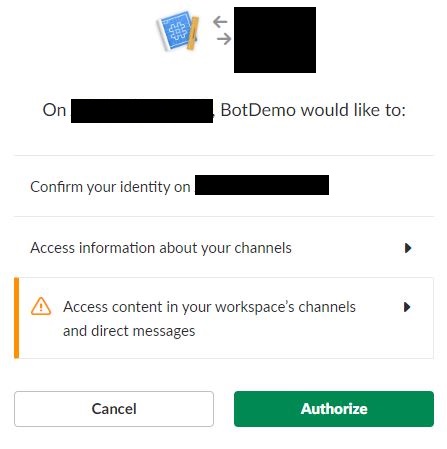
Install your App to Slack
- Open your bot in the Azure portal and select the Channels blade under the Bot management menu.
- Click on Slack.
- Enter your Client ID, Client Secret, and Verification Token from Slack.
- Click Save.
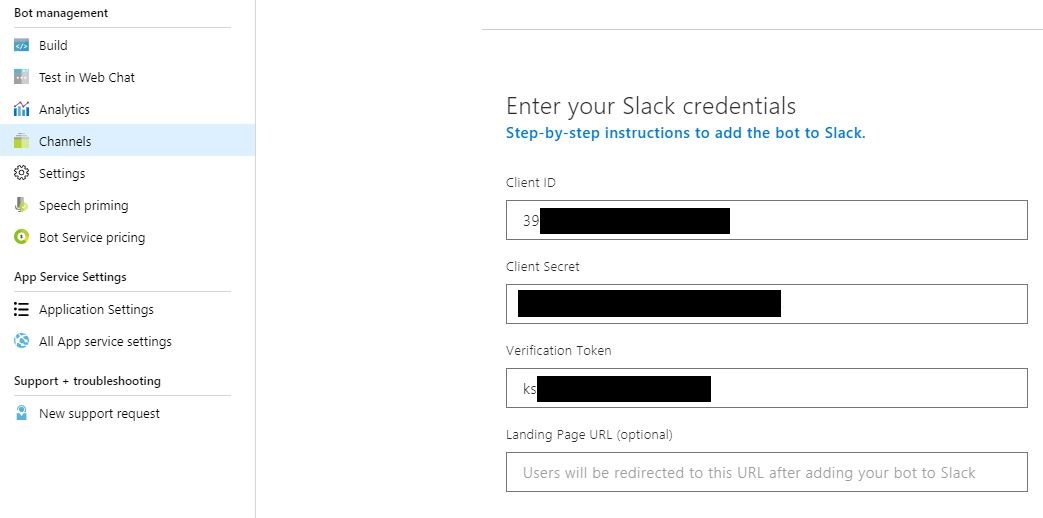
Enter the Slack credentials in the Azure Portal
- A new window opens.
- Click Authorize.
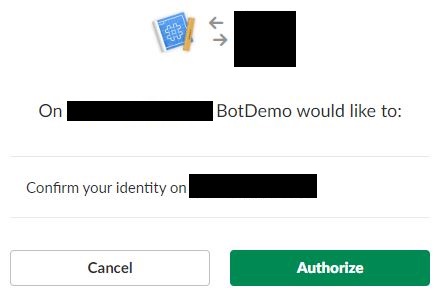
Authorize the App in Slack
That’s it. Now you can chat with your chatbot in Slack. Note that some answers might be displayed differently than on the web. For example, the image carousel is displayed as several images underneath each other.
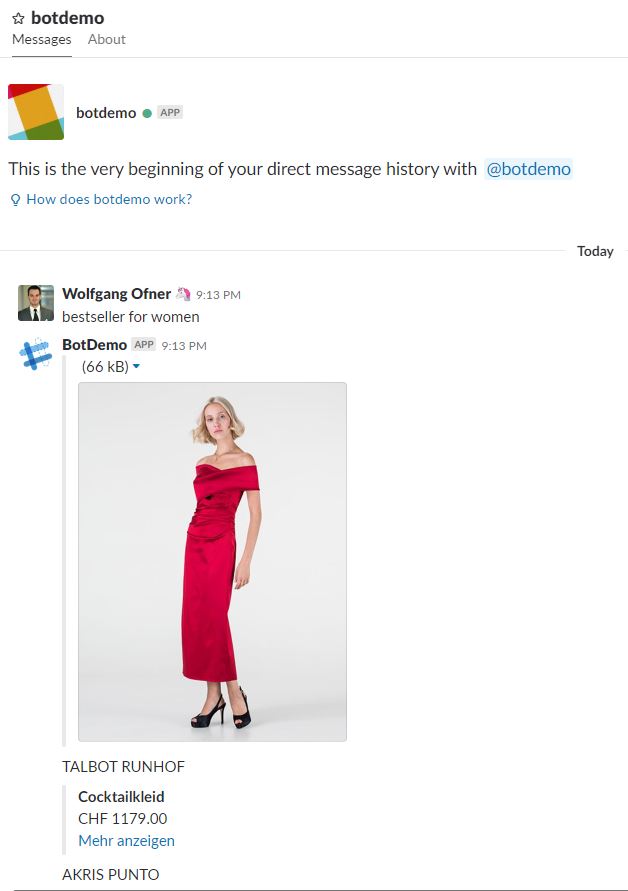
Testing the bot in Slack
Integrate the Bot with Facebook Messenger
Connecting the bot to the Facebook Messenger is as simple as it was with Slack. The only downside is that Facebook has to approve your bot before you can use it. This usually only takes a couple of hours.
To integrate your bot with the Facebook Messenger, follow these steps:
- Create a new Facebook App.
- Under Settings –> Basic, you can find your App ID.
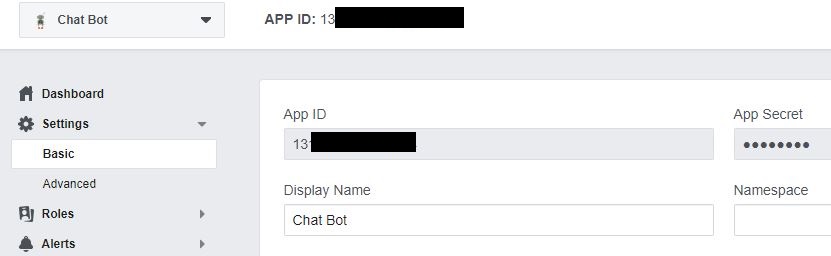
Facebook App ID and Secret
- Click on Dashboard and then on Set Up on the Messenger Tilde.
- In the Token Generation section, create a new page and then save the Page Access Token.
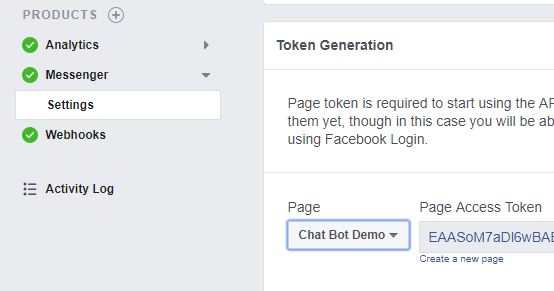
Facebook Page Token
- Click on Setup Webhooks and check the following Subscription Fields:
- messages
- messaging_postback
- messaging_optins
- message_delieveries
- Before you close the window, go back to your bot in the Azure portal and open the Channels blade under the Bot management menu.
- Click on Facebook Messenger
- Enter the App ID, App Secret, Page ID, and Page Access Token. You can find the Page ID on your Page under the About section.
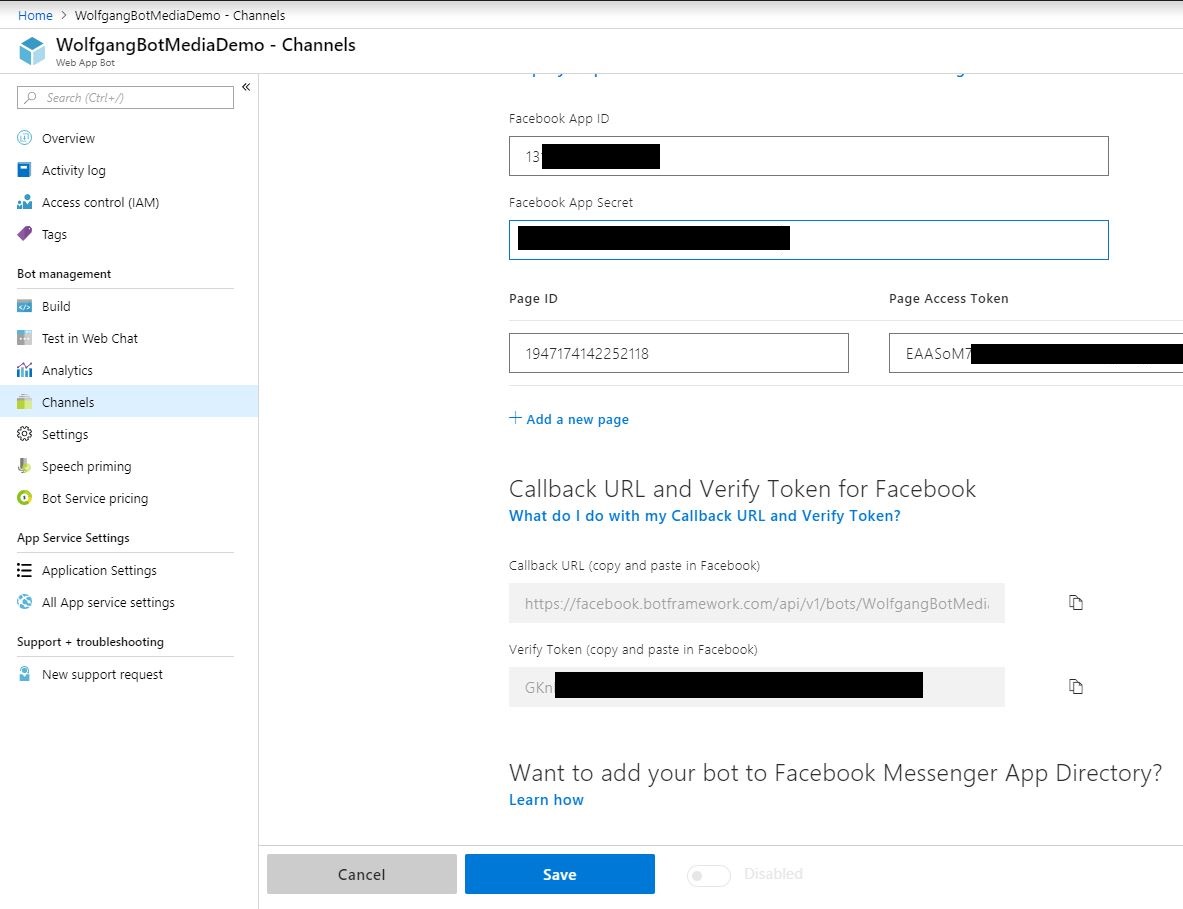
Configure the Facebook Messenger Channel
- Copy the Callback URL and Verify token to the open window on the Facebook page.
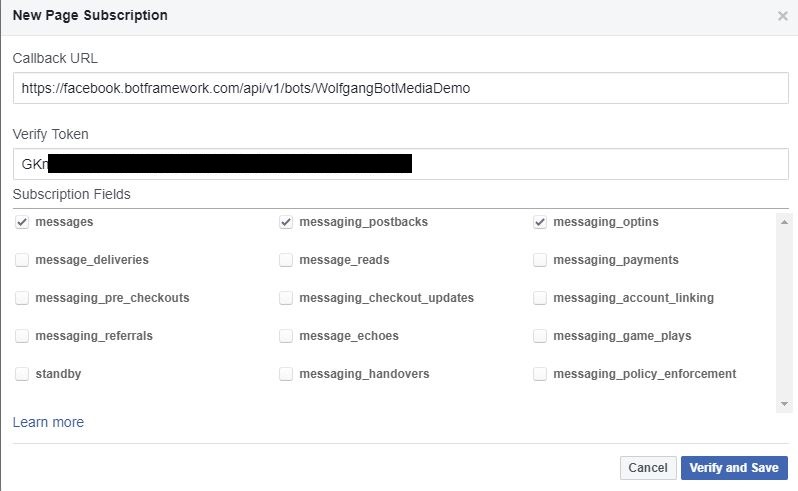
Set up the Callback URL on Facebook
- Click on Save in the Azure Portal.
- Click on Verify and Save on the Facebook page.
- Subscribe your page to the Webhook.
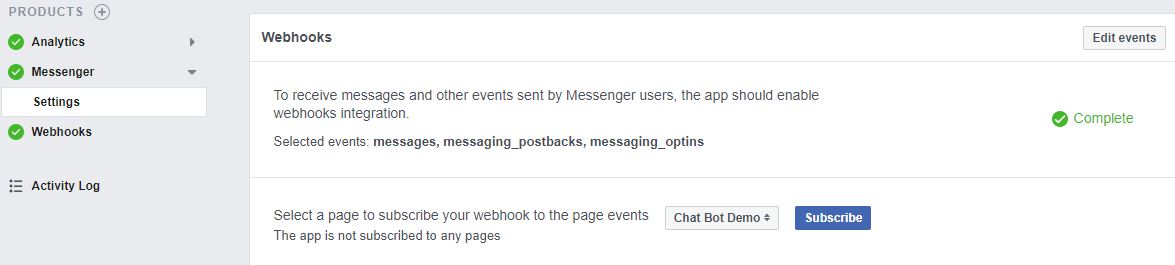
Subscribe your page to the Webhook
- Scroll down and send a request for approval. Once your application is approved, people can test it. As long as it’s not approved, only you can use the chat.
Integrate your bot into your website
Integrating your bot into your website is as simple as it could be. In the Azure Portal in your bot, click on Channels under the Bot management and select Web Chat. There you have your Secret keys and the code to embed the code on your website. You only have to replace the string YOUR_SECRET_HERE with your actual secret and you are good to go.
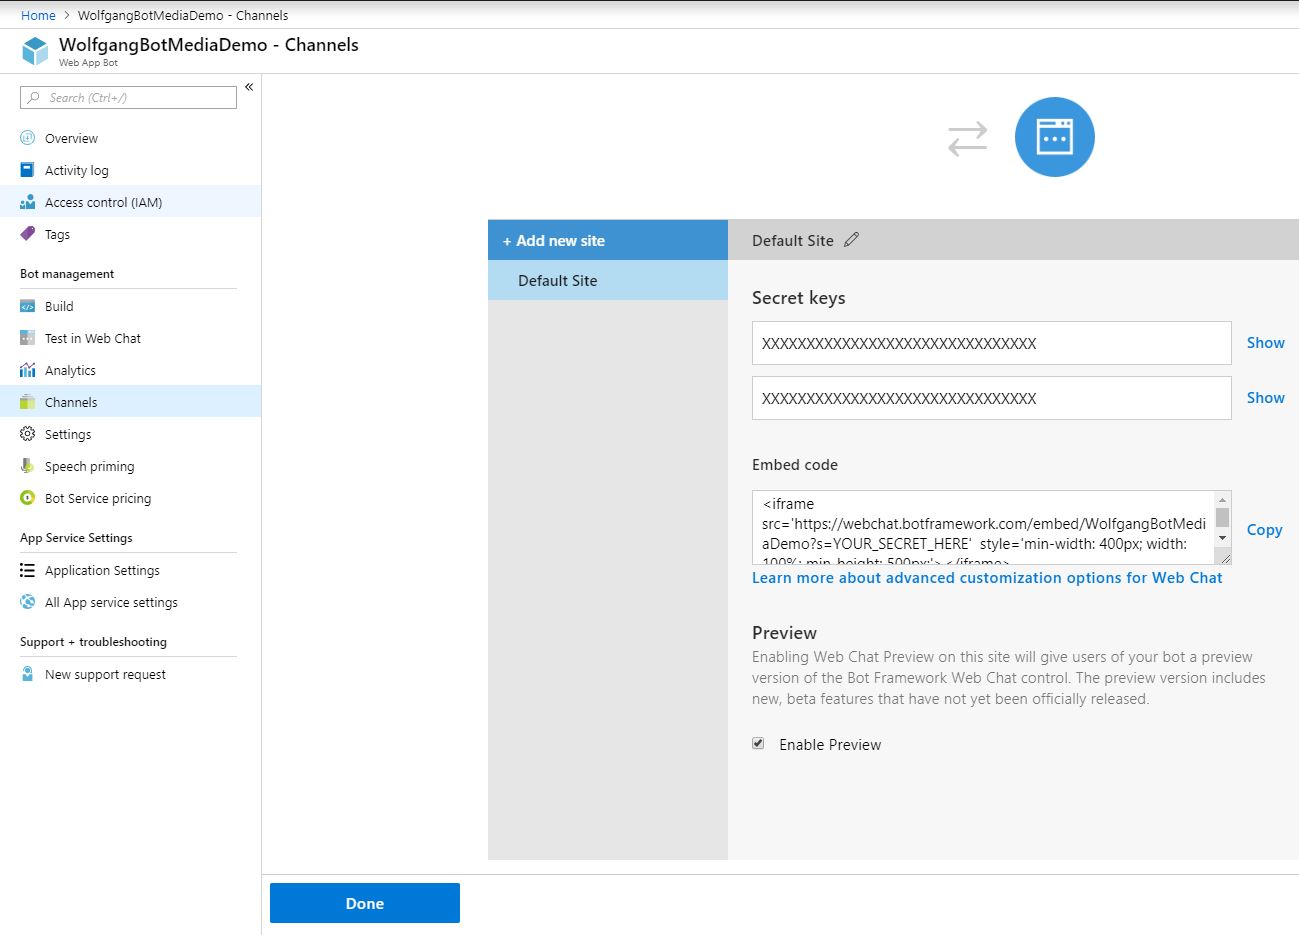
Integrate your application into your website
Conclusion
In this post, I showed how to integrate your Azure bot with Slack, Facebook Messenger, and your own website. Besides the approval from Facebook, it only takes a couple of minutes. Keep in mind that different chats display some replies differently.
For more information on Azure bot, check out my other posts about bots.
Comments powered by Disqus.