

I’ve been curious about how chat bots work and this week I finally took the time to sit down and look into it. In this and the following post, I will talk about what I learned and I how solved some problems. Before I could start, I had to decide which platform I want to use. Therefore I looked at solutions in AWS and Azure. Since I am a fan of Azure and AWS only supports English as the user language, I decided to go with Azure for my chat bot application.
Create your first Azure Chat Bot Application
You can create a bot application with Visual Studio or directly in the Azure Portal. If you want to use Visual Studio, you need Visual Studio 2017 and the Bot Builder Template which you can download here. To create a bot application in the Azure Portal, follow these steps:
- In the Azure portal click on +Create a resource, search for Web App Bot and click Create.

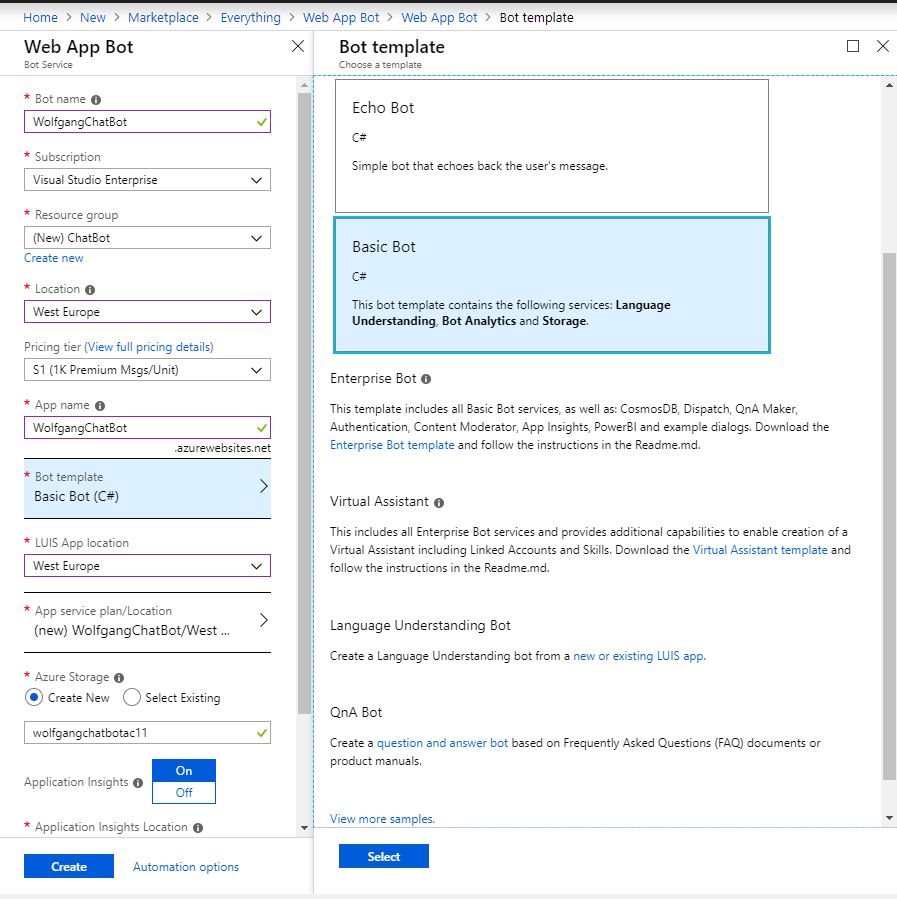
Create a Web App Bot in the Azure Portal
- Enter the basic information for your bot.
- Select a template. For this demo, I will select the Basic Bot template because it is simple but also supports language understanding.
- Select the LUIS App location. It depends on this setting, which luis website you have to use later to configure luis. For example, if you select Europe the URL is https://eu.luis.ai, if you select US the URL is https://luis.ai.
- Click Create.
Create your new bot application
Test your bot
After the bot application is deployed, open it and select Test in Web Chat under the Bot management menu. Type in Hi and wait for a response. Sometimes you don’t get an answer on the first try. Then you have to enter a second message.
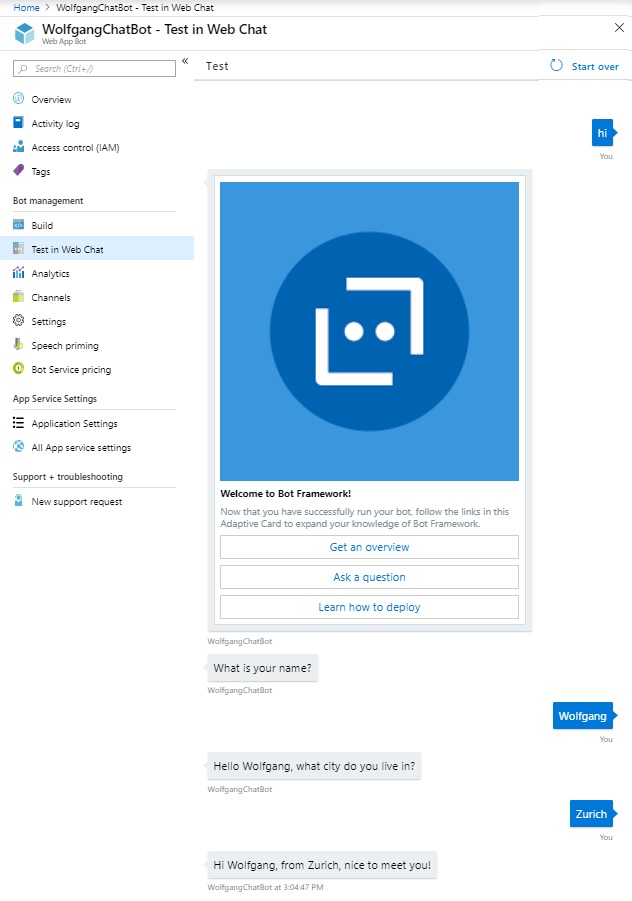
Test your bot
Congratulation, you just talked to your own bot for the first time.
Edit the bot answers
In this section, I will show you how to edit existing answers of your bot and how to deploy it to Azure.
Edit your bot in Visual Studio
To edit the source code of your code, download it. Click on Download Bot source code on the Build blade under the Bot management menu.
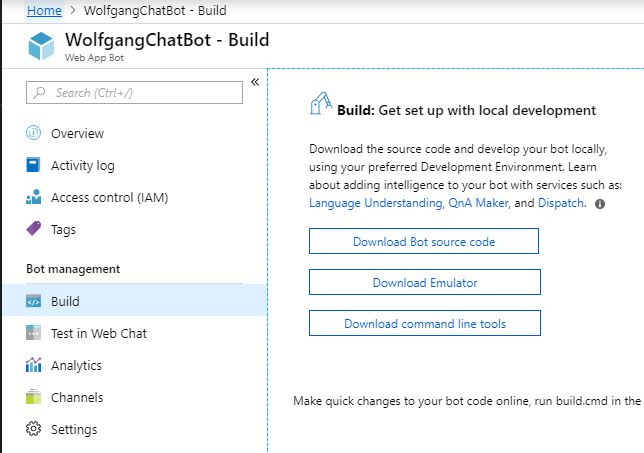
Download the source code of your bot
To edit an existing answer, follow these steps:
- Open the solution you just downloaded in Visual Studio 2017.
- Open GreetingDialog.cs under Dialogs/Greeting and find the line with Text = “What is your name?”. In my case, it was on line 104 but Microsoft updates the default bot quite often, so it might be somewhere else for you.
- Change the string to whatever you want, for example, “Howdy, tell me your name”.
- Save the file.
Deploy your bot to Azure
There are different ways to deploy your bot application to Azure. The simplest is to right-click your solution and select Publish. There you can already see all settings being set and you only have to click Publish. This approach is fine when you are alone but I want to show you a more sophisticated way which includes version control and automatic deployments. I will use GitHub as my version control and every time I check code in, it will be automatically deployed. To configure Azure to do that, follow these steps:
- Open the App Service of your bot application and select Deployment options under the Deployment menu.
- Add a source for your version control, in my case GitHub, but you could also use Bitbucket, Team Services or many more.
- Enter your credentials, select a project and configure the branch you want to use for the deployment.
- Click OK.

Add GitHub as your deployment source
- Next, push your bot application to your GitHub project.
- After you pushed your changes to GitHub, you will see the deployment under the Deployment options.
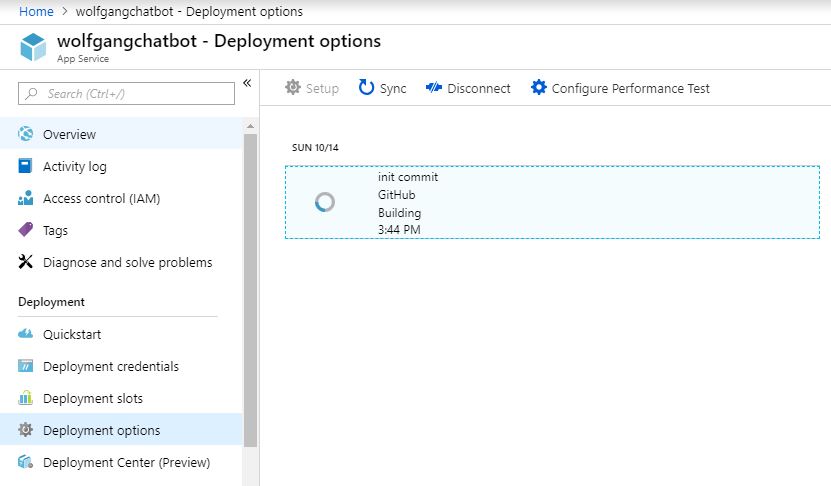
Sync GitHub with Azure
- With the changes deployed, it is time to test them.
- Open your Web App Bot Application and select the Test in Web Chat blade under the Bot management menu.
- Type in Hi and you should see the text, you changed previously.
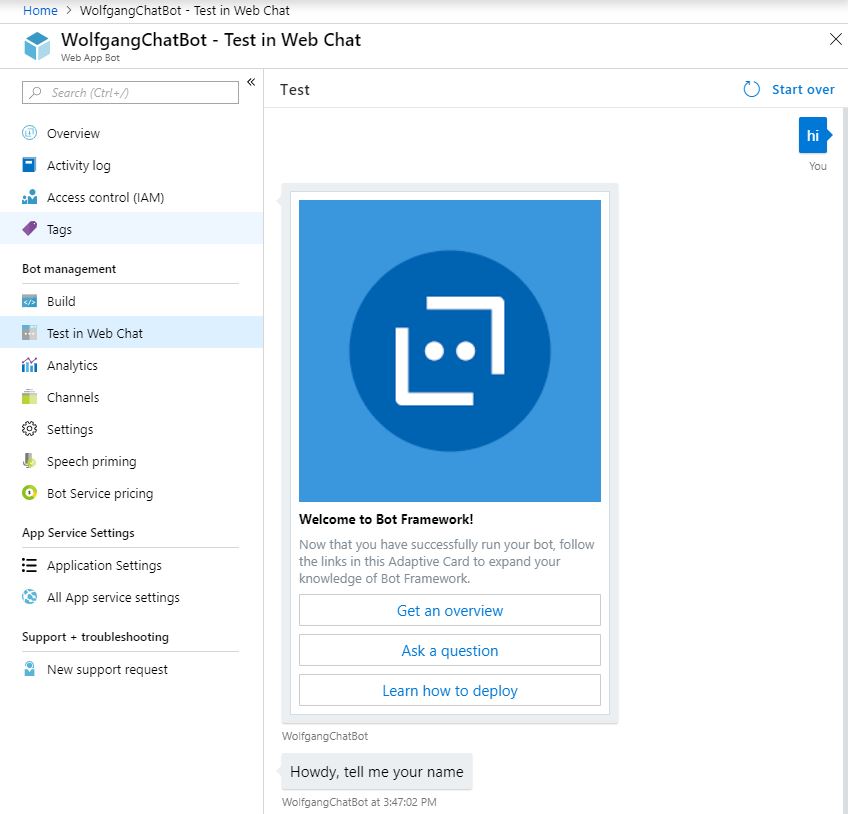
Test the changes in your bot application
As you can see, the changes worked and the bot uses the new phrase to “ask” for the name of the user.
Conclusion
Today, I showed you how to create a simple chat bot with Azure and how to deploy it using GitHub. In my next post, I will show you how to enable language understanding with luis.
You can find the code of the demo on GitHub.
Comments powered by Disqus.