Most examples of building Docker containers just use the latest tag to deploy or Docker images. This is simple but shouldn’t be done in a production environment.
Today, I will show how to add semantic versioning to your CI/CD pipeline in Azure DevOps to automatically create a meaningful version for your Docker images.
This post is part of “Microservice Series - From Zero to Hero”.
Why you shouldn’t use the latest Tag
The latest tag is simple and there is nothing wrong with using it if you want to try out something. In a production environment, you shouldn’t use it because you want to have full control and knowledge of what version you are running at any given time.
Let’s say you have a test and production Kubernetes cluster and both run images using the latest tag. If a developer finishes a new feature the CI/CD pipeline creates a new image with the latest tag and deploys it to the test environment. That’s fine but what if a pod in your production cluster gets restarted? Kubernetes starts the image with the latest tag and suddenly you have the new feature running on one pod in your production cluster. If this new feature also needs changes to the database schema, the pod won’t start because the changes aren’t deployed yet. This will lead to more and more failing pods until your application is offline.
Another problem you might run into when using the latest tag is the caching mechanism of Docker. Docker is caching quite aggressively. By default, Docker checks if the image exists locally, and if it does, Docker starts it. This means that once you have the image with the latest tag, Docker will not update it and always start the outdated version.
There are ways around these problems but the version number is also there to inform your users or customers of a new version of your software/product. For example, my software ABC got updated from version 1.2 to 2.0 is way more meaningful than my software got a new latest version.
Automatically create Semantic Versioning
Semantic versioning is the most used versioning method and consists of three numbers divided by a period, for example, 1.4.35. The first number (1) indicates the major version, the second number (4) the minor version, and the last number (35) the patch version. Major version changes contain breaking changes whereas minor or patch changes are backward compatible.
As of March 2021, the originally used BuildVersioning extension stopped working. I don’t know why and since the last update was years ago, I decided to use GitTools instead. This extension is constantly updated, has simpler usage and more downloads. I will leave the original post for reference at the bottom of this post.
Install GitTools in Azure DevOps
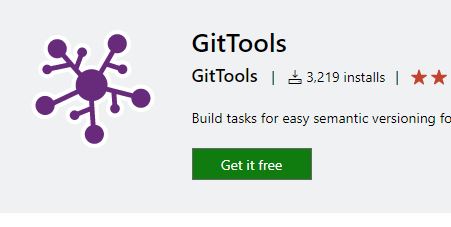
You can download the GitTools extension for free from the Marketplace. To download the extension, open the page of the extension in the marketplace and click on Get it free.
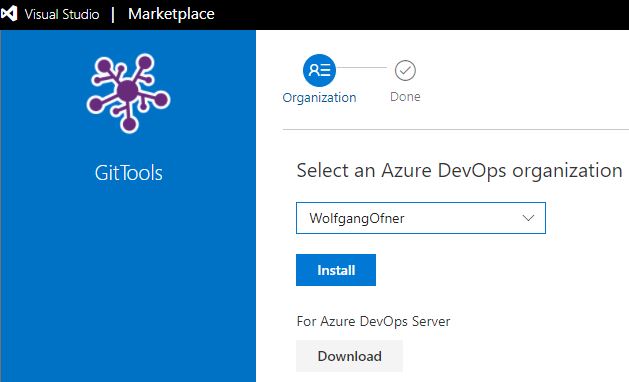
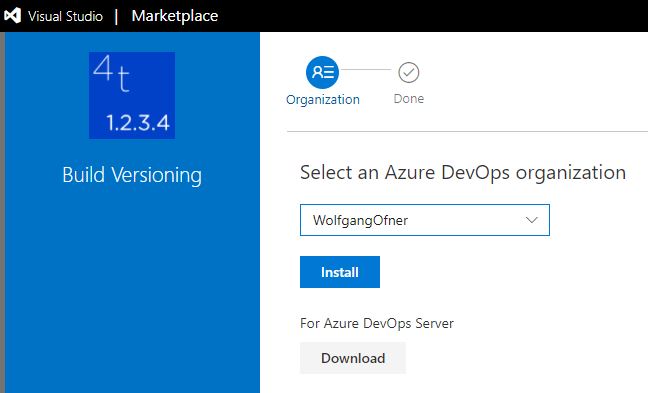
This opens a new page where you can either select your Azure DevOps Services organization to install it or download the extension if you want to install it on an Azure DevOps server.
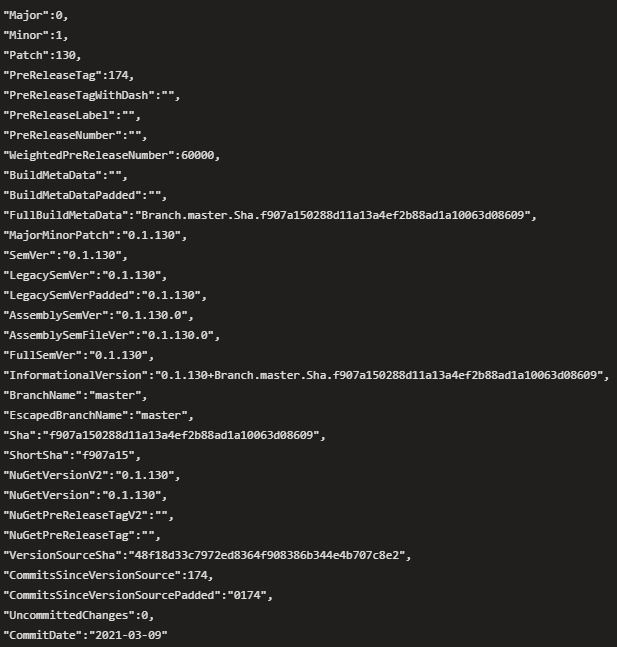
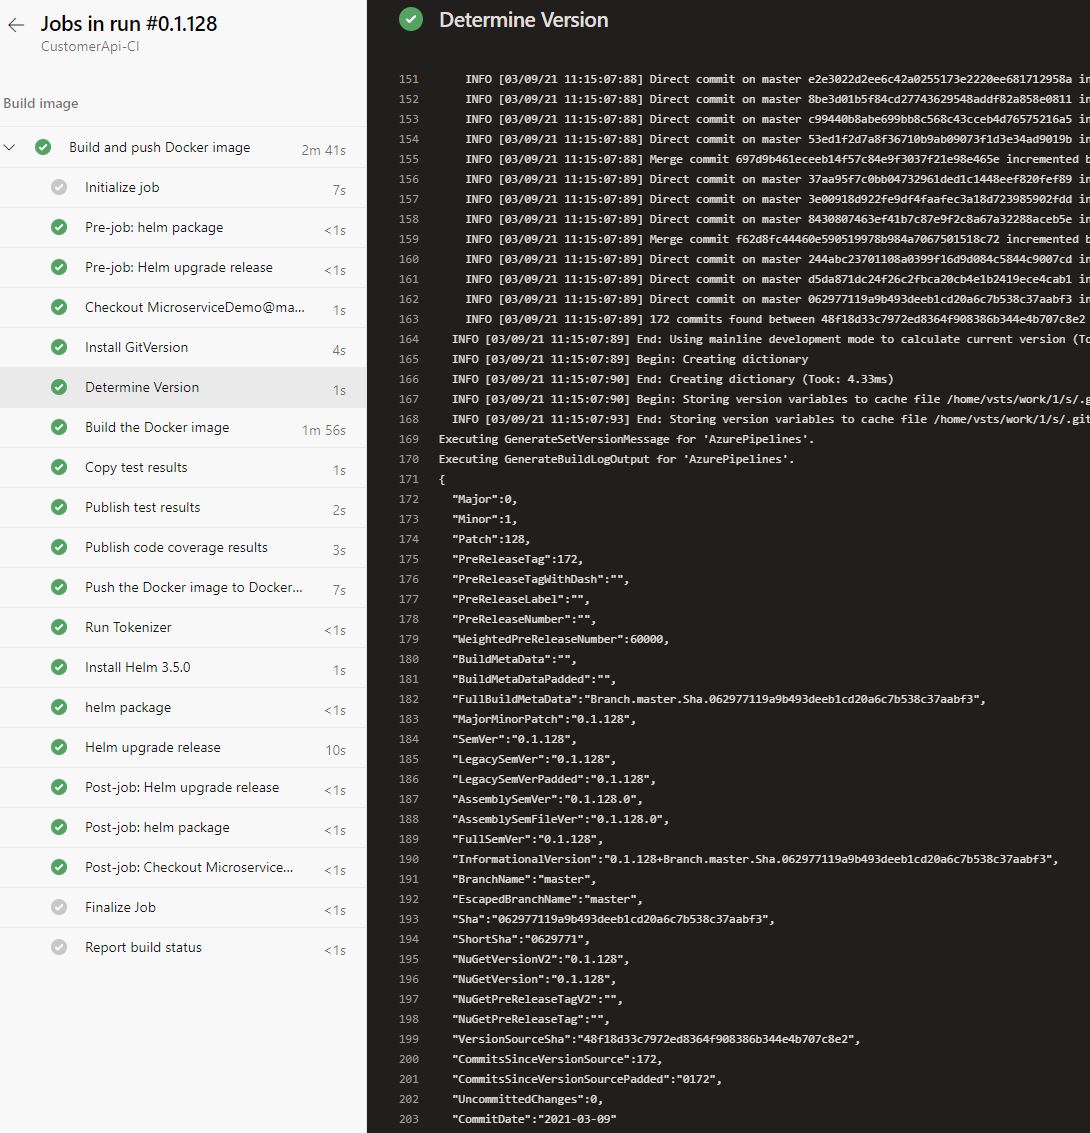
This extension calculates the version and sets it in many different variations in different variables. On the following screenshot, you can see all available variables and what their values look like:
Add the Build Versioning Task to the Pipeline
You can find the code of the demo on GitHub.
Add the following two tasks as the first tasks of your job in your CI pipeline.
These tasks install the GitVersion tool and calculate the build number variables.
Additionally, you have to add a new file called GitVersion.yml to the root folder of your repository with the following content:
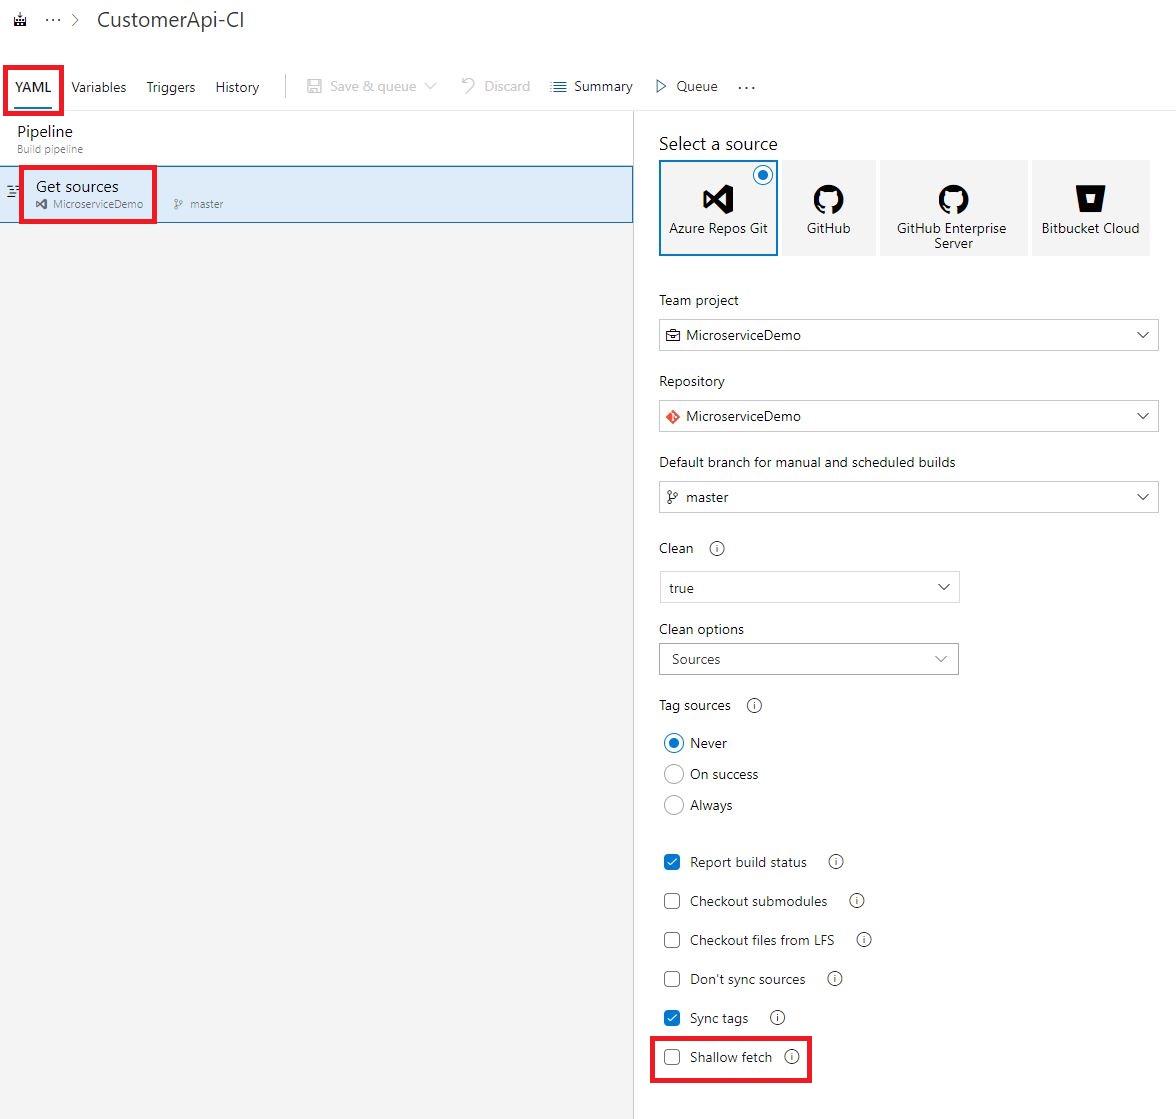
The last step you have to take before using semantic versioning is to ensure that the pipeline does not perform a shallow fetch when checking out the code. You can check this by clicking on the three dots in the top right corner and then select “Triggers”. This opens a new page where you select the “YAML” tab and then “Get sources”. Uncheck shallow fetch on the bottom of the window.
Use the Semantic Version
All you have to do to use the semantic version is to add the desired variable as the tag to your image name. I already have a variable for the image name and add $(GitVersion.FullSemVer) as the tag:
Testing the Semantic Version
Setting up the semantic version is pretty simple. Run the CI pipeline with the master branch and you will see the Build Versioning task creating a new build number. On the following screenshot, you can see that version 0.1.130 was created.
If you commit changes to the master branch and run the pipeline again, it will create version 0.1.129. If you don’t have any changes, it will create 0.1.128 again. After the CI/CD pipeline is finished, the new image gets pushed to Docker Hub. There you can see the new version and the old one.
Having a semantic version like 0.1.128 is way more meaningful than 358 and helps users of the image identify changes easily.
Create a Version Number for Feature Branches
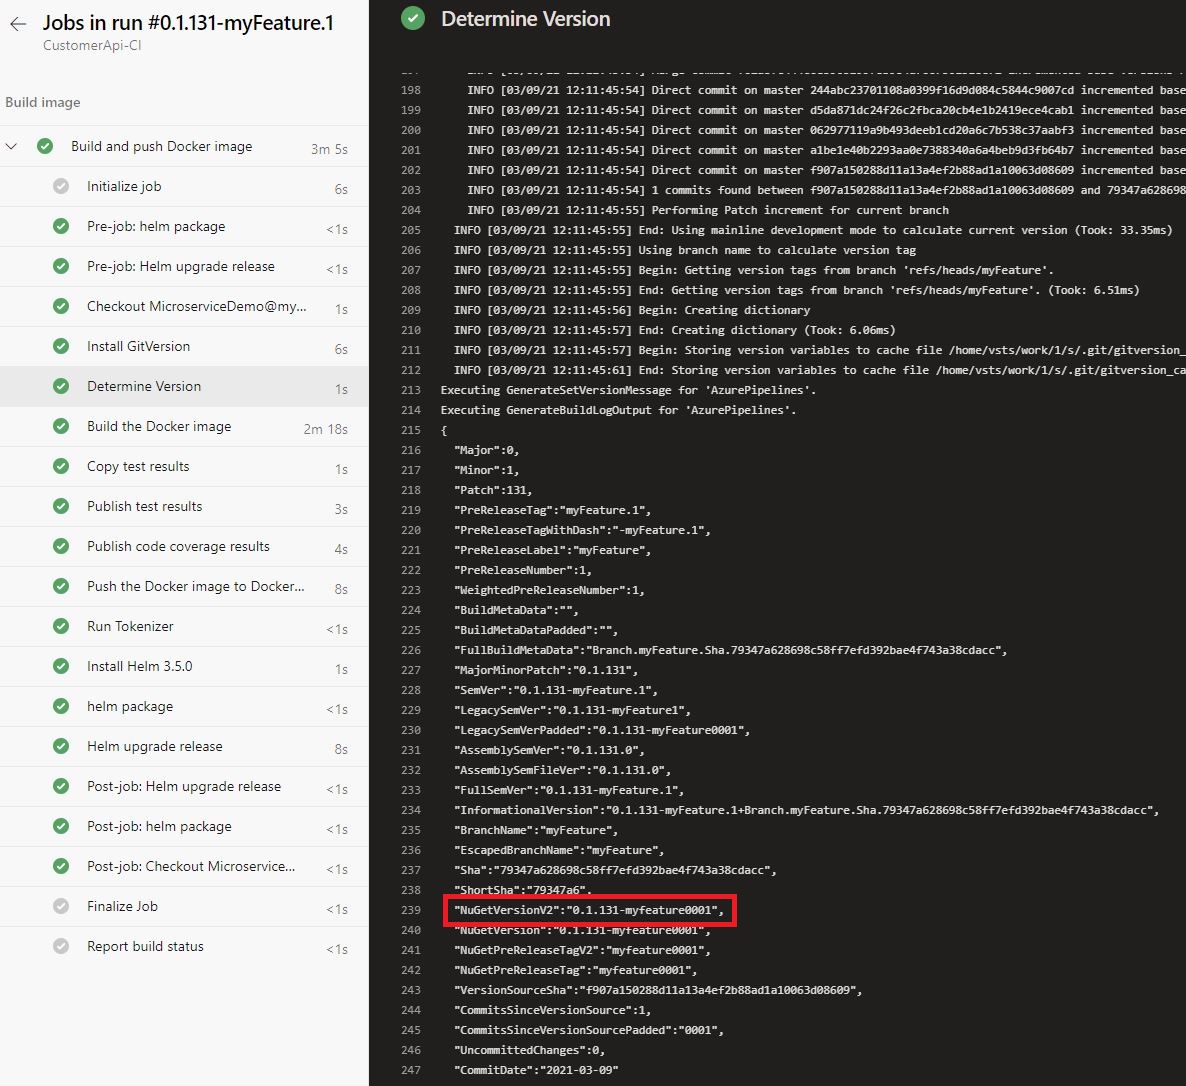
Usually, only the master branch is used to create new versions of an application. Sometimes a developer wants to create an image to test new changes before merging the feature into the master branch. When you run the pipeline with a feature branch (every branch != master), the Build Versioning task will create a preview version. This means that you still get a semantic version but the task adds the branch name and a counter to the end of the version, for example, 0.1.131-myFeature0000.
This version number means that it was run for the branch named versionnumber and it was run the first time. If you commit changes and run the branch again, it will create the version 0.1.131-myFeature0001.
Conclusion
DevOps is all about automating tasks and processes. A part of this automation is the versioning of your application. Today, I showed how easy it is to use the Build Versioning extension in Azure DevOps to automatically create semantic version numbers and how to add them to a Docker image.
You can find the code of the whole demo on GitHub.
This post is part of “Microservice Series - From Zero to Hero”
The following text is the original article about BuildVersioning
Install Build Versioning in Azure DevOps
My company created a free Azure DevOps extension which you can download from the Marketplace. To download the extension, open the page of the extension in the marketplace and click on Get it free.
This opens a new page where you can either select your Azure DevOps Services organization to install it or download the extension if you want to install it on an Azure DevOps server.
This extension automatically installs Git and then calculates the semantic version. The calculated version gets set in the Build.BuildNumber variable.
Add the Build Versioning Task to the Pipeline
You can find the code of the demo on GitHub.
Add the following BuildVersioning task as the first task of your job in your CI pipeline.
This configures the versioning task to use chocolatey to install Git if it’s not available, and then replace the Build.BuildNumber variable with the calculated semantic version number.
Additionally, you have to add a new file called GitVersion.yml to the root folder of your repository with the following content:
Use the Semantic Version
All you have to do to use the semantic version is to add the Build.BuildNumber variable as the tag to your image name. I already have a variable for the image name and add the BuildNumber there:
Testing the Semantic Version
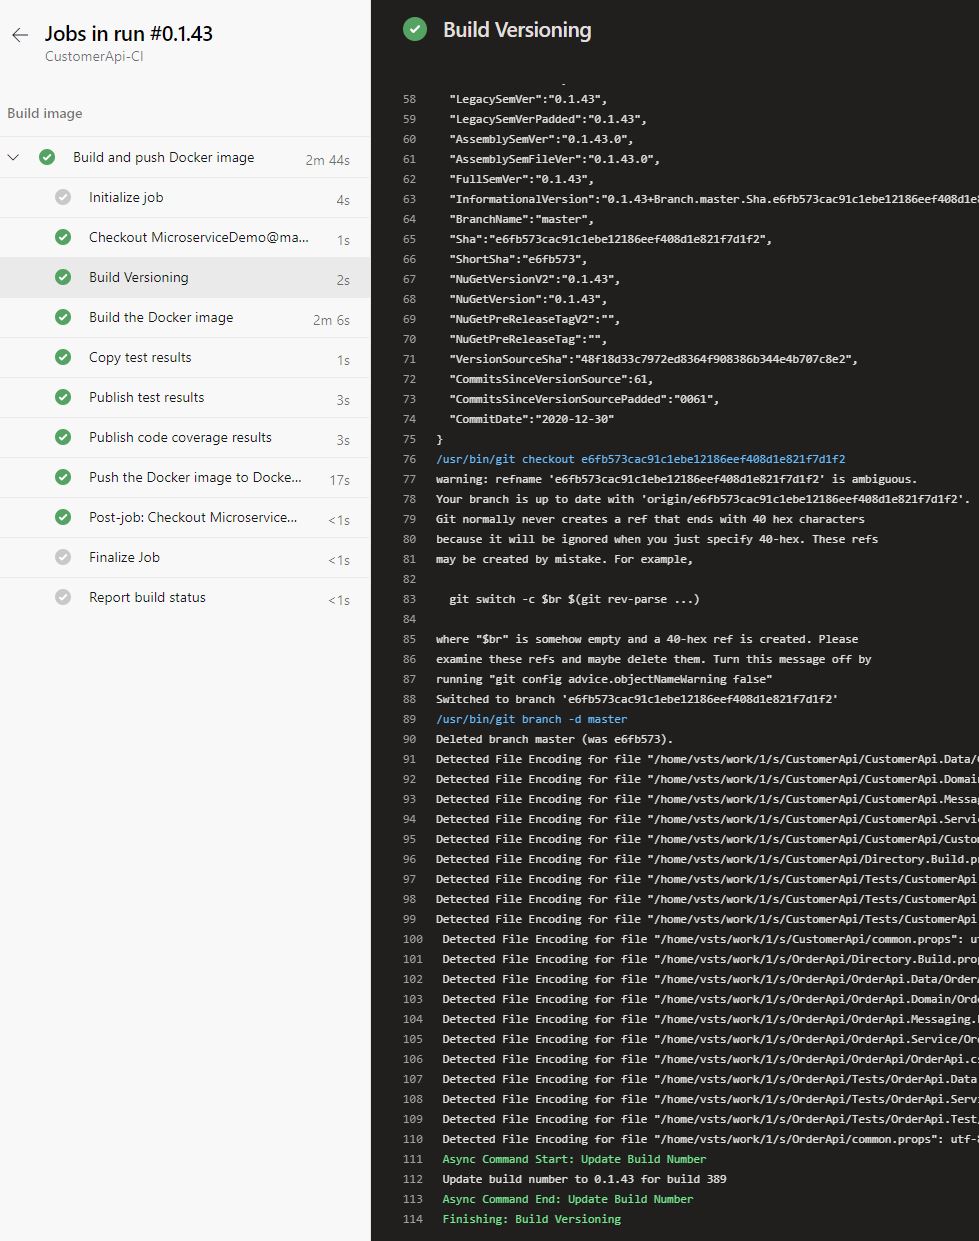
Setting up the semantic version is pretty simple. Run the CI pipeline with the master branch and you will see the Build Versioning task creating a new build number. On the following screenshot, you can see that version 0.1.43 was created.
If you commit changes to the master branch and run the pipeline again, it will create version 0.1.44. If you don’t have any changes, it will create 0.1.43 again. After the CI/CD pipeline is finished, the new image gets pushed to Docker Hub. There you can see the new version and the old one.
The new version 0.1.43 is way more meaningful than 358 and helps users of the image identify changes easily.
Create a Version Number for Feature Branches
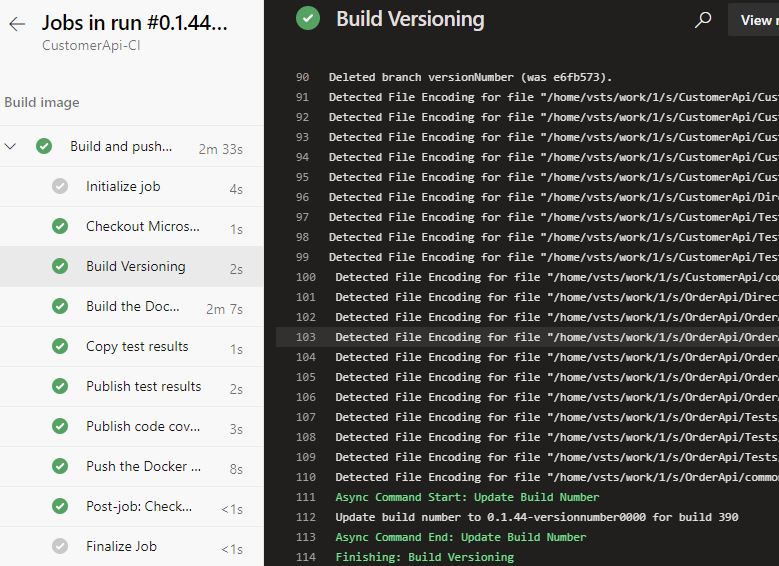
Usually, only the master branch is used to create new versions of an application. Sometimes a developer wants to create an image to test new changes before merging the feature into the master branch. When you run the pipeline with a feature branch (every branch != master), the Build Versioning task will create a preview version. This means that you still get a semantic version but the task adds the branch name and a counter to the end of the version, for example, 0.1.44-versionnumber0000.
This version number means that it was run for the branch named versionnumber and it was run the first time. If you commit changes and run the branch again, it will create the version 0.1.44-versionnumber0001.
Conclusion
DevOps is all about automating tasks and processes. A part of this automation is the versioning of your application. Today, I showed how easy it is to use the Build Versioning extension in Azure DevOps to automatically create semantic version numbers and how to add them to a Docker image.
You can find the code of the whole demo on GitHub.
This post is part of “Microservice Series - From Zero to Hero”.





Comments powered by Disqus.