

Running your build inside a Docker container has many advantages like platform independence and better testability for developers. These containers also bring more complexity though. In my last post, I showed how to set up the build inside a Docker container. Unfortunately, I didn’t get any test results or code coverage after the build succeeded. Today, I want to show how to get the test results when you run tests inside Docker and how to display them in Azure DevOps.
You can find the code of this demo on GitHub.
Run Tests inside Docker
Running unit tests inside a Docker container is more or less as building a project. First, I copy all my test projects inside the container using the COPY command:
Next, I set the label test to true. I will need this label later to identify the right layer of the container to copy the test results out of it. Then, I use dotnet test to run the tests in my three test projects. Additionally, I write the test result into the testresults folder and give them different names, e.g. test_results.trx.
Thats already everything I have to change to run the tests inside the container and generate test results. If you run the build, you will see the successful tests in the output of the build step.

The tests ran inside the Docker container. If you try to look at the Tests tab of the built-in Azure DevOps to see the test results, you won’t see the tab.
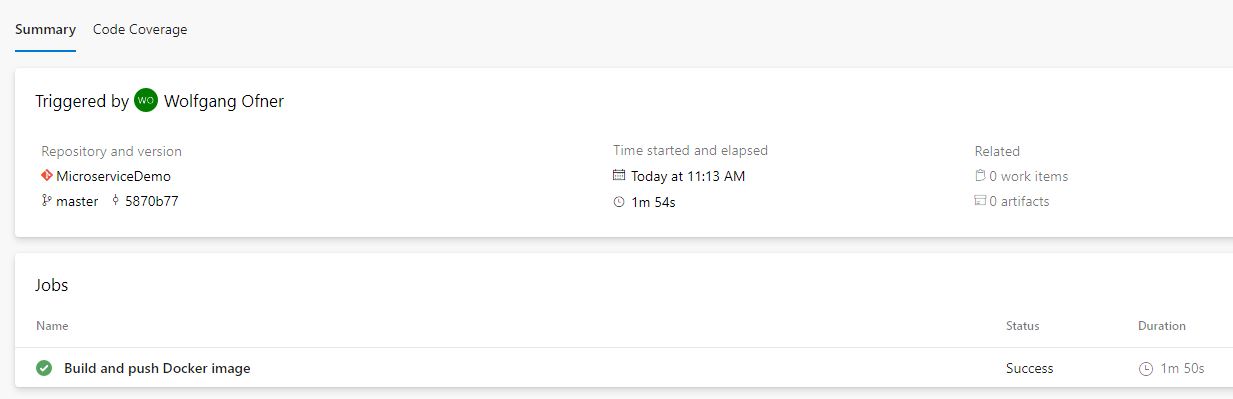
The build was successful but not Test Results are showing
The Tests tab is not displayed because Azure DevOps has no test results to display. Since I ran the tests inside the container, the results are also inside the container. To display them, I have to copy them out of the docker container and publish them.
Copy Test Results after you run Tests inside Docker
To copy the test results out of the container, I use the following PowerShell task in the CI pipeline.
Docker creates a new layer for every command in the Dockerfile. I can access the layer (also called intermediate container) through the label I set during the build. The script selects the first intermediate container with the label test=true and then copies the content of the testresults folder to the testresults folder of the WorkingDirectory of the build agent. Then the container is removed. Next, I can take this testresults folder and publish the test results inside it.
Publish the Test Results
Tp publish the test results, I use the PublishTestResult task of Azure DevOps. I only have to provide the format of the results, what files contain results and the path to the files. The YAML code looks as follows:
Run the CI pipeline again and after it is finished, you will see the Tests tab on the summary page. Click on it and you will see that all tests ran successfully. Azure DevOps even gives you a trophy for that :D.
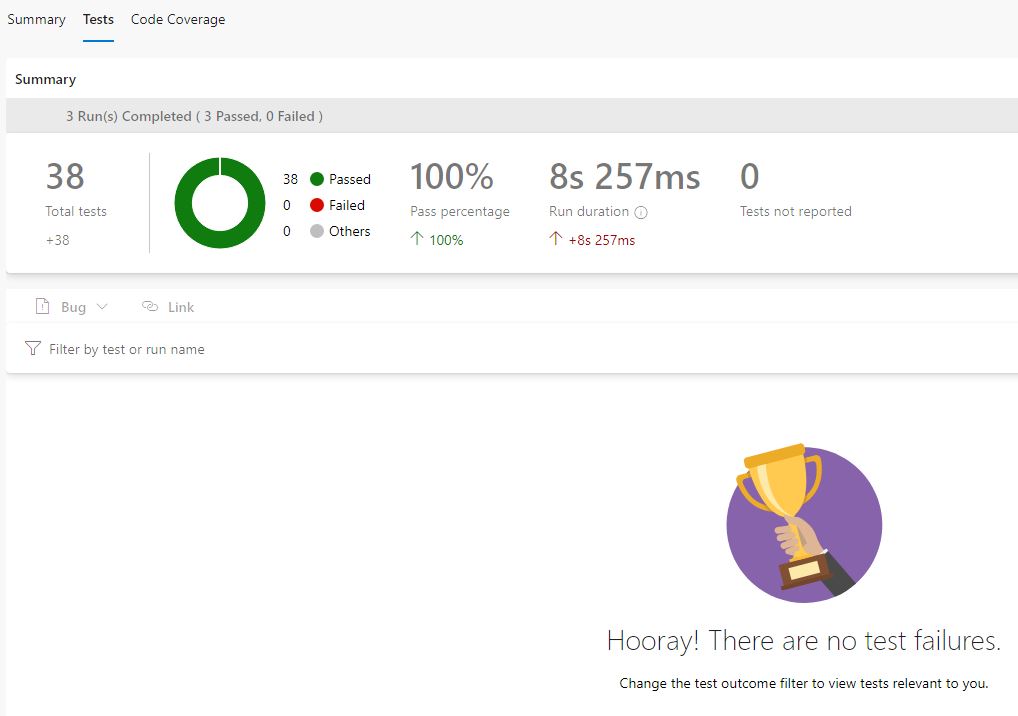
The Tests tab is shown and you get even a trophy
Note if you are following the whole series: I moved the projects from the solution folder to the root folder. In the past couple of months I made the experience that this makes it easier with docker.
Conclusion
Docker containers are awesome. They can be used to run your application anywhere but also to build your application. This enables you to take your build definition and run it in Azure DevOps, or GitHub actions or in Jenkins. You don’t have to change anything because the logic is encapsulated inside the Dockerfile. This flexibility comes with some challenges, for example, to display the test results of the unit tests. This post showed that it is pretty simple to get these results out of the container and display in Azure DevOps.
In my next post, I will show how you can also display the code coverage of your tests. You can find the code of this demo on GitHub.
Comments powered by Disqus.