

In my last post, I showed how to build a .NET Core Microservice with an Azure DevOps CI pipeline. Today, I want to build these microservices in another Azure DevOps CI pipeline and push the images to Docker Hub.
This post is part of “Microservice Series - From Zero to Hero”.
Set up a Service Connection to Docker Hub
Before I create the new CI Pipeline for building the Docker image, I set up a connection to Docker Hub to push my image to its repository. To do that in Azure DevOps, click on Project Settings –> Service connections –> New service connection.
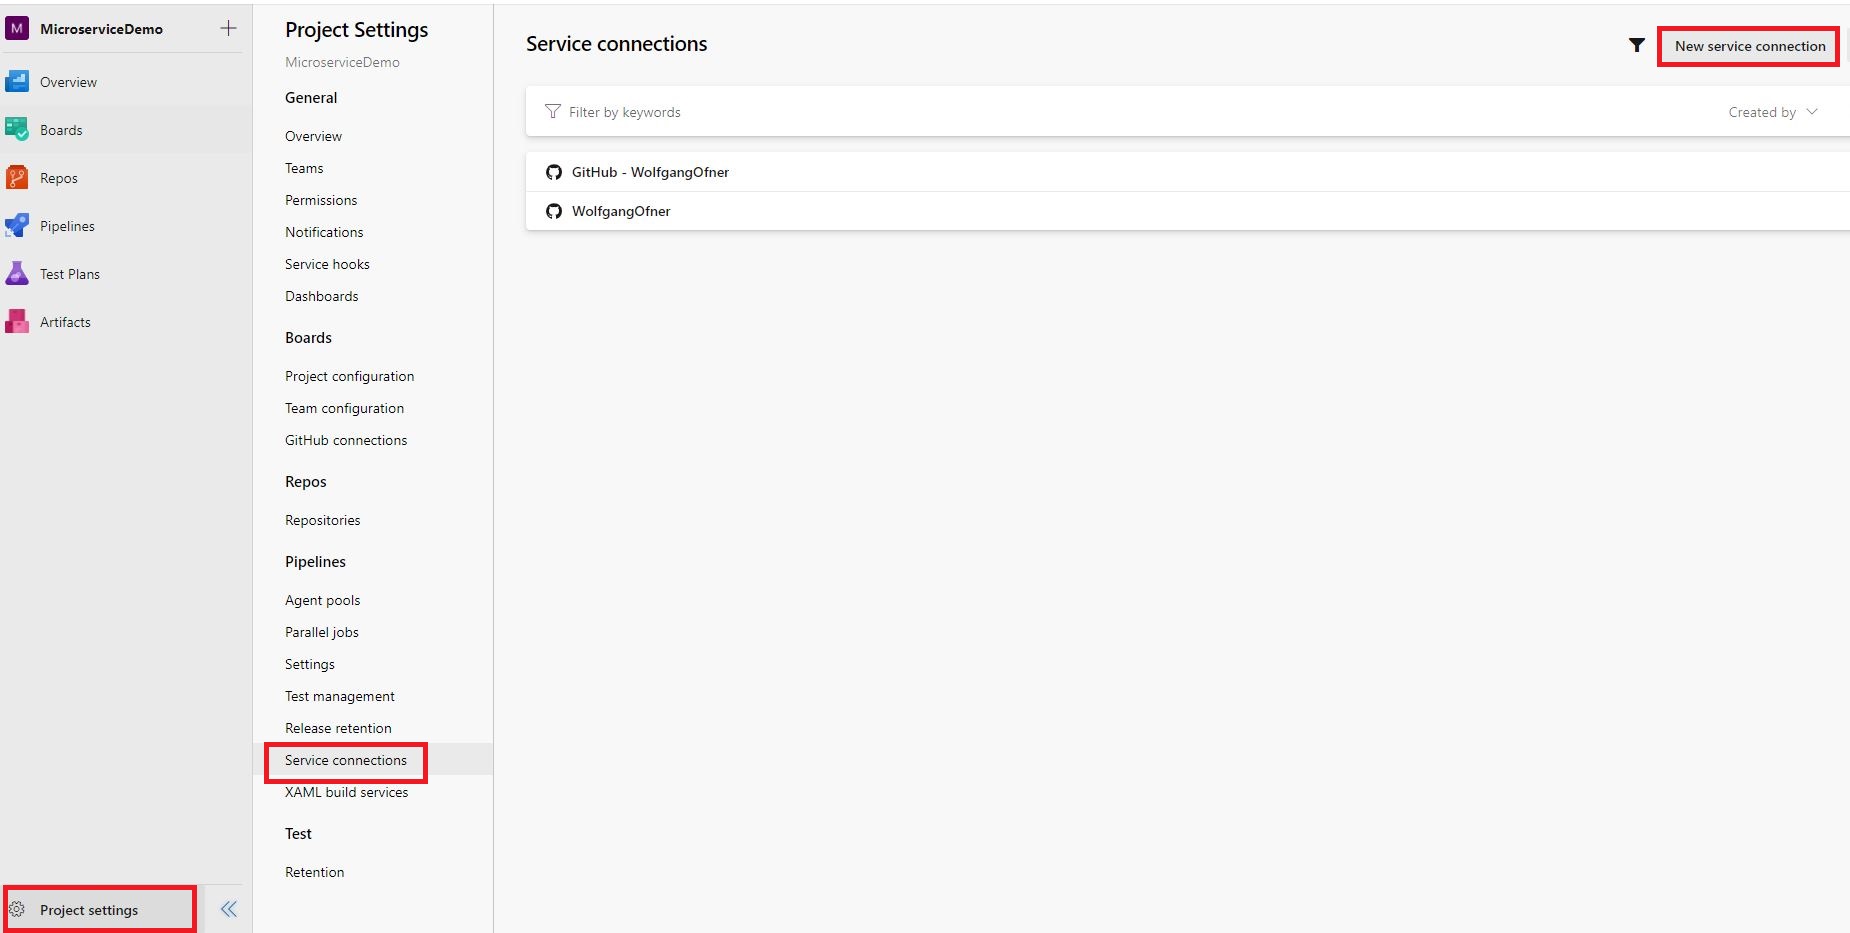
Create a new service connection
This opens a pop-up where you select Docker Registry.
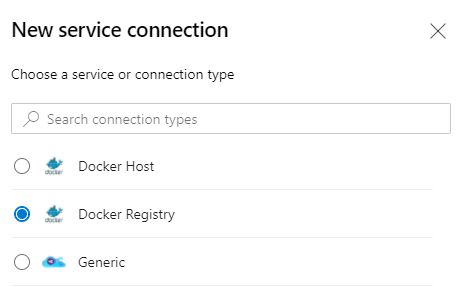
Select Docker Registry for your service connection
On the next page, select Docker Hub as your Registry type, enter your Docker ID, and password, and set a name for your connection. Then click Verify and save.
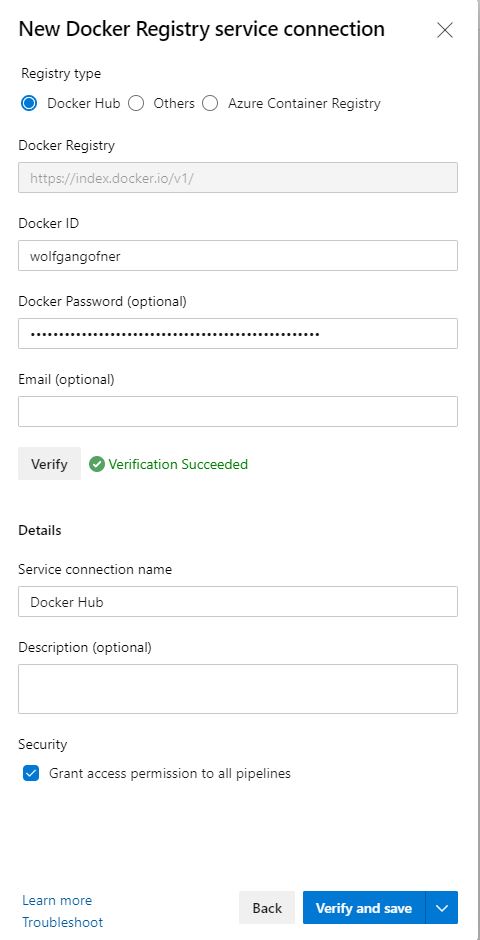
Configure the service connection
Create a new Azure DevOps CI Pipeline
After setting up the service connection, create a new CI Pipeline. Select the source code location and then any template. After the yml file is created, delete its content. For more details on creating a Pipeline, see my post Run the CI Pipeline during a Pull Request.

Create an empty Pipeline
Configure the Pipeline
First, you have to set up some basic configuration for the pipeline. I will give it a name, and set a trigger to run the pipeline every time a commit is made to master and use an Ubuntu agent. Additionally, the build should only be triggered if changes to the CustomerApi folder are made. You can do this with the following code:
In the next section, I set up the variables for my pipeline. Since this is a very simple example, I only need one for the image name. I define a name and set the tag to the build id using the built-in variable $(Build.BuildId). This increases the tag of my image automatically every time when a build runs.
If you want better versioning of the Docker images, use one of the many extensions from the marketplace. In my projects, I use GitTools which you can find here.
Build the Docker Image
Now that everything is set up, let’s add a task to build the image. Before you can do that, you have to add a stage and a job. You can use whatever name you want for your stage and job. For now, you only need one. It is good practice to use a meaningful name though.
Inside the job, add a task for Docker. Inside this task add your previously created service connection, the location to the dockerfile, an image name, and the build context. As the command use “Build an Image”. Note that I use version 1 because version 2 was not working and resulted in an error I could not resolve.
You can either add the YAML code from above or click on the Docker task on the right side. You can also easily edit a task by clicking Settings right above the task. This will open the task on the right side.
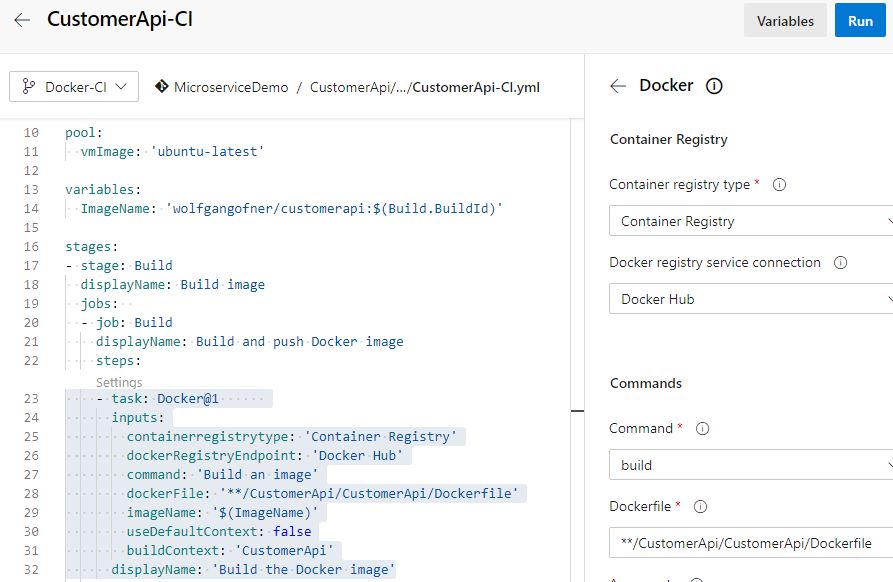
Edit the Docker task
Save the pipeline and run it. This should give you a green build.
Push the Image to Docker Hub
The last step is to push the image to a registry. For this example, I use Docker Hub because it is publicly available but you can also use a private one like Azure Container Registry (ACR) or even a private Docker Hub repository.
Add the following code to your pipeline:
Here I set a display name, the container registry “Container Registry” which means Docker Hub, and select my previously created service connection “Docker Hub”. The command indicates that I want to push an image and I set the image name from the previously created variable. This task only runs when the previous task was successful and when the build is not triggered by a pull request.
The finished Azure DevOps CI Pipeline
The finished pipeline looks as follows:
You can also find the code of the CI pipeline on GitHub.
Testing the Azure DevOps CI Pipeline
Save the pipeline and run it. The build should succeed and a new image should be pushed to Docker Hub.
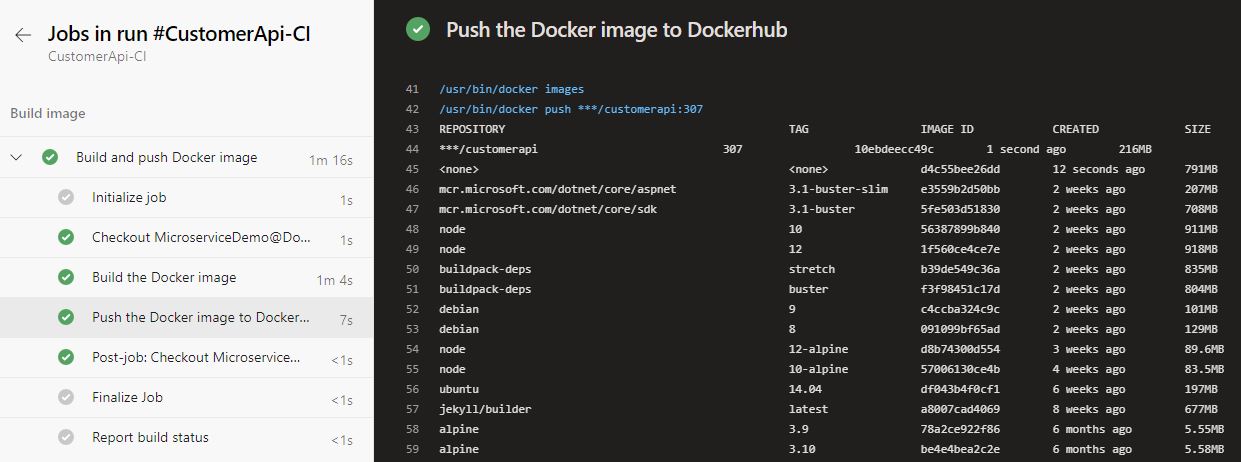
The pipeline ran successfully
The pipeline ran successfully and if I go to my repository on Docker Hub, I should see a new image with the tag 307 there.
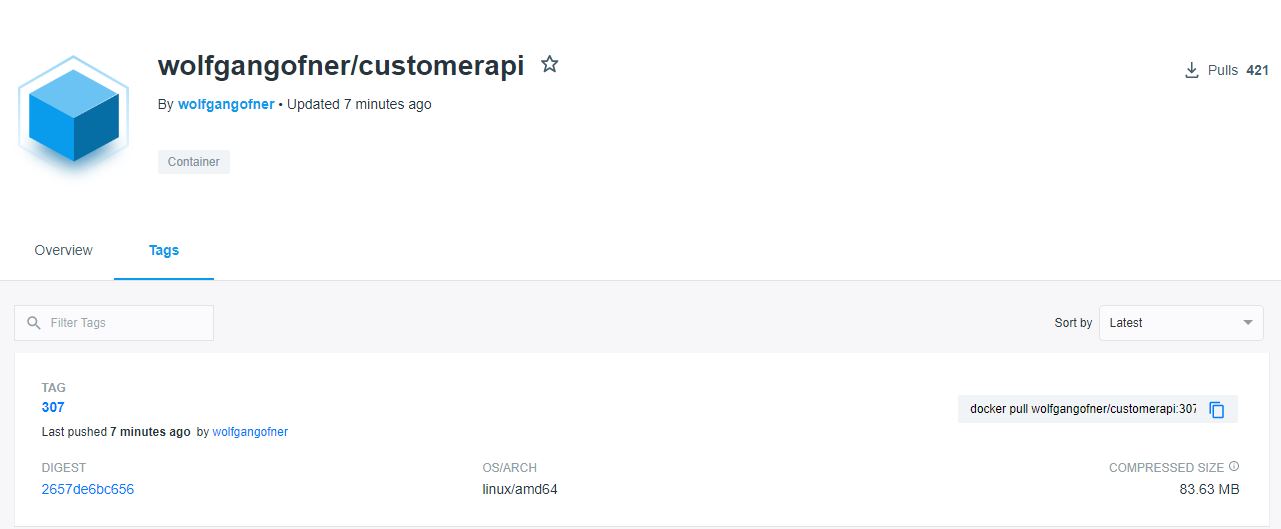
The new image got pushed to Docker Hub
As a practice, you could set up the CI pipeline for the OrderApi. The pipeline will look exactly the same, except that CustomerApi will be replaced with OrderApi. You can find the finished pipelines on GitHub inside the pipelines folder of each solution.
Conclusion
An automated CI pipeline to build and push new images is an integral point of every DevOps process. This post showed that it is quite simple to automate everything and create a new image every time changes are pushed to the master branch.
You can find the source code of this demo on GitHub.
This post is part of “Microservice Series - From Zero to Hero”.
Comments powered by Disqus.