

In this post, I will explain the basics of xUnit and how to write unit tests with it. xUnit is an open source testing framework for the .NET framework and was written by the inventor of NUnit v2. More details can be found on xUnit’s GitHub page. xUnit is used by .NET core as the default testing framework and its major advantage over NUnit is that every test runs in isolation, which makes it impossible that test influence each other.
My Setup
For writing unit tests I use the following NuGet packages and extensions:
- xUnit for unit testing
- xBehave for acceptance tests (xBehave is based on xUnit)
- FluentAssertions for more readable assertions
- FakeItEasy to create fake objects
- xUnit Resharper Extension for xUnit shortcuts in Visual Studio
The code for today’s demo can be found on GitHub. Keep in mind that the tests are only for the demonstration of xUnit. The tests are barely useful.
Execute a test with xUnit
For each class I want to test, I create a separate class to which I add tests in the name, for example, if I want to test the Employee class I name my test class EmployeeTests. To create a test method, you only have to add the Fact attribute to the method.
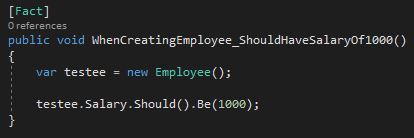
Using the Fact attribute
That’s all. You can run the test and if the constructor of your Employee class sets the salary to 1000, the test will pass. I like to name the object I want to test testee. Another common name is sut which stands for system under test.
Reducing code duplication
In the intro, I mentioned that every test runs in isolation in xUnit. This is done by creating a new instance for each test. Therefore the constructor is called for each test and can be used to initialize objects, which are needed for the tests. Since I will need the object of the Employee class in all my tests, I can initialize it in the constructor and don’t have to write the same code over and over in every test.
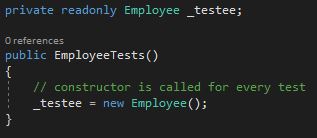
Initialize the testee in the constructor
Cleaning up after tests
Sometimes you have to do some cleanup like a database rollback or deleting a file after the tests were executed. Like the constructor, this can be done in a central place for all tests. To do that implement the IDisposable interface and implement the Dispose method. This method is called every time a test is finished.

Implement the IDisposable interface
Executing tests several times with different parameters
Often you want to execute a test with different parameters, for example, if a valid age for your employee has to be between at least 18 and maximum 65 years, you want to test the edge cases (17, 18, 65, 66). Additionally, you might test negative numbers. You could write several asserts but this would be a lot of typing and not really practical. The solution for this is the Theory attribute in xUnit. A Theory allows you to pass values from different sources as parameters to your test method. With the InlineData attribute, you can add values for the parameter.
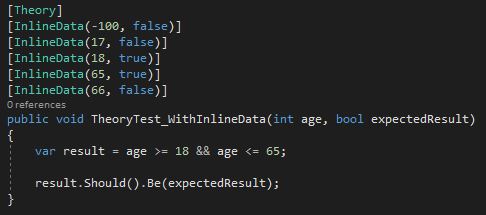
Executing the same method with several input variables
If you run this test method, five test cases will be executed.
Skipping a test
Sometimes you don’t want a test to be executed. To ignore tests, add the Skip attribute and provide an info message.
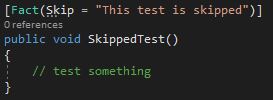
Skipping a test
Grouping tests together
I barely use this feature but sometimes you want to group certain tests together. This can be for example all tests from one class and only some tests from another class. To do that use the Trait attribute and provide a name and category. You can apply this attribute to a class or to a single test.
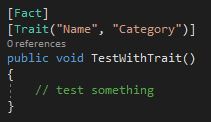
Applying the Trait attribute to a test method
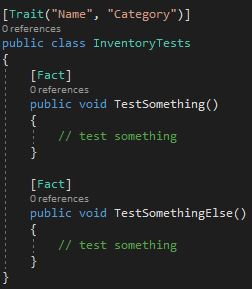
Applying the Trait attribute to a test class
If you run the tests and group the output by category, all traits with the same category will be grouped together.
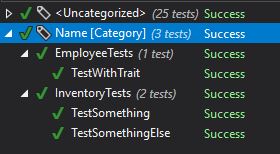
Grouped test output
Add information to the test result output
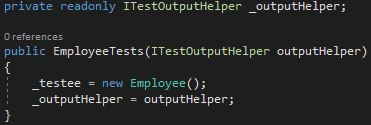
By default, no output is generated when a test finished. For reporting reasons, it can be useful to add some information on what the test did to the output of the test. This can be done with the ITestOutputHelper. Pass it as parameter in the constructor of your test class and initialize a private field with it.
Using the ITestOutputHelper
Next, use the WriteLine method of the ITestOutputHelper object to create the desired output.
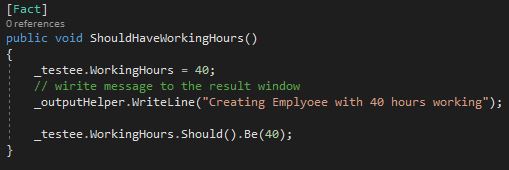
Creating a custom message for the test result
When you run the test, you will see the message in the test result window.

Output message of the test
Share resources over multiple tests
Previously, I mentioned that for every test a new object is instantiated and therefore isolated from the other tests. Sometimes you need to share a resource with several tests. This can be done with Fixtures. First, you have to create a so-called fixture class with the information you want to share. In my simple example, I set DateTime.Now to demonstrate that every test uses the same instance of the object.
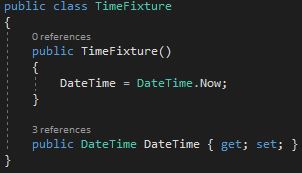
Fixture class to share the time property
Next, I am creating a collection class with the CollectionDefiniton attribute and the ICollectionFixture interface with my previously created fixture class.
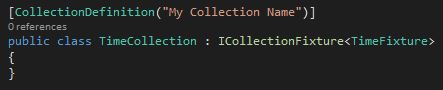
Creating the collection to share date across tests
Finally, I add the Collection attribute with the previously set name to my test class and pass the fixture class in the constructor.
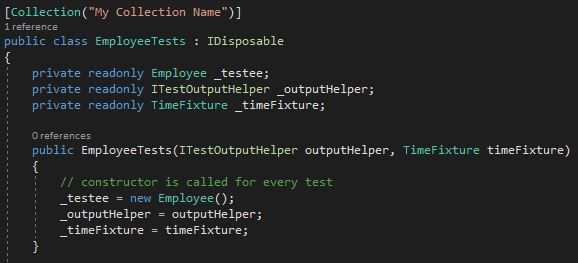
Passing the collection to the test class
To demonstrate that the _timeFixture object stays the same, I run a couple of tests with Thread.Sleep(1500) and both tests will output the same time.
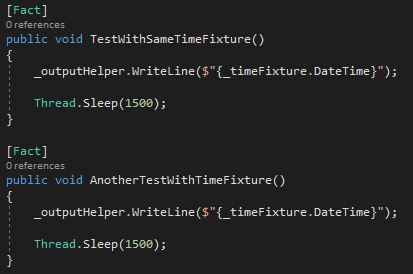
Tests using the fixture object
Both tests will print the same output.

The same output of the fixture object
Provide test data from a class
Previously, I showed how to use the Theory attribute to pass several parameters for the test. If you want the same data for several tests, you would have to enter it several times. This is error-prone and unpractical. Therefore, you can place these values in a class and just add a reference to the class.
Create a new class with a static property and only a getter which yield returns all your test data as object arrays.
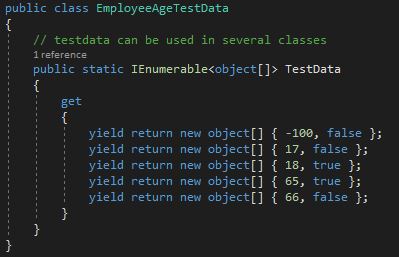
Class with test data
For your test, use the MemberData instead of the InlineData attribute and provide the name of the property and the type of the class containing your test data.
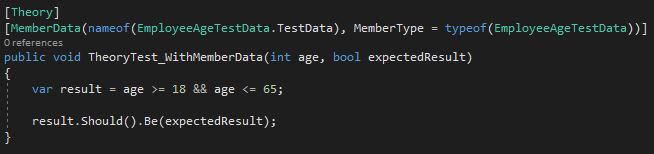
Using test data from a class
Provide test data with a custom attribute
A custom attribute works the same way as the MemberData attribute but it is even less to write in your test. Create a new class and inherit from the DataAttribute class. Then override the GetData method.
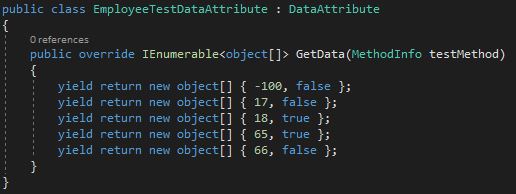
Override the GetData method from the DataAttribute class
After you created the class, add the name of the class (without Attribute) as the attribute to your Theory. xUnit will recognize your attribute and call the GetData method.
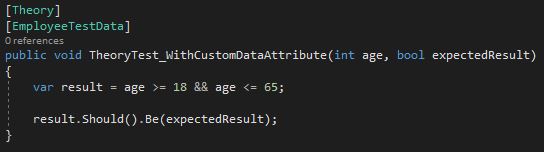
Use the custom attribute
Provide test data from an external source
The last method to provide data for your tests is from an external source. To read the data from a csv file, I placed the csv file in the root folder of my project and created a class with a static property. In the getter of the property, I read the file, split the values and return them as object arrays. Don’t forget to set the Copy to Output Directory property of the csv file to Copy always or Copy if newer. Otherwise, the file won’t be copied when you compile your code and therefore won’t be found at runtime.
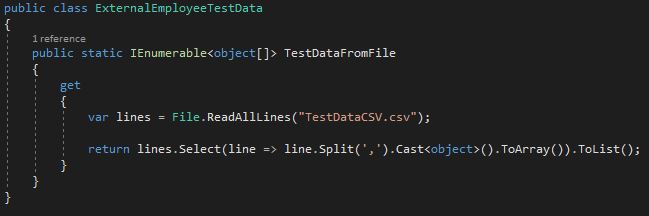
Read data from a csv file
Now use the MemberData attribute for your test to add the name of the property and the type of your class.

Provide data from an external file to your test
Conclusion
In this post, I gave a quick overview of xUnit and explained how to get data from several sources and how to reduce duplicate code. For more information on xUnit, I can recommend the Pluralsight course “Testing .NET Core Code with xUnit.net: Getting Started” from Jason Robert.
You can find the code of my demo on GitHub.
Comments powered by Disqus.