

In a previous post, titled “Securely connect to an on-premises Kubernetes Cluster with Azure Arc”, I demonstrated the step-by-step process of establishing a secure connection to an on-premise Kubernetes cluster using Azure Arc. The key highlight was creating a user and obtaining the user’s token for authentication.
However, with the release of Kubernetes version 1.24 and onwards, there have been some changes to this method. In this new post, I’ll guide you through the updated approach to obtain the token if you are using the latest K8s version.
This post is part of “Azure Arc Series - Manage an on-premises Kubernetes Cluster with Azure Arc”.
Breaking Change with Tokens in Kubernetes 1.24
Ah, the ever-evolving world of Kubernetes! As we delve into the fascinating realm of secure cluster connections, let’s address a breaking change that occurred with the release of Kubernetes version 1.24.
In my previous explanation on how to connect to your Kubernetes cluster, we journeyed through creating a new service account and binding a role to grant necessary permissions. The following code served as a friendly reminder:
At that time, I mentioned that this cluster binding also automatically generated the secret we required to establish the connection. Here’s the code snippet we used to retrieve and leverage that essential token:
However, with the introduction of Kubernetes 1.24, there has been a significant shift – the token is no longer automatically generated. As a result, executing the code above will leave the $SECRET_NAME variable empty, preventing you from obtaining the token as it was previously done.
In the following section, I will guide you through the new method of obtaining access token token.
What is new in Kubernetes 1.24
As with every new version of Kubernetes, the latest release, Kubernetes 1.24, comes packed with a plethora of changes and exciting features. To explore the complete list of modifications and upgrade notes, you can refer to the detailed Kubernetes changelog on GitHub.
One noteworthy change in this release is the introduction of the LegacyServiceAccountTokenNoAutoGeneration feature gate, which is now in beta and enabled by default. With this feature gate activated, the automatic generation of Secret API objects containing service account tokens for every ServiceAccount has been disabled.
There’s a new and improved method to acquire those essential service account tokens. You can now leverage the TokenRequest API to obtain service account tokens. Additionally, if you require a non-expiring token, you have the option to create a Secret API object following a straightforward guide, allowing the token controller to populate it with a service account token.
In the next section, I’ll guide you through the process of creating these tokens yourself, ensuring you are up to speed with the latest practices and ready to embrace the changes in Kubernetes 1.24.
Utilizing the TokenRequest API for Enhanced Security
With the introduction of Kubernetes 1.22, we now have the TokenRequest API at our disposal, offering a more secure approach to create tokens compared to the previously used Secret object. Let’s dive into how we can leverage this API to enhance security in token creation.
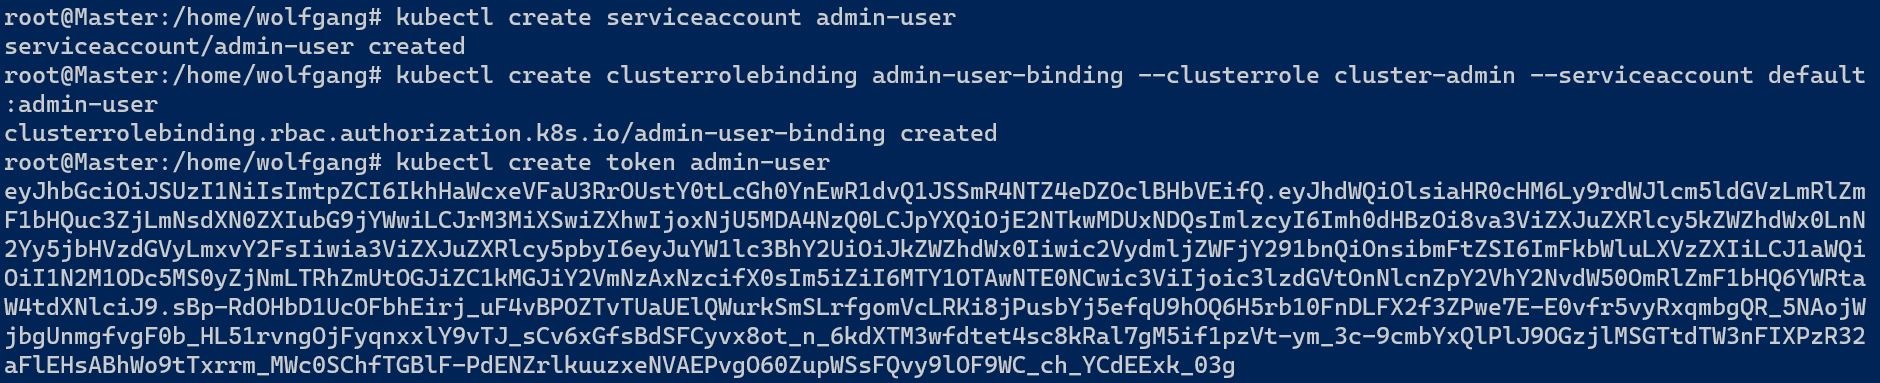
To use the API, first create a new service account and bind a role to it. Then use “kubectl create token <Service Account Name>” to create the token.
The create token command will automatically generate the token and display it on the console for you.
Use the TokenRequest API
With the TokenRequest API in action, you can now confidently create tokens with enhanced security measures. Embrace the power of Kubernetes 1.22 and take advantage of this improved approach for all your token creation needs.
Manual Creation of a Service Account Secret for the Cluster Access
If you can’t use the TokenRequest API, then you can create the secret yourself. To create the access token in Kubernetes 1.24 manually, you have to create a service account and bind a role to this account first. This is the same code as in my last post:
Next, add a new secret to your cluster with the following code:
Make sure that the annotation “kubernetes.io/service-account.name:” has the name of the previously created service account as value. After the secret is created, Kubernetes automatically fills in the information for the token.
Assign the value of the name in the previously created secret to the SECRET_NAME variable and then use following code to read the automatically created value of the token and then print it to the console:
The following screenshot shows the whole process and the printed token.
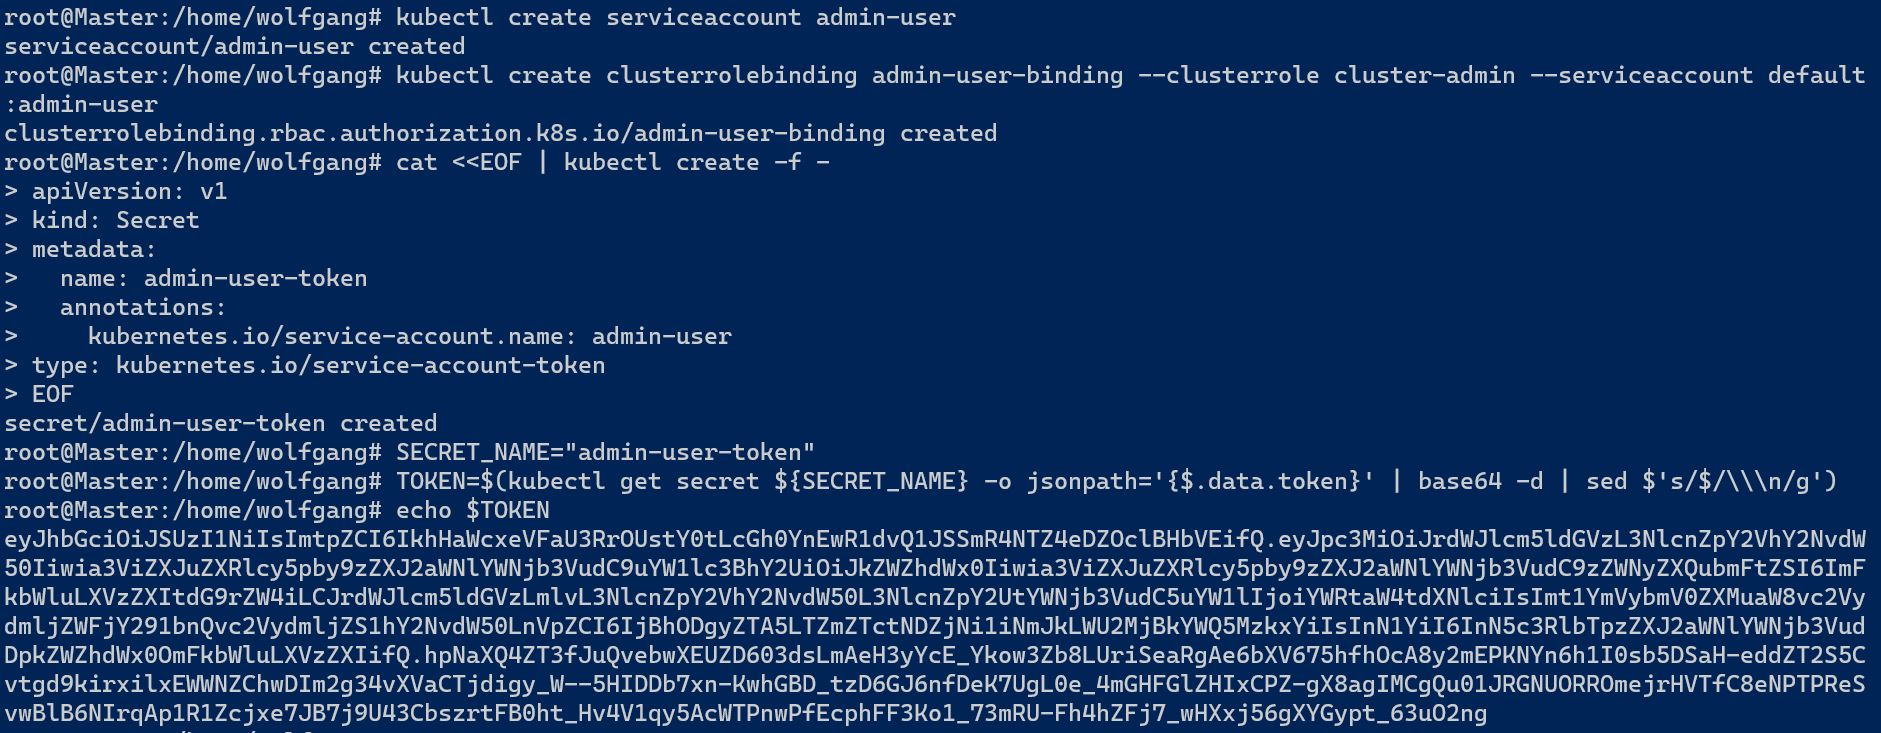
Create a new service account and print its token
Note, when you delete the service account, the associated secret will be automatically deleted as well, ensuring a tidy and secure process.
Conclusion
In conclusion, Kubernetes 1.24 removed the automatic creation of secrets for new service accounts. Instead, the recommended and more secure method is to use the TokenRequest API to create tokens. This API simplifies the process and enhances cluster security. Embrace these changes to enjoy a smoother Kubernetes experience with improved access control.
This post is part of “Azure Arc Series - Manage an on-premises Kubernetes Cluster with Azure Arc”.
Comments powered by Disqus.