Back in the day developers had to go through a lengthy process to get new hardware deployed. Often it took several weeks and then there was still something missing or the wrong version of the needed software installed. This was one of my biggest pet peeves and it was a major reason why I left my first job.
Fortunately, we have a solution to these pains, Infrastructure as Code. This post will explain what it is and how you can easily set up all the services needed.
This post is part of “Microservice Series - From Zero to Hero”.
What is Infrastructure as Code (IaC)?
As the name already suggests, Infrastructure as Code means that your infrastructure and its dependencies are defined in a file as code. Nowadays the configuration is often saved in a JSON or YAML file. IaC has many advantages over the old-school approach of an operation person creating the infrastructure:
- The definition can be reviewed and saved in version control
- Infrastructure can be deployed fast and reliable
- Deployments can be repeated as often as needed
- No (less) communication problems due to developers writing the configuration themselves
- Many tools are available
If you are working with Azure, you might be familiar with ARM templates. There are also many popular tools out there like Puppet, Terraform, Ansible and Chef. My preferred way is Azure CLI. In the following sections, I will show you how to create an Azure DevOps YAML pipeline using Azure CLI and Helm to create an Azure Kubernetes Cluster with all its configurations like Nginx as Ingress Controller, Azure SQL Database, Azure Function, and Azure Service Bus.
Azure CLI Documentation
I like using Azure CLI because it is easy to use locally and it is also quite intuitive. All commands follow the same pattern of “az service command”, for example, az aks create or az sql server update. This makes it very easy to google how to create or update services. Additionally, the documentation is very good. You can find all commands here.
Create your first Infrastructure as Code Pipeline in Azure DevOps
You can find the code of the demo on GitHub.
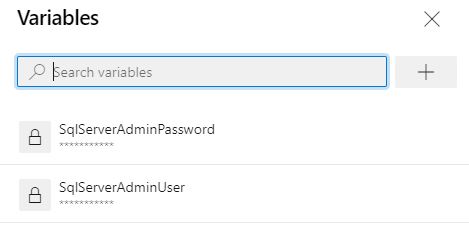
Create a new pipeline and define the following variables:
The variables should be self-explanatory when you look at their usage later on. Also if you followed this series, you should have seen all names and services before already. You need an existing Azure Service Connection configured in Azure DevOps. If you don’t have one yet, I explain in Deploy to Azure Kubernetes Service using Azure DevOps YAML Pipelines how to create one.
Next, install Helm to use it later and create a resource group using the Azure CLI. This resource group will host all new services.
If you are unfamiliar with Helm, see Helm - Getting Started and Deploy to Kubernetes using Helm Charts for more information.
Create an Azure Kubernetes Cluster
Creating an AKS cluster is quite simple due to the names of the parameters. For example, you can configure the VM size, what Kubernetes version you want to install, or the node count of your cluster. The full command looks as follows:
Install the Cert-Manager Addon
The Cert-Manager adds SSL certificates to your services running inside AKS to allow the usage of HTTPS. If you read Automatically issue SSL Certificates and use SSL Termination in Kubernetes, then you will be familiar with the following code since it is identical.
Add the Certificate Cluster Issuer
The SSL certificates need to be issued using the Cluster Issuer object. I am using the same YAML file as in Automatically issue SSL Certificates and use SSL Termination in Kubernetes except that this time it is applied as inline code and with the variable for the email address.
Install Nginx and configure it as Ingress Controller
In Set up Nginx as Ingress Controller in Kubernetes, I added Nginx and configured it as Ingress Controller of my AKS cluster. To install Nginx in the IaC pipeline, add its Helm repository, update it and then install it with the following commands using Azure CLI:
Create a new Azure SQL Server
After the deployment of the AKS cluster is finished, let’s add a new Azure SQL Server with the following command:
You might miss the variables SqlServerAdminUser and SqlServerAdminPassword. Since these values are confidential, add them as secret variables to your Azure DevOps pipeline by clicking on Variables in the top-right corner of your pipeline window.
By default, the Azure SQL Server does not allow any connections. Therefore you have to add firewall rules to allow access to the SQL Service. The following code enables Azure resources like Azure DevOps to access the SQL Server.
Feel free to add as many firewall rules as you need. All you have to do is to edit the start and end IP address parameters.
Deploy an Azure Service Bus Queue
To create an Azure Service Bus Queue, you also have to create an Azure Service Bus Namespace first. I talked about these details in Replace RabbitMQ with Azure Service Bus Queues.
To allow applications to read or write to the queue, you have to create shared access signatures (SAS). The following commands create both a SAS for listening and sending messages.
Create an Azure Function
The last service I have been using in my microservice series (“Microservice Series - From Zero to Hero”) is an Azure Function. Before you can create an Azure Function using Azure CLI, you have to create a Storage Account and an App Service Plan.
With the Azure Storage Account and App Service Plan set up, create the Azure Function.
Create all your Infrastructure using the IaC Pipeline
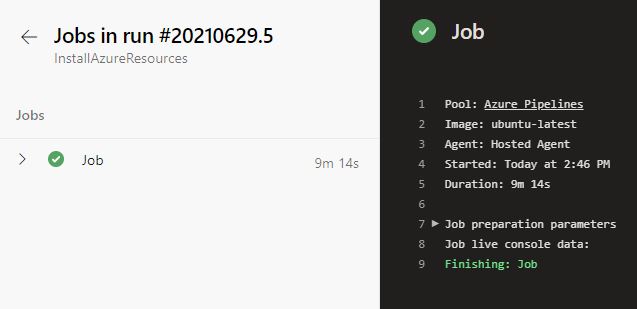
Run the pipeline in Azure DevOps and all your services will be created in Azure.
As you can see, the pipeline ran for less than 10 minutes and deployed all my services. This is probably faster than you can click and configure all the services in the Azure Portal. If you want to deploy the services to a different Azure subscription or with different names, all you have to do is to change the variables and run the pipeline again.
This makes it very safe and fast to set up all the infrastructure you need for your project.
Conclusion
Infrastructure as Code (IaC) solves many problems with deployments and enables development teams to quickly and reliably deploy the infrastructure. You can choose between many tools like Ansible, Terraform, or Chef. Alternatively, you can keep it simple like I did in the demo and use Azure CLI. The advantage of the Azure CLI is that you can easily use it locally for testing.
You can find the code of the demo on GitHub.
This post is part of “Microservice Series - From Zero to Hero”.


Comments powered by Disqus.