

Azure Functions is a serverless compute offering and lets developers execute code without thinking about the infrastructure it is running on. This helps to efficiently develop event-driven solutions.
This post will show how to use Azure Functions to read messages from an Azure Service Bus Queue and how to write data to an Azure SQL Database.
This post is part of “Microservice Series - From Zero to Hero”.
What are Azure Functions?
Azure Functions is a serverless compute platform that allows for quick development without the need to manage the underlying infrastructure. Serverless means that Microsoft abstracts the infrastructure away and fully manages its operation and scaling.
An Azure Function is usually one method that can be triggered by an event like an HTTP call or a message being placed in a queue. Microsoft offers a wide variety of triggers and programming languages like C#, Java, or Phyton for your function. You can use an App Service Plan which you pay monthly or you can use a Consumption plan and only pay when the function is running.
Azure Functions are great when you want to execute for background services like processing items on queues but it is not that great when users are waiting for the result because it might take some time to start the function.
Explaining the Demo Application
You can find the code of the demo on GitHub.
The demo application contains two microservices called OrderApi and CustomerApi. Every time a customer is updated, the CustomerApi places a message with the new information on either a RabbitMQ or Azure Service Bus Queue, depending on its Startup configuration. The OrderApi has a background service that checks the RabbitMQ queue for new messages and then takes these messages to update the customer names in its database.
The problem with this solution is that every container running in Kubernetes has this background service running. The background service always scales with the OrderAPI, even though it might not be necessary and therefore wastes resources and as a result, increases the costs. Additionally, there is no insight into the background service and it would be nice to have some information about the queue processing logic, like how many messages were processed or how many errors occurred.
I want to create an Azure Function to process the queue messages independently from the containers running in Kubernetes and then will deactivate the background service entirely (I will leave it in the code in case you want to use it). The Azure Function will read the queue message, load the orders of this customer, update the customer name and then save the orders in the database.
Create your first Azure Function
You can find the code of the demo on GitHub.
To create a new Azure Function, start Visual Studio, search for Azure Functions and click Next.
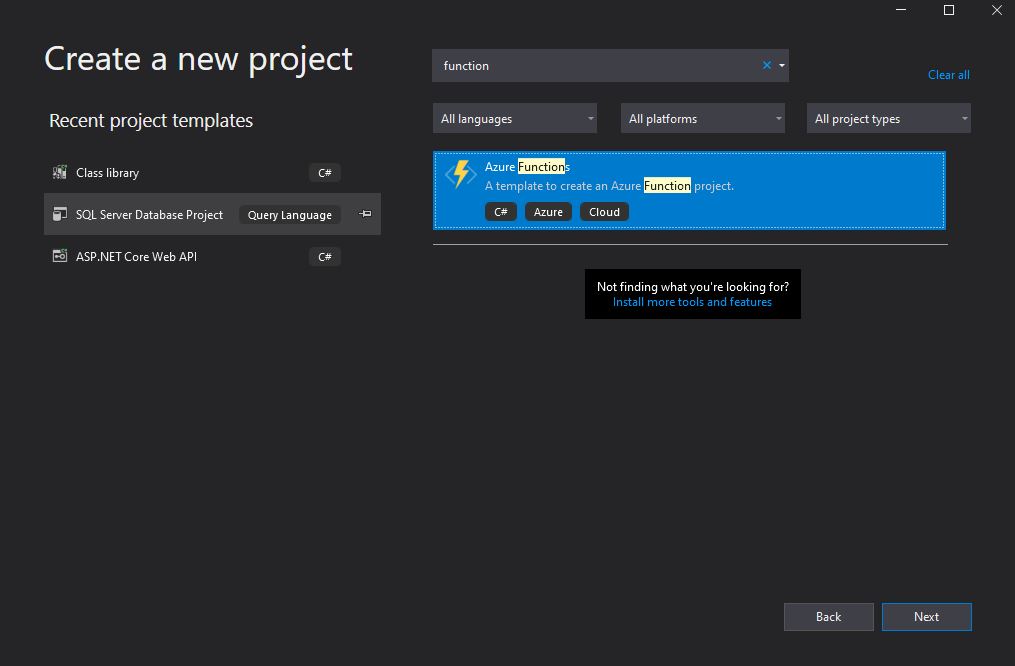
Create a new Azure Function
Enter a name and then select a trigger. As you can see, the template offers a wide variety of triggers such as HTTP, RabbitMQ, or SignalR. Select Service Bus Queue trigger and on the right side enter a name for the connection string and the queue name.
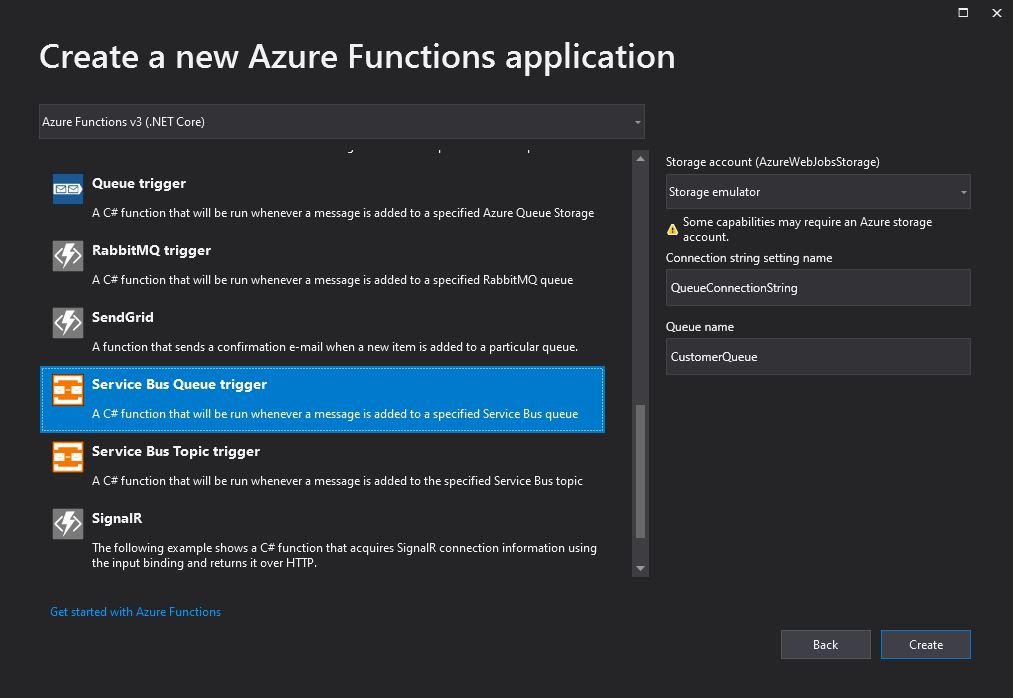
Configure the Function Trigger
Click on Create and your first Azure Function gets created.
In the Azure Portal, go to your Service Bus Namespace and select your CustomerQueue. There select the Shared access policies pane and create a new policy with Listen. After you saved the policy, click on it and you can see the Primary Connection String. If you want to learn how to create an Azure Service Bus Queue and more details about Shared access policies, see my post Replace RabbitMQ with Azure Service Bus Queues.
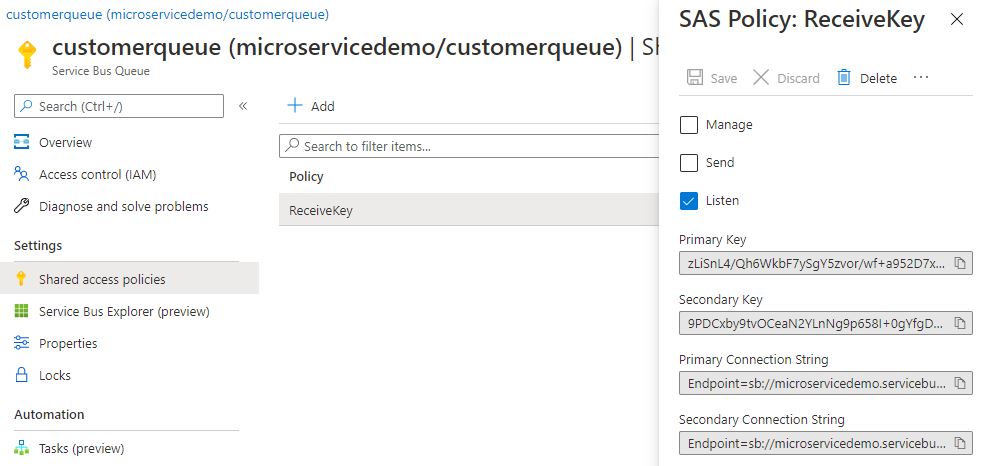
Copy the Connection String to your Azure Service Bus Queue
Copy the Primary Connection String and add the following line inside the Values to the local.settings.json file of your Azure Function:
Note that some versions of the Azure Service Bus SDK have a problem with the connection string. If you run into a problem, remove the Entity Path at the end of the connection string. In my case the is “EntityPath=customerqueue”. Set a breakpoint in the function, start the solution, and then add something to your queue. As soon as you added a message to the queue, you will hit the breakpoint because the Azure Function was triggered. This confirms that your connection string and trigger are working.
Add Entity Framework Core to an Azure Function
Install Entity Framework Core 3.1.14 via NuGet or add the following line to your project file:
Note that Entity Framework Core 5 currently has a dependency that is incompatible with Azure Functions. Azure Functions should be updated to .NET 5 soon.
Next, create a new file and add the database context:
Then create the Order and UpdateCustomerFullNameModel which you will need to load and update the orders.
Lastly, add the following line inside the Values section of the local.settings.json file to configure the connection string:
Replace <YourDatabaseConnectionString> with your connection string and you are good to go. Now let’s set up dependency injection and inject the database context into the function.
Add Dependency Injection to an Azure Function
To add dependency injection to an Azure Function, install the Microsoft.Azure.Functions.Extensions NuGet package. Then create a new class, called Startup with the following code:
This code reads the connection string from the settings file and adds it to the database context. Now you can use constructor injection to inject the database context into your function. The whole code for the function looks as follows:
The function deserializes the message into an UpdateCustomerFullNameModel object, then searches for all orders with the customer id from the deserialized object and updates all names. If something goes wrong, messageReceiver.DeadLetterAsync(locktoken) places the message in a dead letter queue. To use DeadLetterAsync() you have to install the Microsoft.Azure.WebJobs.Extensions.ServiceBus NuGet package.
Deploy the Code to Azure Functions
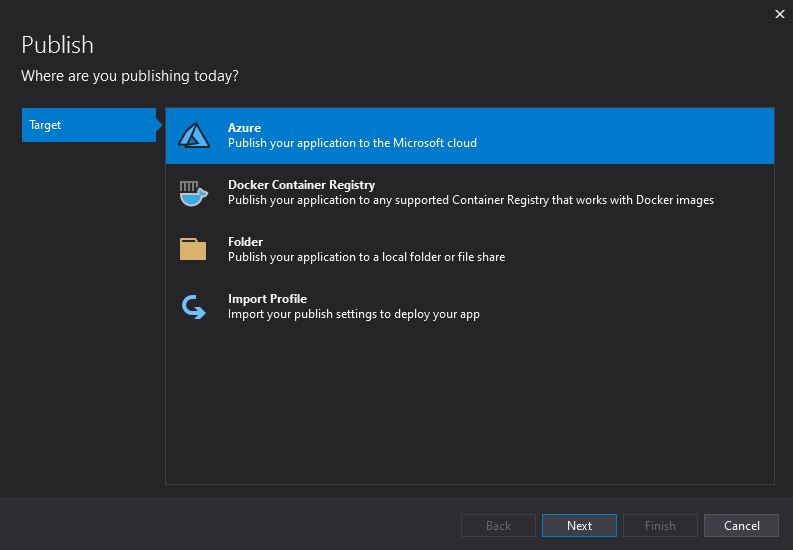
To publish your code, right-click the project and select Publish. This opens a new window where you select Azure and click Next.
Publish the Azure Function to Azure
On the next window, select the environment you want to use. Note that Windows has more options for editing the function in the Azure Portal but for this demo it doesn’t matter if you use Windows or Linux.
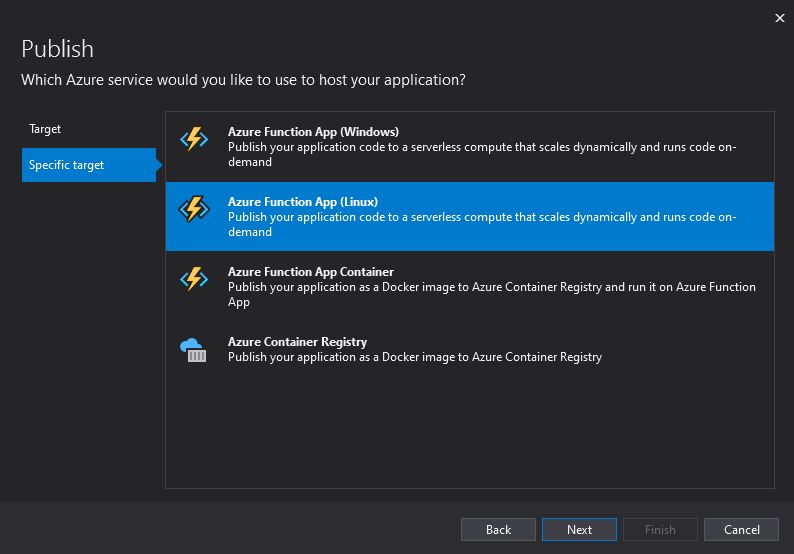
Deploy the Function to Linux
Next, provide a name, subscription, resource group, plan, and location for the new Azure Function.
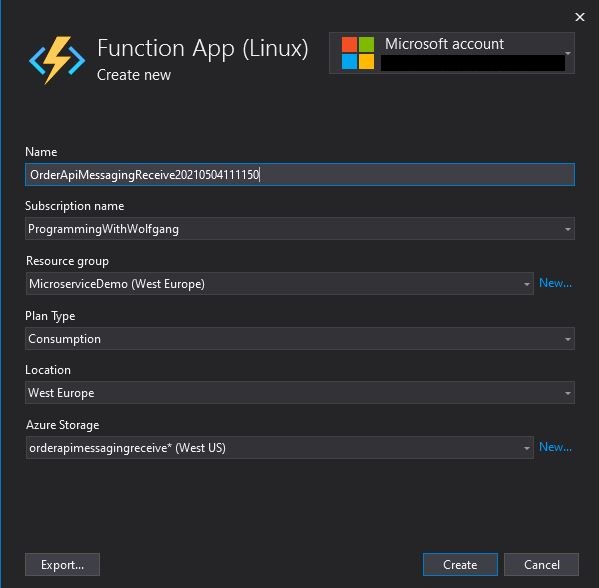
Provide basic settings
After providing the settings, click on Finish and the publish profile will be created. Before you publish the function, you have to provide the connection string to the database and Service Bus Queue. On the right side, click on the three dots and then select Manage Azure App Service settings. This opens a new window with all Application settings. You can either copy the local values for the connection strings or paste the desired values into the text boxes.
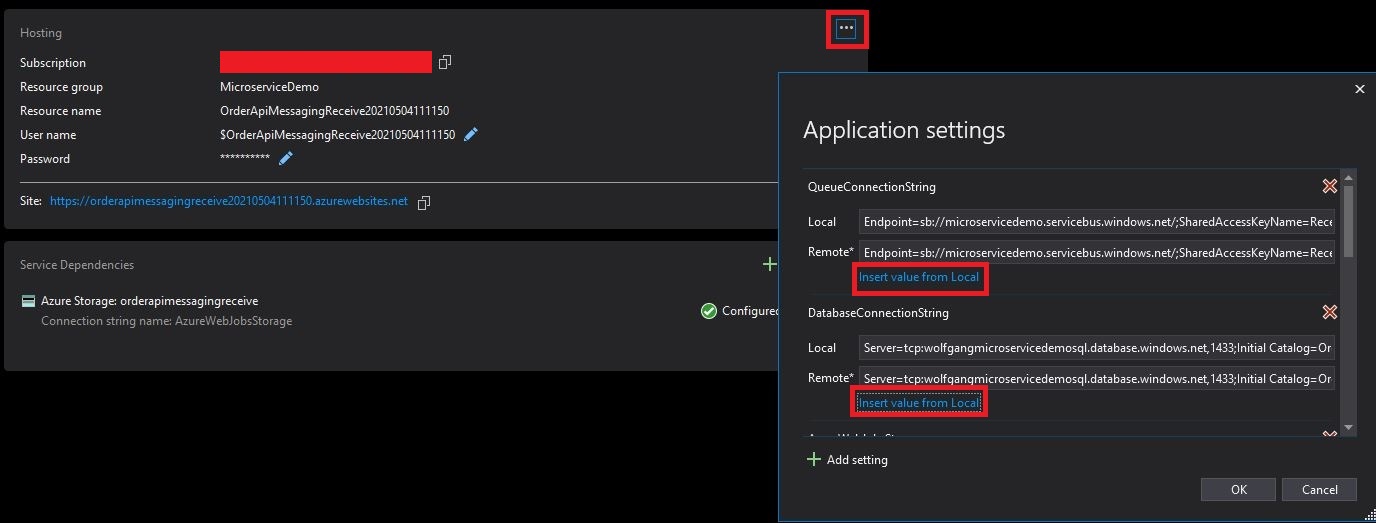
Configure the remote Connection Strings
Note to keep your connection strings secret and never check them into source control.
After inserting the connection strings, publish the Azure Function.
Testing the Azure Function
Open the CustomerAPI solution, add your database and queue connection strings in the appsettings file and start the application. In the Swagger UI update an existing user with the PUT operation.
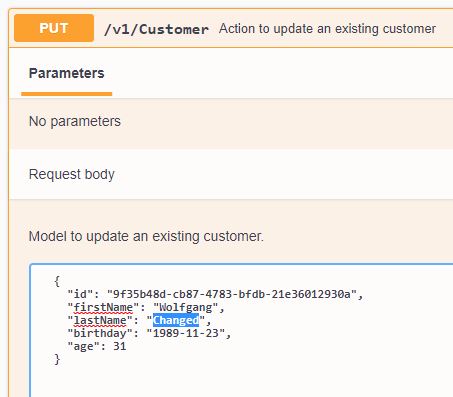
Update an existing Customer
Updating the customer will also create a message on the Azure Service Bus Queue. For more information about the Azure Service Bus Queue, see my post Replace RabbitMQ with Azure Service Bus Queues.

The Customer was added to the Service Bus Queue
Note you might not see the message if your Azure Function is already running because the message might be already processed. Open your Azure Function in the Azure Portal and on the Overview page, you can see that the function was executed once.
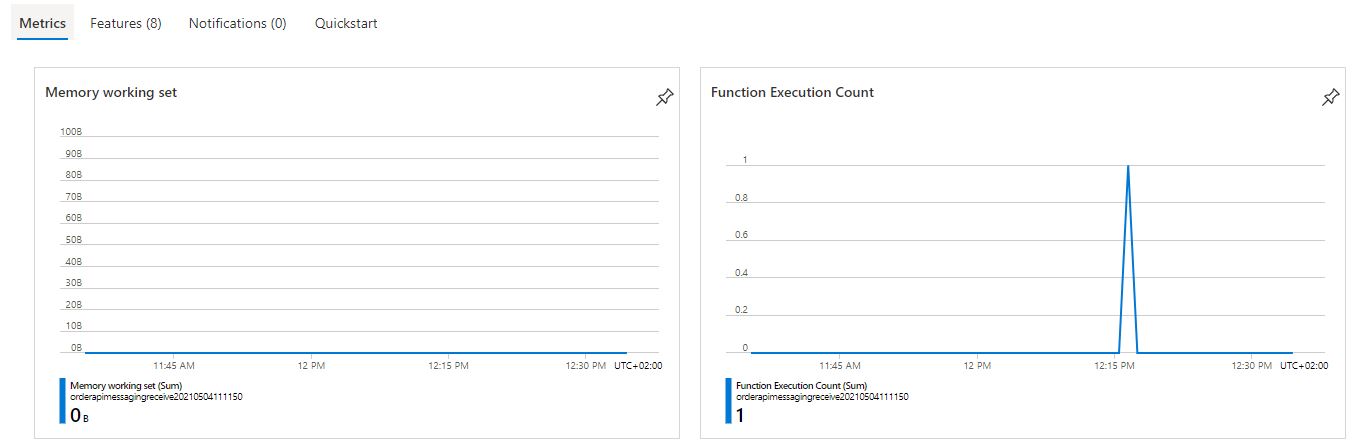
The Azure Function was executed once
To make sure everything worked you can either check the Service Bus Queue to see that there is no message left or in the DeadLetter Queue or you can check the changed value in the database.
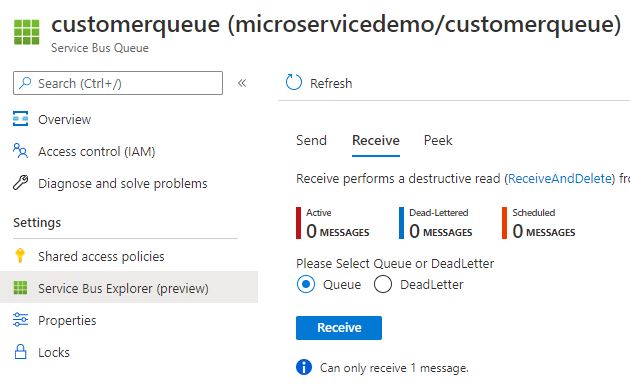
No message in the DeadLetter Queue

The Customer Name got updated
Conclusion
Azure Functions is a great tool to implement event-driven solutions without worrying about the underlying infrastructure. You only pay when your function runs if you select the Consumption plan and can connect a wide variety of different services like RabbitMQ, Azure Event Hub, or Azure Service Bus Queues. This post showed how to deploy an Azure Function from Visual Studio.
In my next post, I will show you how to create a CI/CD pipeline in Azure DevOps to automate the deployment.
You can find the code of the demo on GitHub.
This post is part of “Microservice Series - From Zero to Hero”.
Comments powered by Disqus.