Writing HTML forms can be a tedious task. To help the developers, the ASP.NET MVC framework offers a wide range of helper methods which make creating an HTML form way easier.
ASP.NET MVC offers for every feature the option to use your own implementation. In this post, I will only talk about the built-in helper methods and not about custom helper methods.
Setting up the project for Model Validation
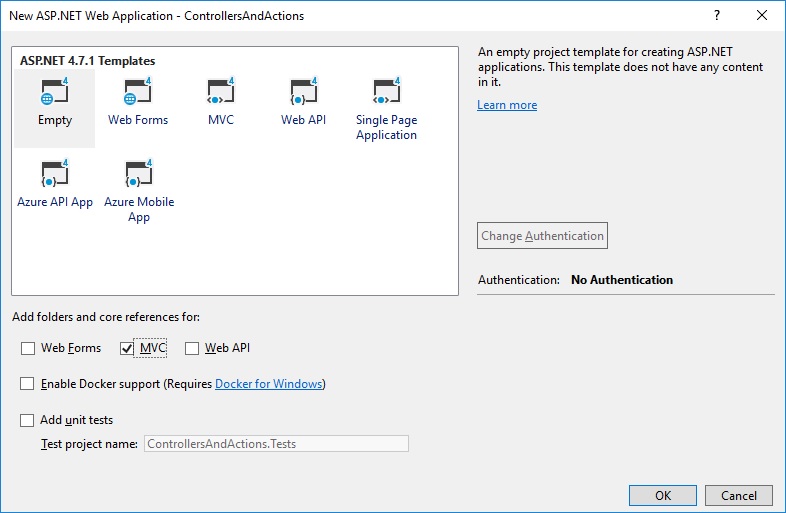
I created a new ASP.NET MVC project with the empty template and add folders and core references for MVC.
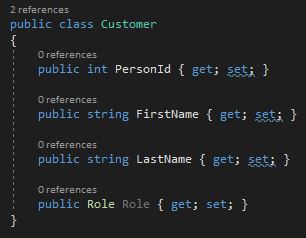
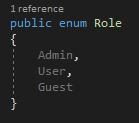
In the next step, I create a model classes, Customer and a Role enum.
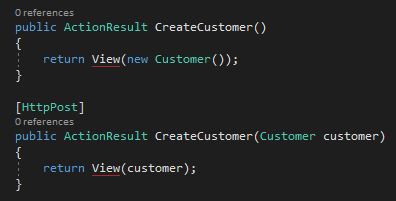
In the Home controller, I create two actions, both with the name CreateCustomer. One sends a new Customer object to the view and the other action takes an HTTP post request with the customer. This is the standard approach to deal with HTML forms.
Using built-in Helper Methods
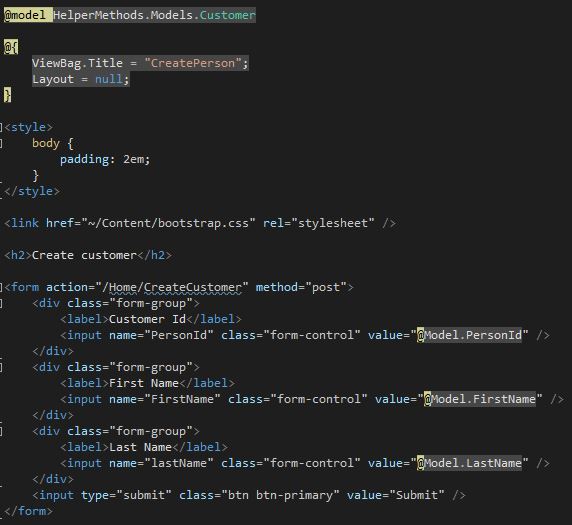
The MVC framework offers many helper methods out of the box to manage your HTML code for elements. First, I want to show you how to build a form without any helper methods and then extend this form piece by piece.
This is a very simple view. I added Bootstrap and some simple CSS. Usually, I would use a layout file but since the focus of this post is on helper methods, I think this approach is fine. Note that I have to set the name property of every input field. This name corresponds to a property of the model. If I don’t set the name, the model binder wouldn’t be able to bind the data.
Creating a form
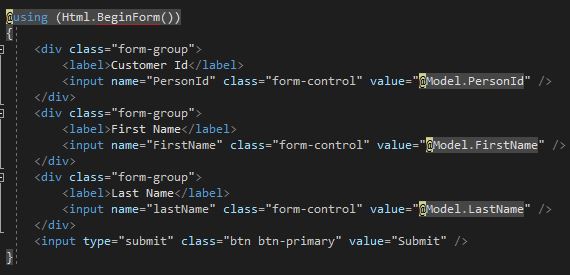
The most used helper method is Html.BeginForm. This helper creates the form tag and has 13 different versions. You can use either @{Html.BeginForm();} to create an open form tag and @{Html.EndForm();} to create a closing form tag or you can use the simpler version @using(Html.BeginForm()){ and add the closing bracket } at the end of the form. I think I never saw anything else than the approach with the using since it’s so much simpler.
Here are the different overloaded versions of the BefginForm helper method:
| Overload | Description |
| BeginForm() | Creates a form which posts back to the action method it originated from |
| BeginForm(action, controller) | Creates a form which posts back to the action method and controller, specified as strings |
| BeginForm(action, controller, method) | As for the previous overload, but allows you to specify the value for the method attribute using a value from the System.Web.Mvc.FormMethod enumeration |
| BeginForm(action, controller, method, attributes) | As for the previous overload, but allows you to specify attributes for the form element an object whose properties are used as the attribute names |
| BeginForm(action, controller, routeValues, method, attributes) | Like the previous overload, but allows you to specify values for the variable route segments in your application routing configuration as an object whose properties correspond to the routing variables |
Specifying the route for a form
When you use the BeginForm helper method, you leave the routing to the MVC framework. It takes the first route in the routing configuration. If you want to use a specific route for your form, use BeginRouteForm instead.
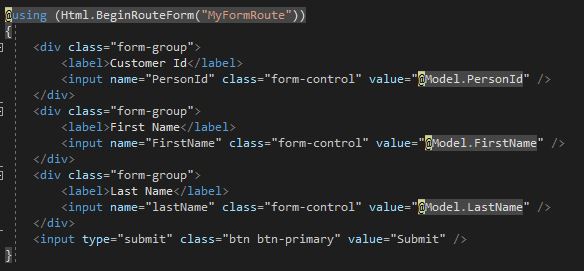
To demonstrate the BeginRouteForm helper method, I added a new route in the RouteConfig. I added the new route before the default one and named it MyFormRoute.
In the BeginRouteForm method, I pass the route name as the parameter. The MVC framework now finds the first route and routes to the CreateCustomer action in the Home controller. (I know this behavior isn’t very clever but it shows how BeginRouteForm works)
The BeginRouteForm helper method also has several overloaded versions which enable you to specify the form element in more detail.
Using HTML Input Helper Methods
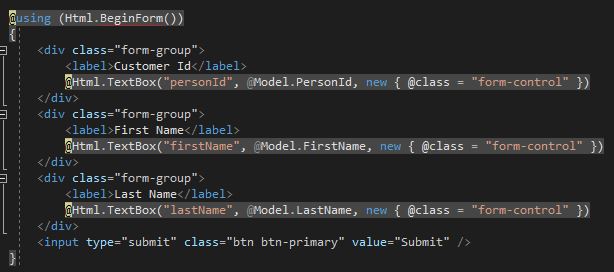
In the previous example, I create the HTML code by hand and assigned the model data to the value attribute. The ASP.NET MVC offers several HTML Helper methods which make creating forms easier.
The following input helper methods are available out of the box:
| HTML Element | Example |
| Check box | Html.CheckBox(“myCheckbox”, false) |
| Hidden field | Html.Hidden(“myHidden”, “val”) |
| Radio button | Html.RadioButton(“myRadiobutton”, “val”, true) |
| Password | Html.Password(“myPassword”, “val”) |
| Text area | Html.TextArea(“myTextarea”, “val”, 5, 20, null) |
| Text box | Html.TextBox(“myTextbox”, “val”) |
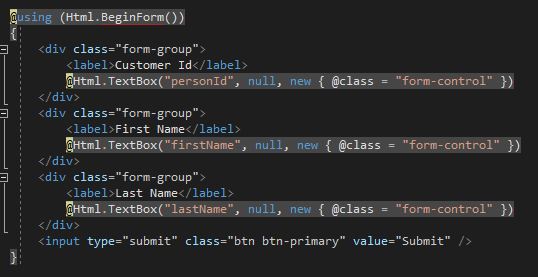
I replace the HTML input elements with Html.TextBox. The syntax might feel strange in the beginning but once you got used to it, you won’t go back to writing plain HTML forms.
Generating HTML elements from a view model
Previously, I showed you how to create input elements using HTML helper methods. The problem with this approach is that I had to specify the name of the element and had to make sure that this name fits the view model property which I want to bind. If I had misspelled a name, the MVC framework wouldn’t be able to bind the property to the element.
The solution to this problem is another overloaded version of the helper method which takes only a string as a parameter. The string is the property name and the MVC framework automatically creates the name attribute for you.
Note that I had to use null as the second parameter to add a CSS class. If you don’t need CSS you only need the string parameter. This string parameter is used to search the ViewBag and then the Model for a corresponding property. For example for the first input element with personId the MVC framework searches for ViewBag.personId and @Model.personId. It finds the property in the model and therefore is able to bind it. As always, the first value that is found is used.
Using strongly typed Input Helper Methods
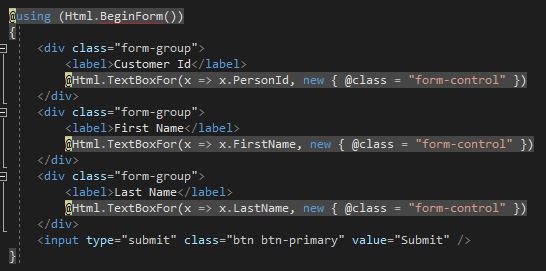
Each input helper method has also a strongly typed version which works with lambda expressions. The view model is passed to the helper method and you can select the needed property. The strongly typed input helper methods can only be used in a strongly typed view.
I prefer this approach because it is less likely that you mistype a property name and with the lambda expressions you also have IntelliSense support.
Creating Select elements
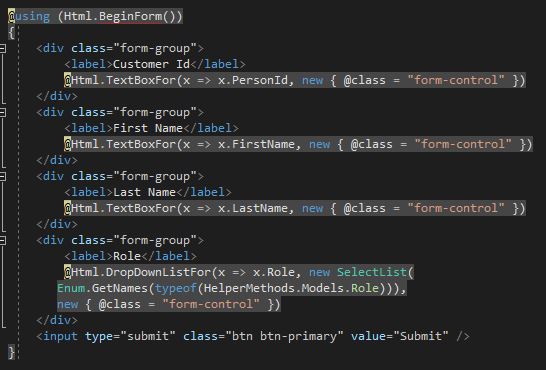
So far, I only talked about input elements. The MVC framework also offers helper methods for drop-down lists.
The difference between a normal drop-down list and multiple-select is that the drop-down list allows only one element to be selected.
The drop-down list displays all available roles. the DropDownList and ListBox HTML helper methods work with IEnumerable. Therefore, I have to use GetNames to get all the names of the roles.
Conclusion
Today I talked about different approaches on how to create input fields with HTML helper methods which are built-in into the ASP.NET MVC framework. With all this new knowledge, it’s time to go out and write some code 😉
For more details about model validation, I highly recommend the books Pro ASP.NET MVC 5 and Pro ASP.NET MVC 5 Plattform.
You can find the source code with all examples on GitHub.




Comments powered by Disqus.